The Alpine Pack

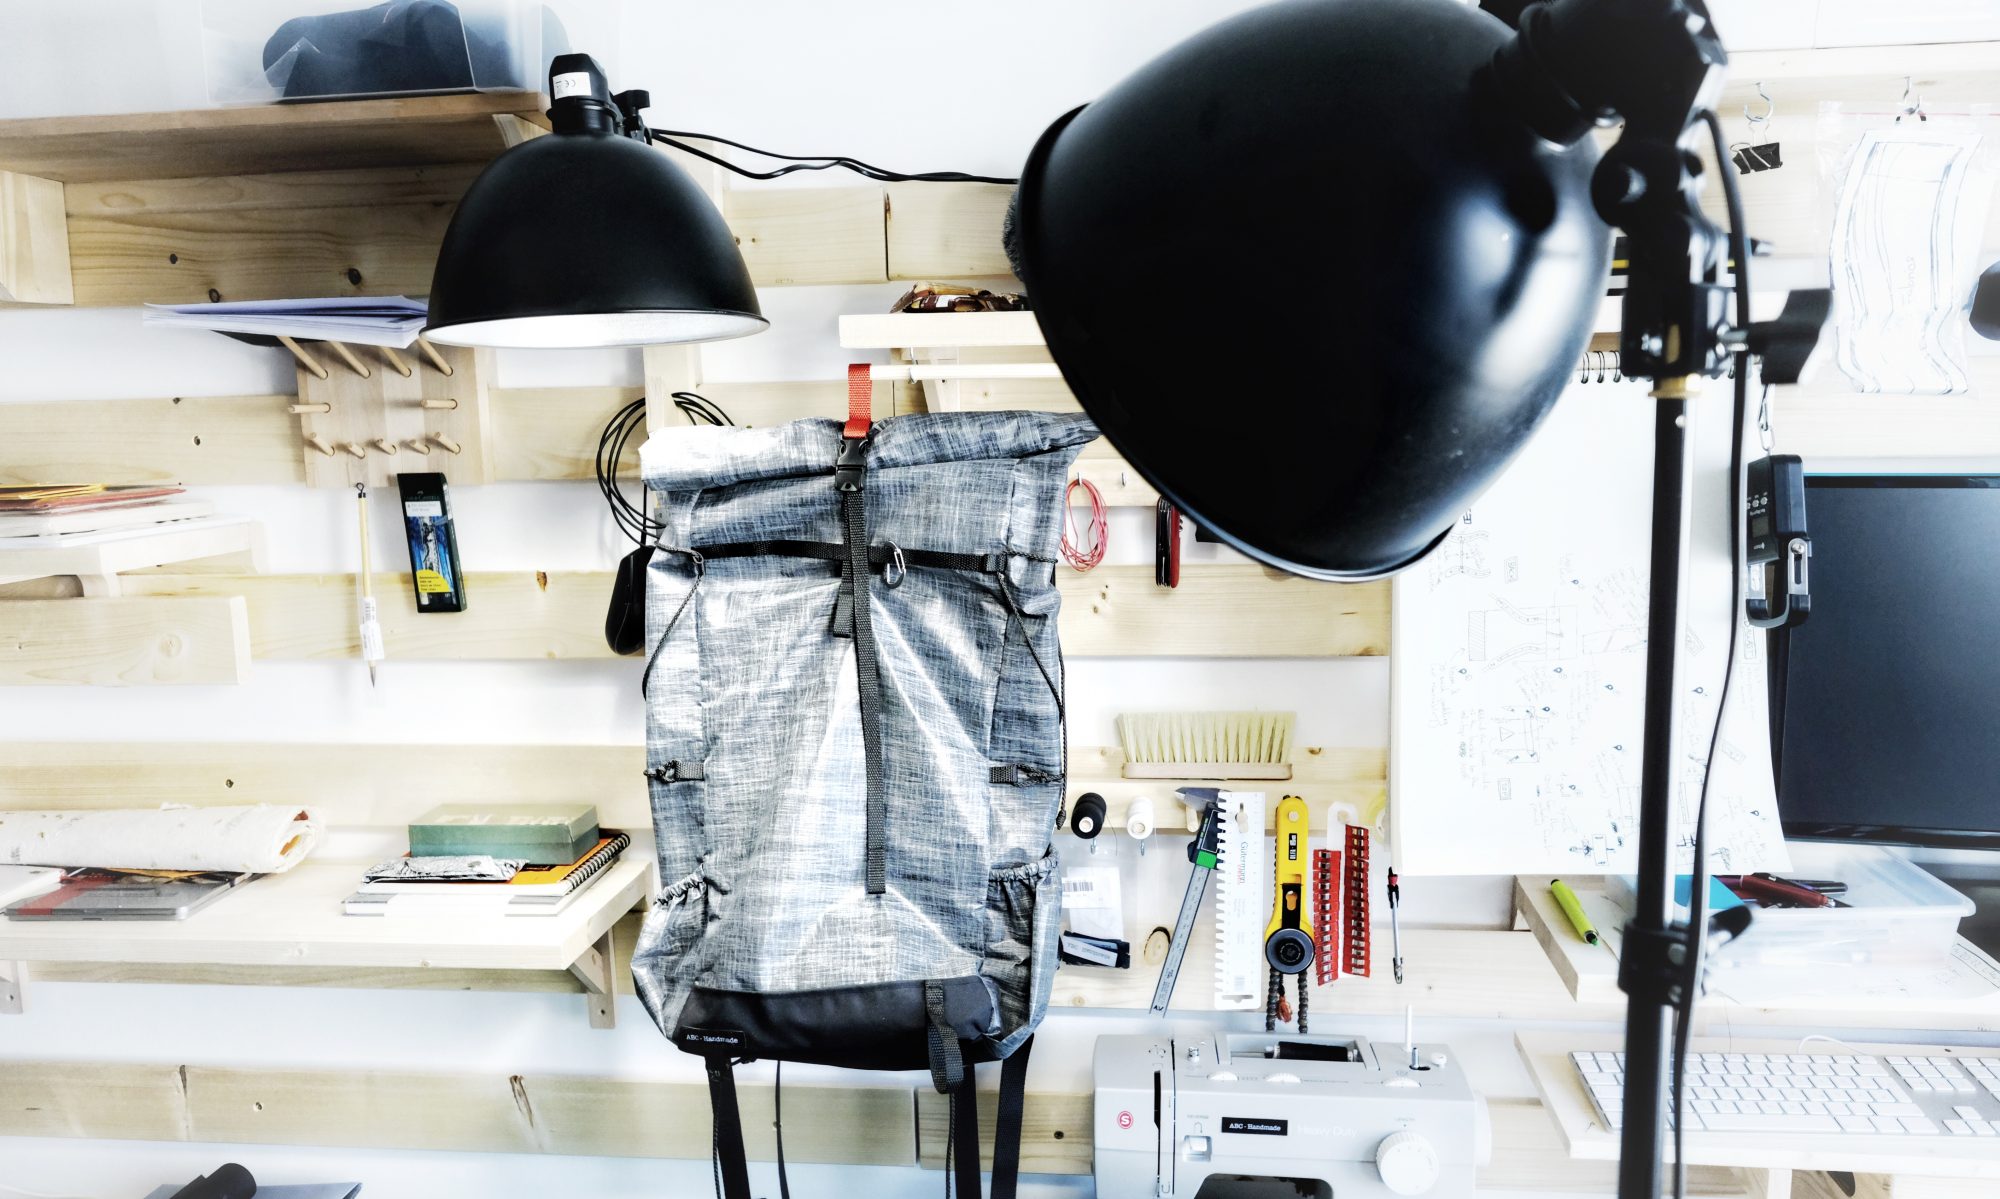
I’ve been thinking about making a specialised alpine pack for a long time now. There are a couple of considerations to take such as weight, abrasion resistance, equipment attachment points and all without impeding the wearer’s freedom of arm movements.

I’ll cover the reasoning and building process in more details in some future posts, but to achieve a decent ratio of weight to material strength, I selected a tough woven UHMWPE fabric (ultra high molecular weight polyethylene more popular name is Dyneema). These woven fabrics are extremely resistant to wear and tear. In the end, I settled for a relatively new fabric from Challenge Sailcloth called Ecopak Ultra EPL 400. The future will tell if this was the right choice, but after working with it, I like it a lot.

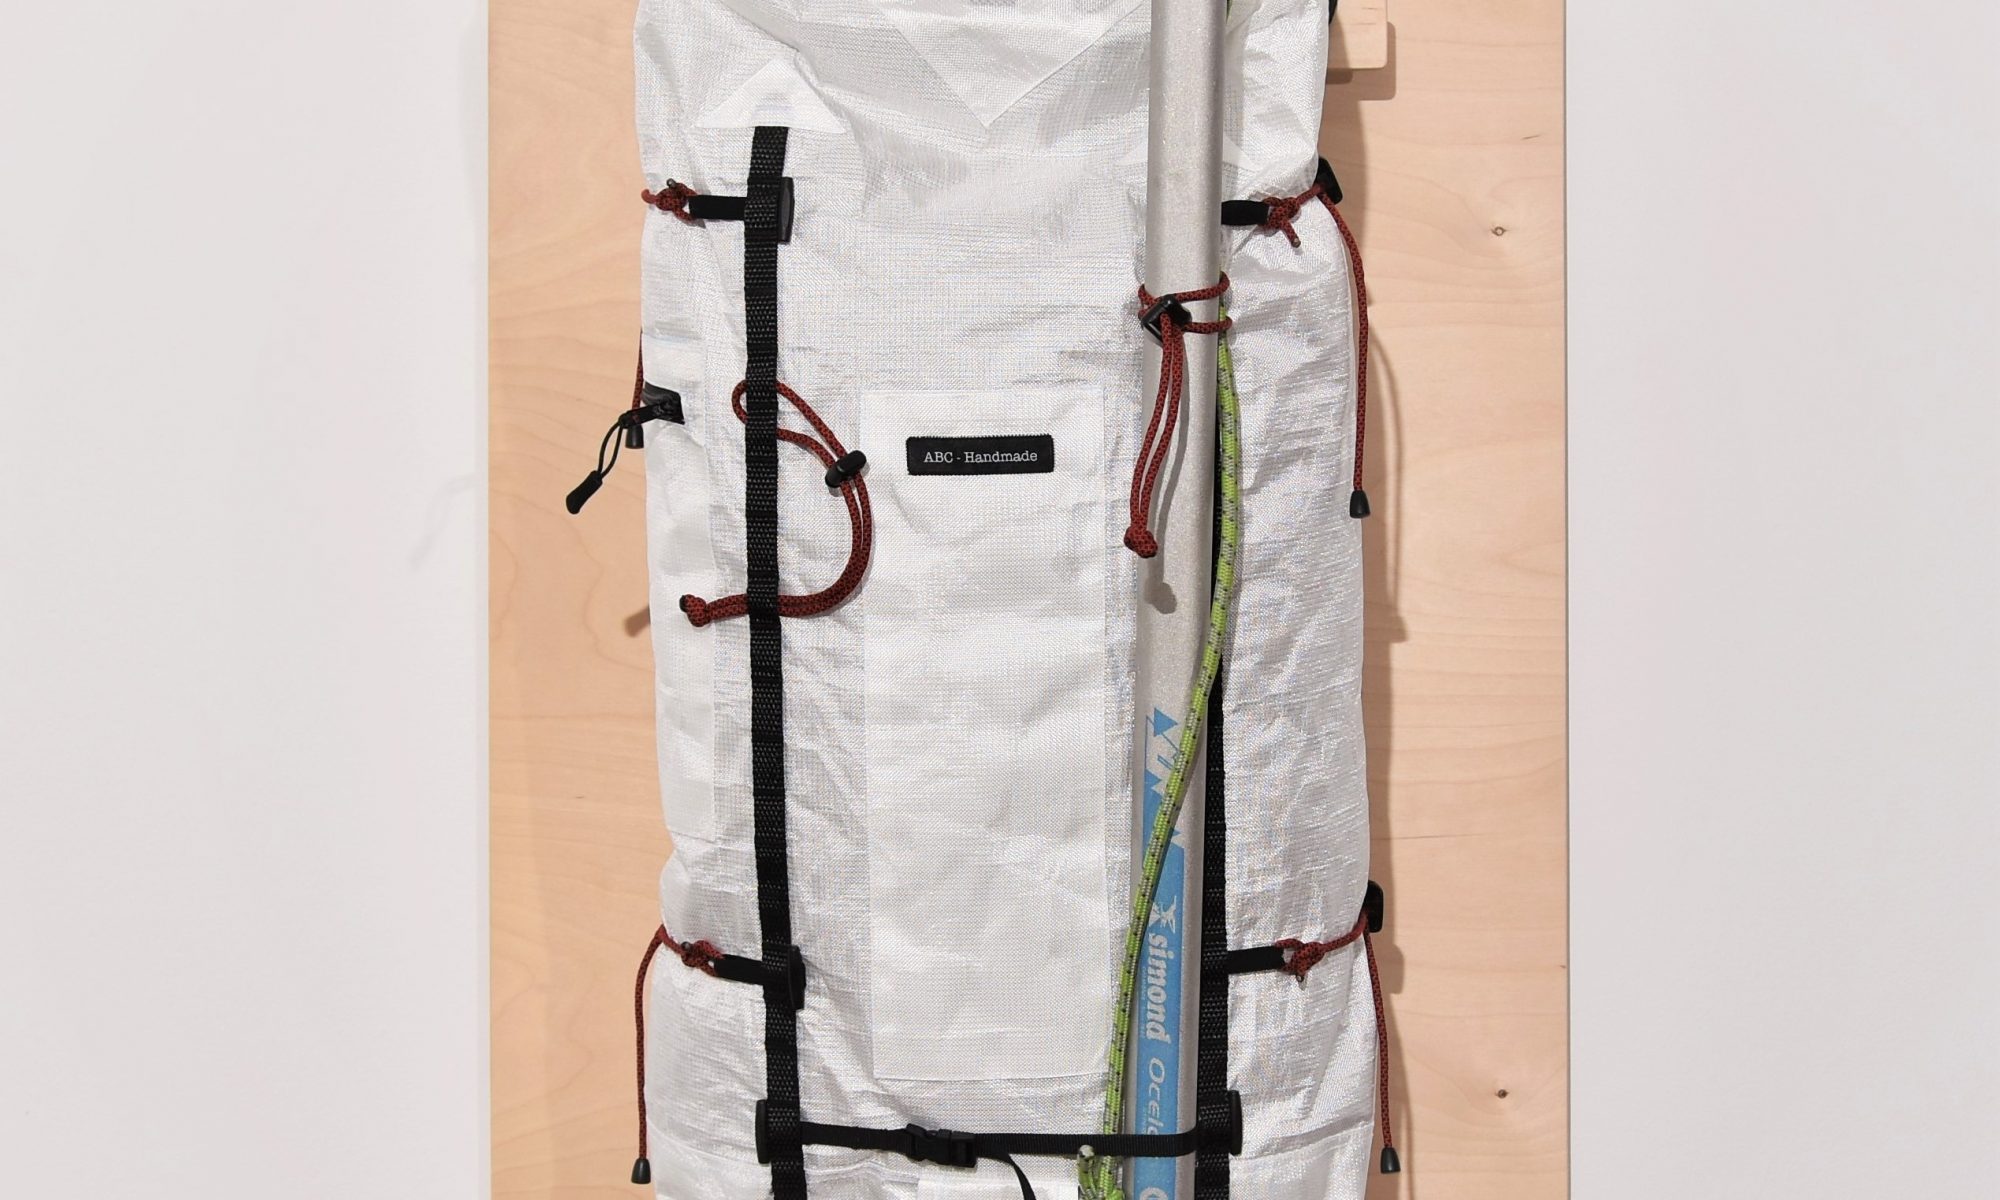
Since Alpine packs get more abuse than most bag – if you ever had to haul a pack up a wall, you know – I wanted to be able to remove most of the straps and cords in a pinch to replace them, or to be able to prevent snagging in more difficult conditions. I also reinforced the most exposed parts to prevent critical failures during an expedition.

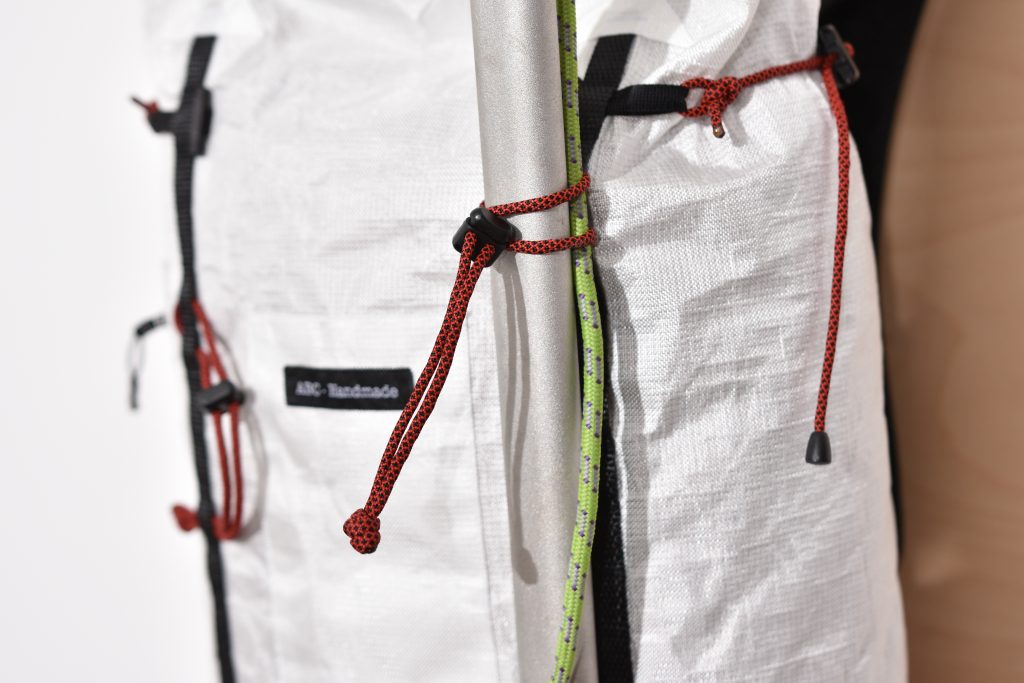
In order for the compression straps and ice-axe attachment to be replaceable and removable, I decided to use the daisy chains as the main static feature. Each of the removable element ties into them using T-bars. In the end, this also allows me to rearrange the attachments if I need a different configuration or longer compression cords for some reason.

In order for this to work though, the daisy chain spacing for each “loop” must be relatively small (about 22mm) which would potentially make it difficult to attach climbing equipment directly to it. Since this was not my primary concern, I went ahead with that design. You’d be surprised how much every detail counts in a design like this.

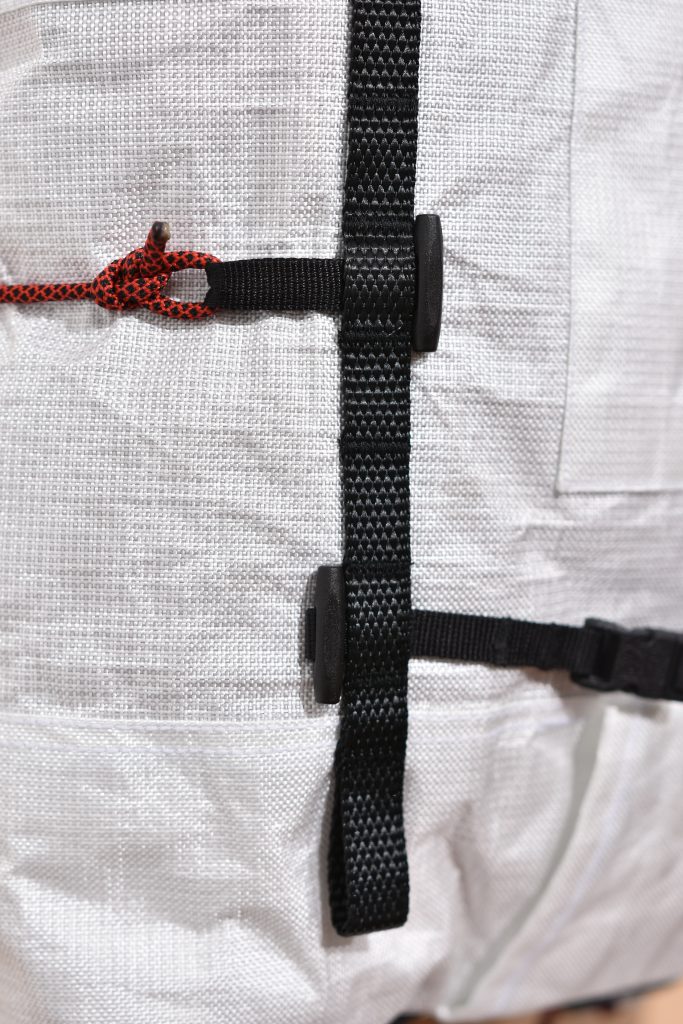
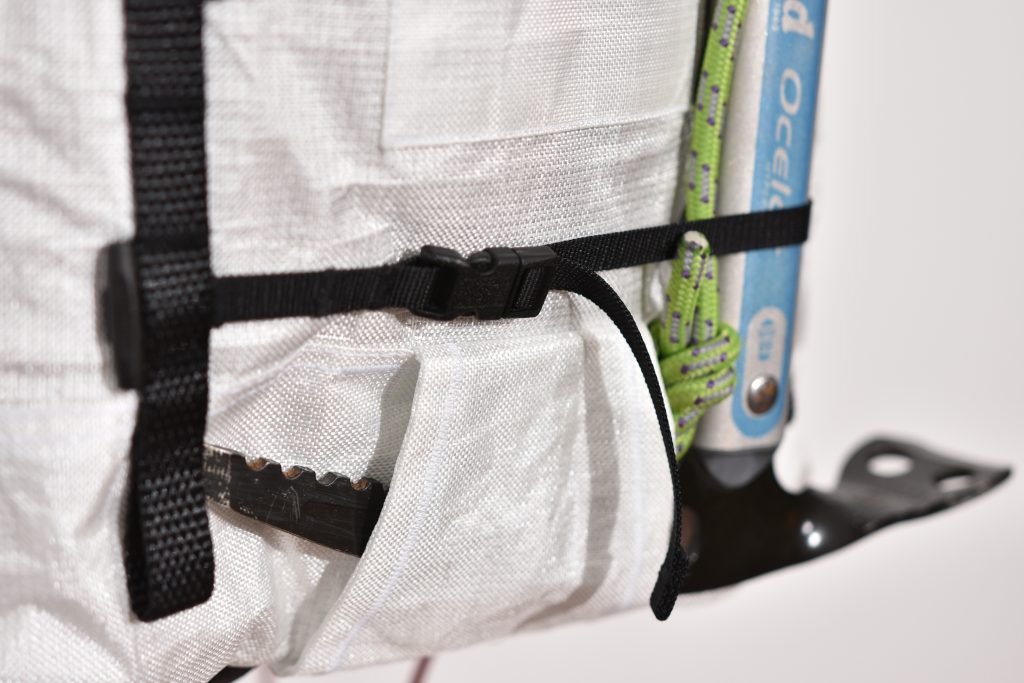
The side compression straps themselves do have a fixed point (non-removable part) where the quick-release LineLoc ties into the bag. But beyond that, the cord and the T-bar can be removed in a pinch.

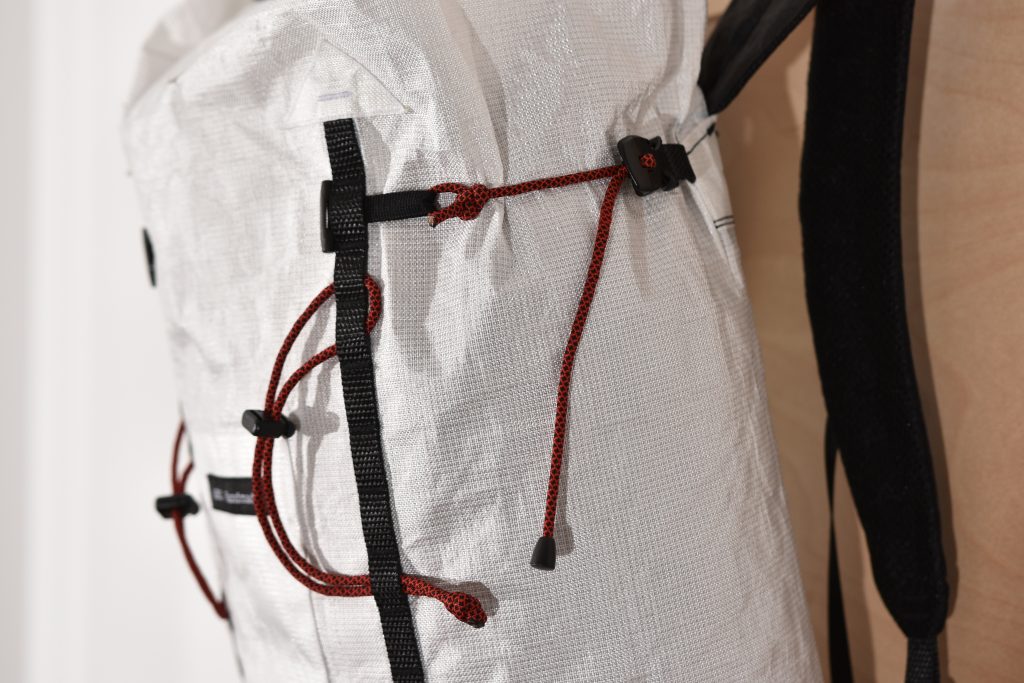
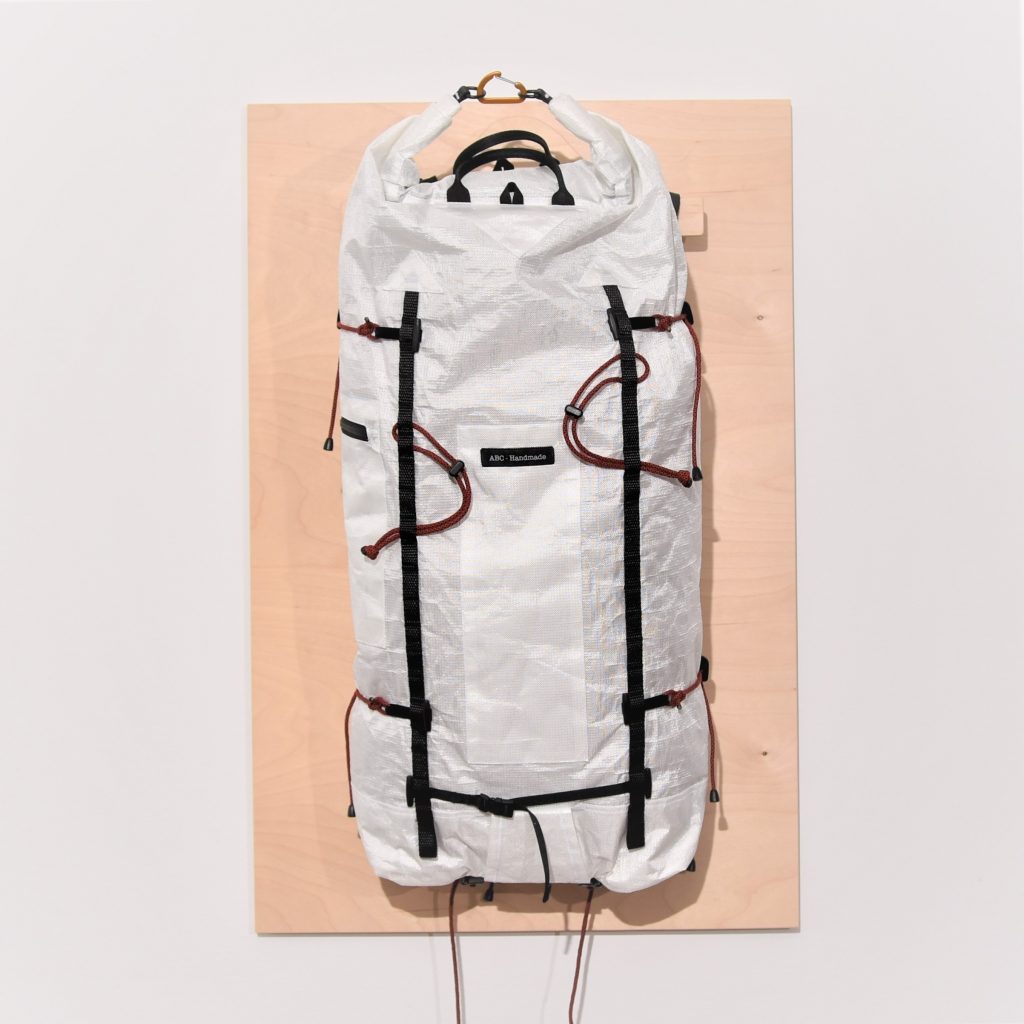
On most bags, I do like to have one small quick-access pocket where I can store papers, energy bars, keys and so on. Since I still wanted to avoid any potentially snagging, I went for a very low profile design with a zipper closure. It will not hold much, but it will do the job and not protrude from the bag.

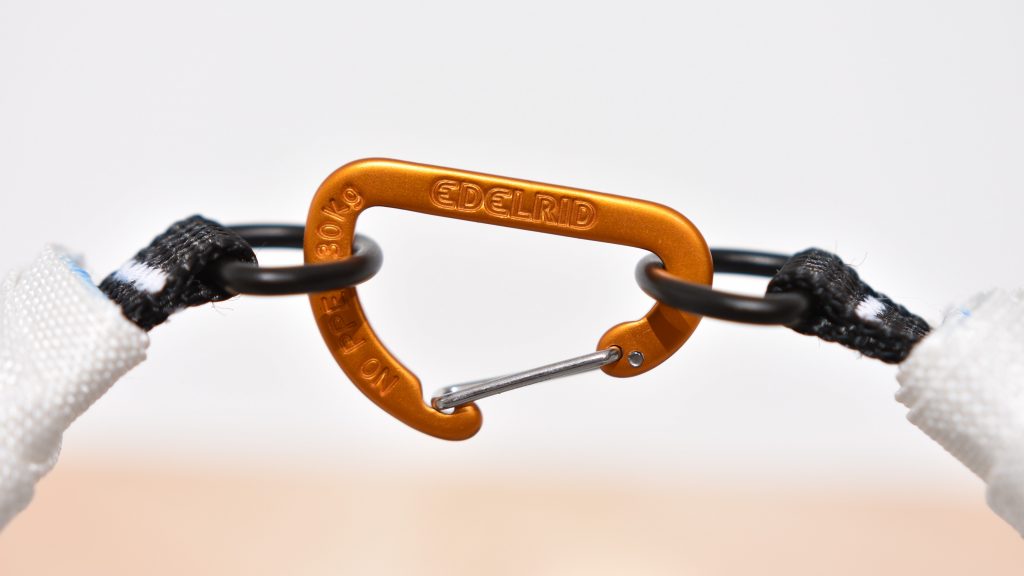
As we were talking about hauling earlier, I was debating options for a while. I always build strong roll-tops so I can carry my bags grabbing the loop they form. I use small high-end carabiners that can take up to 30kg of load and always use metal D-rings instead of the usual Nylon to make sure this won’t fail over time. I decided that would make a poor rope attachment point for hauling since the D-Rings are too small for a climbing carabiner and you could reach 30kg of pulling force on a bad day’s haul.

Instead, I went for a handle style carrying attachment that would fit the needs for hauling quite well and double as a handles if you prefer a straight roll-top rather than dry-bag style closure. Since I wanted the bag to stay levelled and haul straight, I decided to add symmetrical attachments so that the pack would be balanced. Each handle was tacked well and should be handling loads in the 20kg range without any problem.

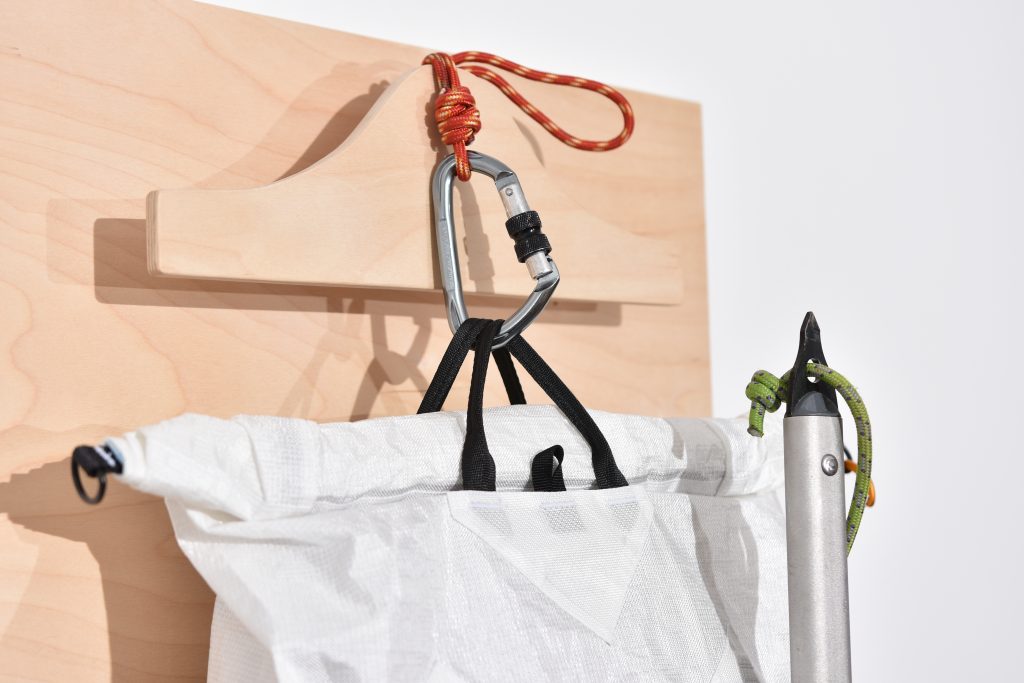
I would not expect the pack to be filled to the brim for a haul, but if it is, this design will not be ideal if the roll-top stands higher that the handles. In this case, one should haul with only one handle and hope for the best.

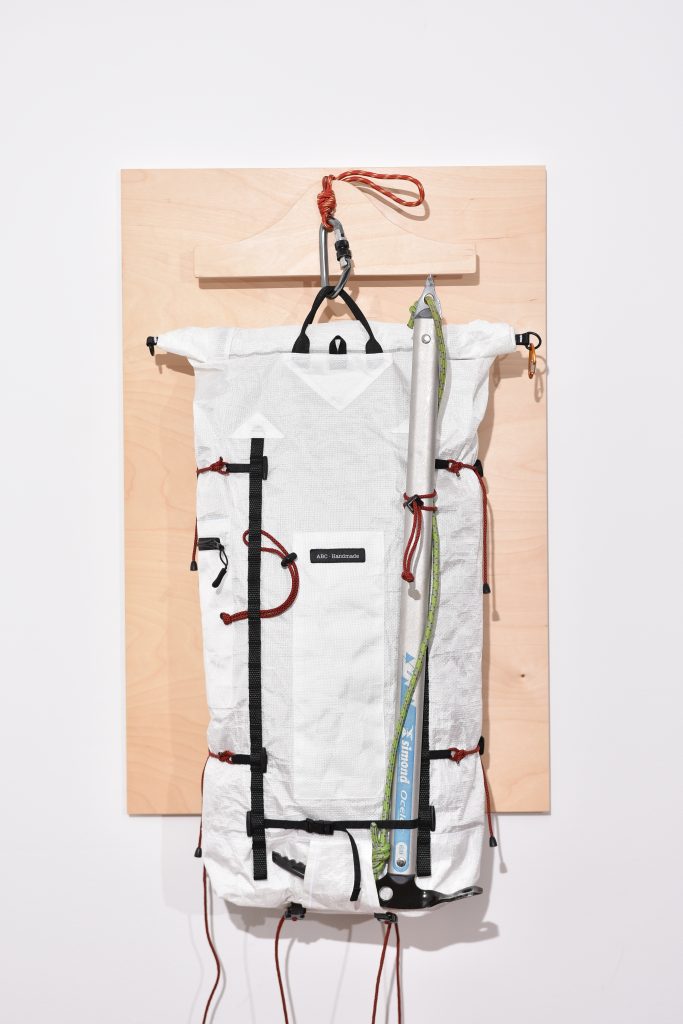
The last feature worth mentioning is probably the ice-axe attachment although there really isn’t much to talk about. It is a very simple design, tried and true. It can support a single axe or a hybrid setup (2 smaller axes). To secure the lower part of the axe, a simple webbing and quick release is tried between the two daisy chains. This strap can be lowered or raised depending on the axe configuration, but there is probably no need for this. I admit I was a bit worried about the strength of this puny little quick release that fits a 10mm webbing. After fiddling with it for hours, I figured it would do the job. It’s anyway easy to replace and upgrade but if anything ever fails on this bag, I assume this would be it.

Since we only talked about the front so far, it’s only fair to show you the back. The padding is minimalist, with some 3D mesh on the lower back, and the shoulder straps are lightweight as well. I rarely use foam in ultralight shoulder straps, but it also limits the maximum load that one can comfortably carry. Everyone is different, but for me these stay comfy up to about 7kg.

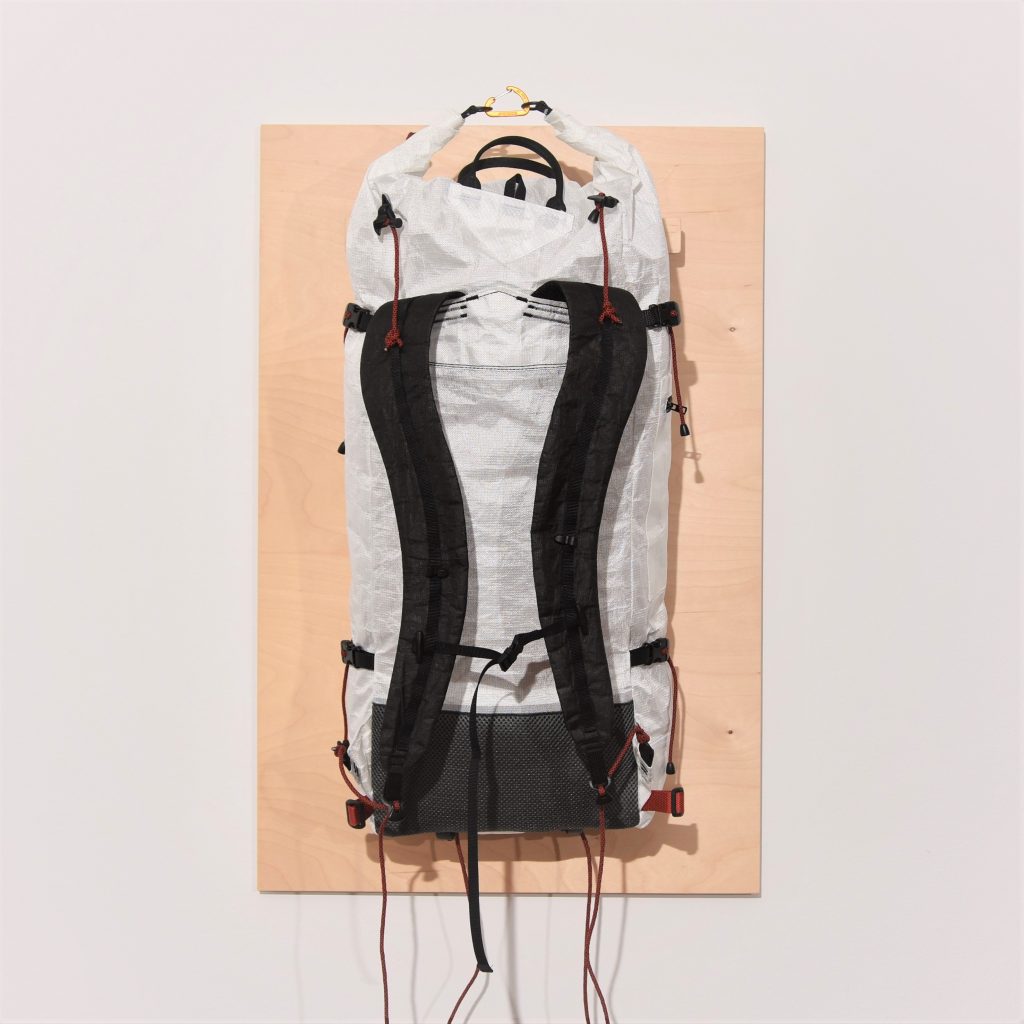
And the best part is, it only weights in at 410 grams. Ok, now enough with the talking, let me just dump a boatload of pictures! Stay tuned for more detailed discussion about this bag!

Make the Winter Pack from White X-PAC VX07

I have already covered all of the techniques I used to build the Winter Pack in other posts so I will not dwell on the details too much. The pack is relatively simple in terms of features, it has an almost vertical daisy chain, a side zipper pocket, a roll-top closure and a padded back. Plus some quality of life details.

For most of my builds, I design the front (1) and back (2) panels first, then I sew on the side panels (3, 4) to the front panel. The last pieces of the puzzle are to set the height of the roll-top with multiple parts if required, and only after that do I sew on a wide panel for the roll-top across the 3 front and side sawn panels.

Representation of the cut panels (not to scale)

The bottom panel itself is more often than not the last thing I put together, and stitch it to the front and side panels before finishing the pack by attaching the completed back panel (2,5,6).

I wanted a decent back padding for this pack since I might have to carry pointy or uncompressible gear (water bottles, alcohol stove) and not a lot of temporary padding. I went for an inversed T-shaped pad with 8mm closed cell foam topped with 3D mesh. All directly sewed on the back panel to keep every light and water resistant. To avoid wasting a lot of mesh, I decided to stitch two parts together with a flat-felled seam. The foam itself ended up being a three parts piece.

To secure the shoulder straps, I usually embed the ends in between separate panels (2, 5). I also use the same technique to add the load-lifters and the roll-top compression strap (2,5,6). The smaller pieces of the back panel will define the height of the last roll-top piece (7).

The shoulder straps are just my usual design, with an outer shell out of Cordura and 3D mesh inside. I always add daisy chains to to the full length of the shoulder straps to attach the chest strap, or smaller equipment. For this build, I went with ladder-lock buckles instead of Lineloc buckles since weight was not a huge concern.

There isn’t much else to talk about really. The front panel is very lean, with just the daisy chain attached to the main fabric without reinforcements (if the daisy chain was planned to attach heavy equipment, I would back the VX07 fabric to avoid future tear outs.

The pocket itself is just a flat pocket sewn onto on side panel. Since I am right handed, the most logical side to put the pocket on was on the right side (when wearing the pack) so I can slide the bag on one shoulder and access the pocket while walking.

That’s it! I did not cover the side compression straps since there is really nothing special about it. Enjoy!

Bricks can’t go wrong. Greeblies come later.

A lot of bags follow a relatively simple “brick-like” construction. These bags might not have the best looks, but they are definitely the easiest to build without a lot of experience, and you’ll get a perfectly functional bag. I ended up using this one for a 10 days solo trip above the arctic circle and it got me there and back.

When in doubt, always cut straight! You can always add curves and greeblies later.

The two side panels are almost identical. The pockets have different slopes and sizes.
The front and back panel are also assembled out of multiple smaller panels to form clean rectangles.

At the end, the final assembly starts from the side panels aligned to the bottom panel, then “closing” with the front panel as the last big step. Final trims and tidying up the top will hide any misalignments or small dimensional issues.

Just need to add the front panel now.

The final bag is documented under https://abcpacks.com/the-ballast-pack.

Feature breakdown of the Slumber pack

It’s always difficult to make a distinction between nice-to-have and must-have features. Here is a breakdown you might find useful in your deliberations.

A3mm Cord load lifter with LineLoc.
BCam side release buckle on 15mm strong webbing.
CDaisy chain out of strong 15mm webbing.
DSide compression systems out of cord, hook, and LineLoc quick release buckle.
ESide pockets (different heights for different purposes).
FHip belt out of 25mm webbing and high-quality quick release.
G+HGear loops out of 15mm strong webbing.

The Slumber Pack

The ABC Slumber is a 20+ liter pack designed for short overnight hikes, while carrying limited supplies, and maybe a bivy and sleeping bag combo. It’ll fit a deflated sleeping pad (which can be strapped on-top or below the pack), a good 2 liters of water, some warm layer(s) and rain protection. And of course, a small first aid kit, because you should never hike without one!

On this version, the main body is built out of X-Pac LiteSkin LS07. It’s not the most abrasion resistant fabric, but it offers good protection against the elements for a lightweight laminated fabric. For better wear resistance, the pack is reinforced at the most exposed parts with low denier non-coated Cordura. Here are some more specifications:

Volume20+2 Liters
Dimensions60x28x12 cm (closed roll-top)
Weightmax. 390g (without padding)
Carriescomfy. 5kg
max. 7kg
FabricsX-Pac LiteSkin LS07, Cordura
(LS07 only comes in one color/pattern)
ClosureRoll-top + Velcro
Strap padding10mm CCF padding + 3D Mesh
Hip BeltNo padding.
25mm strap with 2-sided quick release buckle
Pockets2 (one on each side, different heights, inverted inclinaison)
Attachments– Daisy chain on the front panel for gear
– Daisy chains on roll-top for securing pack
– Gear loops on the front panel (middle + bottom right)
– Compression cords with hook and quick-release (x2)
– Compression cords on the bottom panel
– Daisy chain on each shoulder strap
– Loop inside for a water bladder
Specs sheet for my fellow gear junkies

The design relies on using a sleeping bag inside the pack as padding and therefore does not necessarily need a foam pad to protect your back. If you need to protect your back better, I’d recommend using a 10mm high quality closed cell foam (for example Evazote EV50) cut to dimensions.