This post contains Amazon affiliate links. I receive a small commission if you use these links to purchase something at no additional cost to you. Thank you for the support!
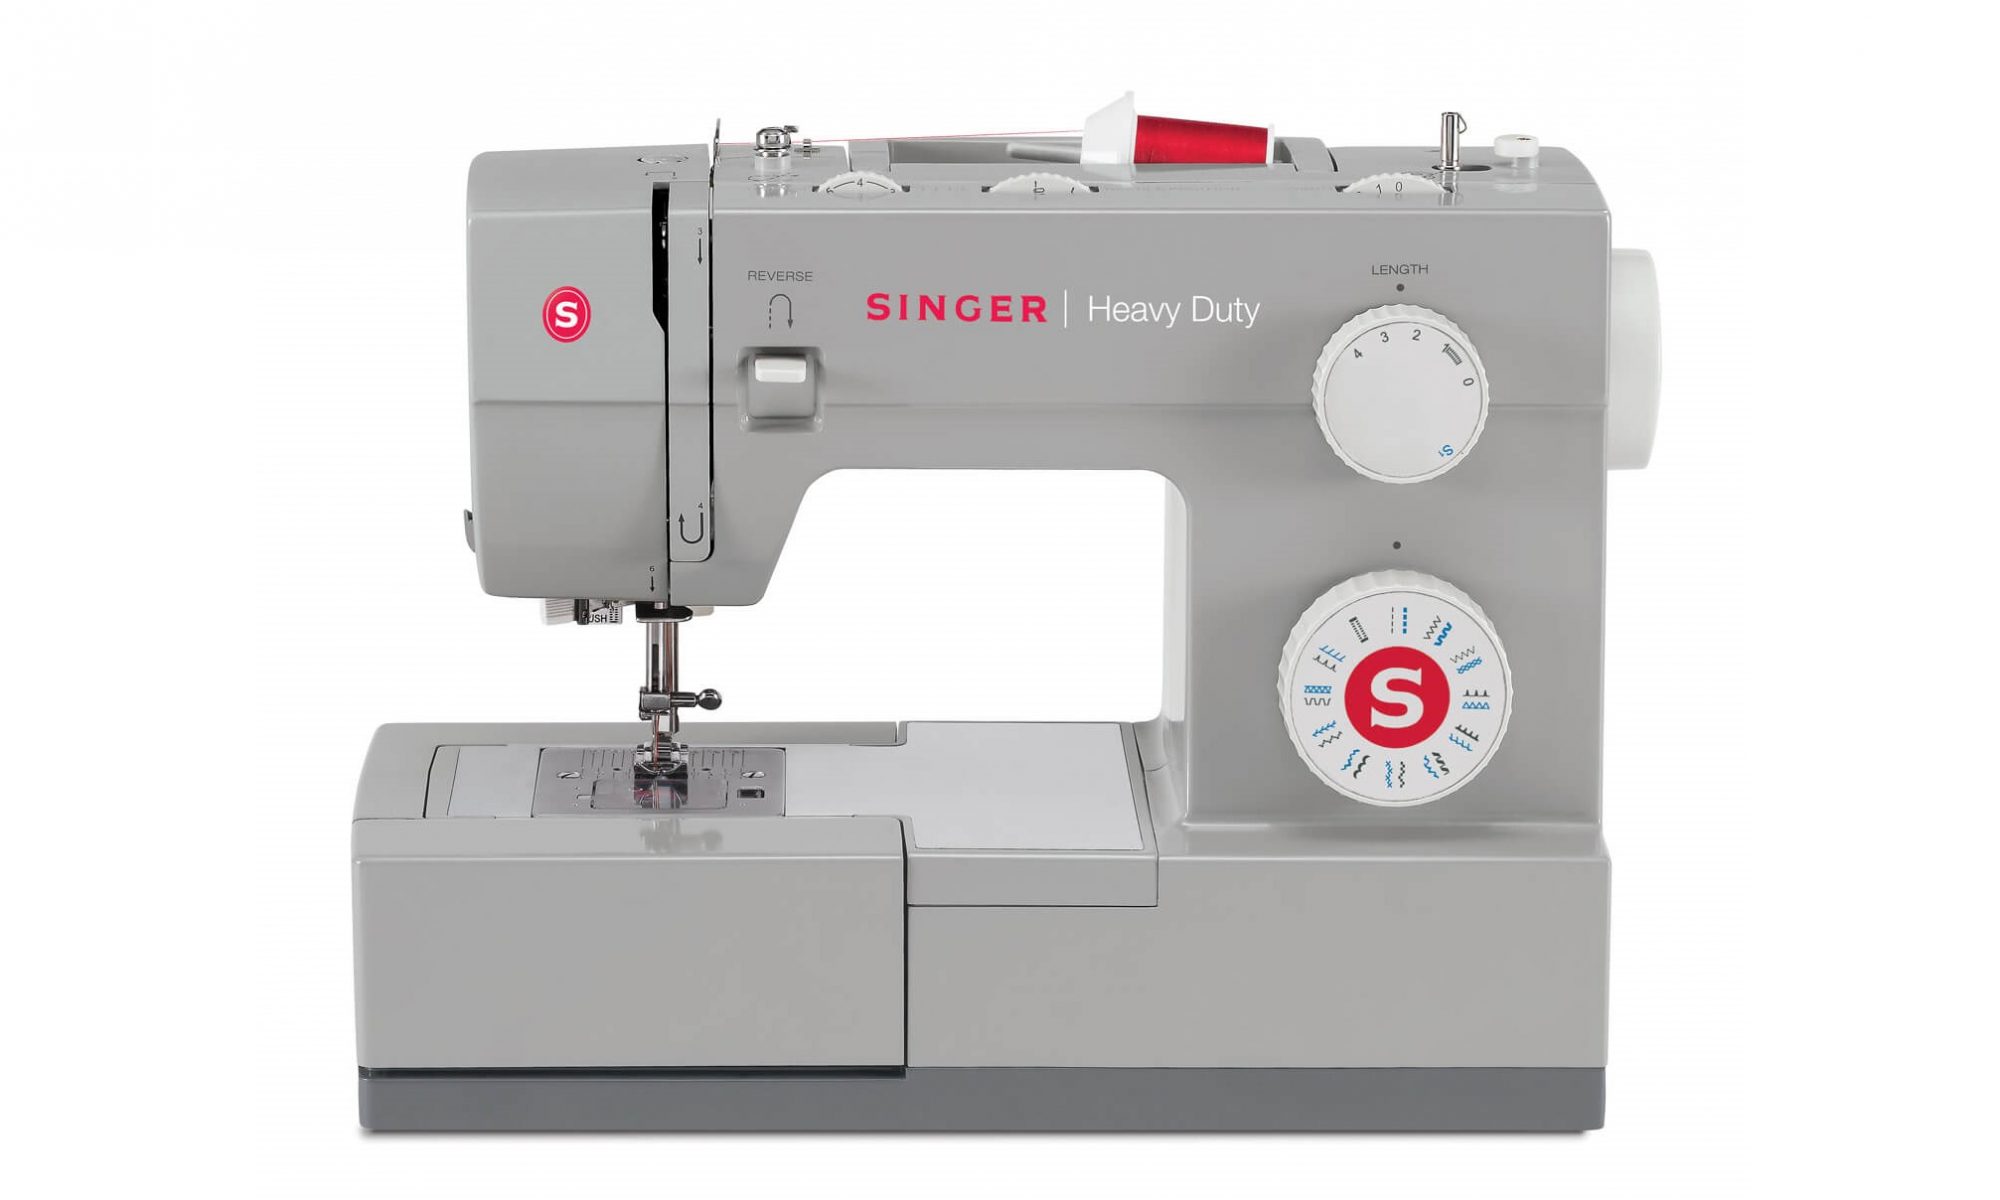
I would absolutely recommend the Singer 4423 if you are serious about learning the craft but you are looking for a small new machine. It’s other siblings simply offer more stitch types, none of which I would ever use for what I make. Simpler is better when it comes to fine machines.
I find it to be a good machine overall for its price, and it will get you a long way. It is my second brand-new machine which I bought in April 2019 and I still have it and use it regularly today. It can sew through a few layers of medium weight fabrics with ease. The feed is decent, and grabs well on medium and heavy fabrics alike. The feed dogs might be a tad too aggressive for very fine fabrics like 30D Nylon fabrics found in kites for example.
This machine has plastic gears inside, so might not be the most durable machine for heavy-duty work despite the name as the gears might get worn out over time, but so far mine is in great condition 3 and a half years later and rarely skips a beat.
One of my favourite features on this machine is the clear top-loading quick-swap bobbin window which allows you to always see the amount of threads remaining in the lower bobbin, and replace it in a heartbeat.
Maintenance is relatively easy and I had to reset the needle/bobbin timing a few times already (about once a year). Oiling the machine is really simple and quick, and I use fine machinery oil to keep the cogs, shafts, and bearings movings smoothly (100ml will last you forever).
Additionally, the fact that this particular sewing machine is well documented both from Singer itself and from other sources like Youtube makes it a great platform to learn on.
When it comes down to ultralight packs, the number #1 feature for me is volume to weight ratio. Unfortunately, while weighing a pack is easy, measuring volume is not so simple, so sometimes an estimate just has to be good enough.
Generally speaking, the backpacking industry tends to over estimate (or over advertise) pack volume which makes it relatively difficult to settle on a method that my audience can visualize. For ABC packs, I am following three simple rules to estimate their volumes.
Estimate the main compartment's volume as if it was a cylinder.
Do not account for pockets (even cargo pockets).
All measurements performed on a closed pack in the optimal position.
I will break down the math for you but it really is a simple process. Before I get the tape measure, I fill the bag with some pillow or cushions to give it a realistic volume and look. if you have only sleeping bags, even better. After that, I only need to measure the following two dimensions.
Height from bottom panel to the lowest part of the closed pack.
Circumference of the closed pack at mid-height.
Now let’s say the pack is a simple brick design, then the “circumference” is just the added width of the front, back and side panels after they were stitched together. It is a relatively crude approach, but it reflects the reality of how a pack deforms and sometimes stretches when full. So let’s do some simple math.
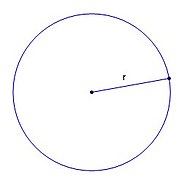
A circle and tis radius
The circumference of a circle is given by the following formula based on the radius r:
Circumference [cm] = 2 × π × Radius [cm]
Now if you take the standard formula giving the volume of a cylinder, it basically says that the volume is the product of the surface area of the base circle and its height and some contants.
A cylinder, its radius and its height
In other words, given that h is the height and r the radius:
Volume [cm³] = π × Radius [cm] ² × Height [cm]
If I now take the formula of the circumference and extracts the radius from it, I can inject the radius into the volume formula.
That’s it, that’s all you need! In the metric system, I would use centimeters for all my measurements, so I end up with a volume in cubic centimeters [cm³]. To convert this to liters:
Volume [L] = Volume [cm³] ÷ 1000
Et voilà, you now have a rough estimate of how much gear you can stuff in a bag. It’s not accurate since it is measuring a squarish form as a cylinder and making a lot of assumptions, but when packed to the brim, you can expect to be able to fit at least that volume in the pack. Note that in general a roll-top can also compensates for calculation errors, other closure types might not be so forgiving.
Afterword
But how does that help you if you are not making a pack but buying a custom pack from a maker? Well just send them this page and ask for them to measure their packs this way, then take this measurement and compare it to your measurements of the bags you already have. That way, you have one simple system. The exact volume does not matter, what matters is that you know what theoretical volume you use for different activities. Over time, you will develop a sense of what you need for a winter day hike, or a week long solo camping trip above the arctic circle in full autonomy.
Why would the exact volume not matter? Well, we all pack differently, and have different gear. Some gear compresses well, some gear creates empty space that cannot be filled, some gear needs to be inside the bag, while other gear just hangs on the outside… It mostly boils down to you and how you achieve your outdoor goals. The volume is an indicator of what that particular pack will hold “for you” in a particular configuration. The features you would request with that pack are what matters most after the volume of the main compartment. And that same volume of pack for two different configuration might not both do what you need.
In the same vain as the Cotton experiments, I thought I’d also expend the fabric tryouts to the good’ol Ikea Frakta bag, which costs a literal 1€. What started as a joke ended up being the real deal: A friend of mine and fellow maker/hiker challenged me to make a decent looking bag with just one single Frakta bag.
Since the challenge was still to build something nice, we also agreed that we could use small recycled bits and pieces and small components, as long as we can keep the overall cost of the material below a few euros. I settled on adding some recycled webbing in a couple of places, and use a scarp piece of light Cordura to reinforce the bottom just for convenience.
In the end, I re-used a few things from previous prototypes and deceased bags to make sure I keep the “bill of material” cost under the price of coffee on the French Riviera. ☕ In the end, it came down to a relatively short and definitely cheap material list.
Item
Quantity
Price (total)
Ikea Frakta shopping bag
1
0.99€
Upcycled 10mm Polyester webbing
50cm
0€
Remant 15mm Strong Polyester webbing
60cm
1€
Reused Lineloc tensioners
2
0€
12mm D-Rings (0.30€ each)
2
0.60€
Reused 3mm Cord
1m
0€
Scrap Uncoated Cordura
0.04m²
0€
Scrap Hook & Loop Tape (Velcro)
25cm
0€
Grand Total:
2.59€
Call me cheap, but it’s worth every penny.
Now that I am done with it, I think this is a fantastic challenge. Every pack maker should try this at least once no matter how long they’ve been making things for. It forces you practice a couple of important steps in pack making:
Properly rip the seams of the Frakta to avoid loosing precious material
Work around resource limitations.
Recycle stuff you’ve been piling up.
Optimize the design to into a small canvas.
Think about the stitch type and size based on the canvas properties.
Align a patterned canvas parts properly (to avoid crooked looks)
I wouldn’t spoil the the final result just yet since I will upload a few pictures of the final pack in no time, but suffice to say, it looks great ! Better than I thought even!
I must have been spending hours on the concept itself, and just mentally iterating through constructions and ideas, starting from a burrito shape, to ultra complicated constructions, until I finally landed on a appealing concept. After that, I easily spent 20 hours building the pack itself. But between the build idea, and the first cuts, there really wasn’t time at all.
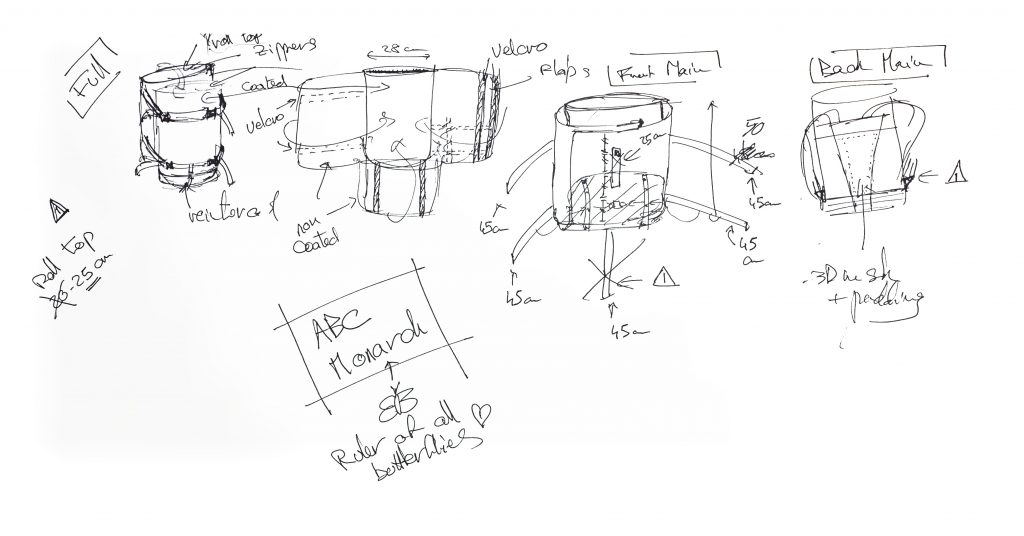
That the last scribbles I made before jumping right in.
You’ve guessed it, I worked slow to avoid mistakes because I was still improvising quite a bit. I sketched a few different drawings and highlighted the details I wanted to add, then marked all the small things that are easily missed, and I got cracking almost immediately. If you look closer at the sketches above, the idea I started with was to have a third compartment that would have been strapped atop the flaps, securing the secondary compartment, creating essentially a sandwich pack. As you can see with the finished pack, I quickly dismissed that idea.
This workflow is somewhat an evolution to my normal process. I usually spend a lot of time sketching and doodling and measuring and thinking, before starting to work fast. But I definitely recommend the exercise every so often! It’s a good way to test your spatial acuity and your building habits.
On a side note, this is the second backpack I build with unpadded shoulder straps, the first one was also a spur of the moment thing. I was just tired of struggling while trying to slide the foam inside the straps, and decided to give that a try instead. I’m quite happy with the comfort the 3D mesh provides for small to medium loads (up to 6kg) and I’ll probably stick to this construction for a while. But sometimes, an idea will make things worse, just keep that in mind!
The shoulder straps are just made of 3D mesh (3mm) and a top layer out of Cordura.
I had a ton of fun doing this project. I have to say, working with X-Pac X10 was harder than I expected. The 360g/sqm fabric is extremely stiff, but the look and feel of that fabric is totally worth the effort. I wouldn’t try to do anything too complicated with it though.
X10 is heavy, stiff and dense, but boy is it beautiful….
The design itself worked great, and I am very pleased with the result. The only flaw I have found so far is that the the lowest compression strap has a tendency to slip below the bulky content I stuff in the secondary compartment, which – in itself – is not a problem, but weakens the overall strength of the secondary compartment held mostly by Velcro. I was hoping that using the front flap’s daisy chains to weave the strap through would help, but I think the strap is just to low on the pack. If I was to do it again, that would be the only thing I change: move the lowest compression strap above the shoulder straps’ attachment.
The lower red webbing with he quick-release should have been higher.
This pack feels like a tank with proper reinforcements where abrasion often takes place and layers above layers of Cordura on top of the natural stiffness of the main compartment. This combination makes for an extremely sturdy pack, and I don’t feel like having to be kind to it anytime soon.
The final shape is extremely pleasing, and mostly due to the combination of the V-shape design and the very subtle curves. To ensure the cuts were symmetrical given the slightly higher complexity than usual, this was the first time I spent the time creating a mostly complete pattern for the main panels (all but the roll-top panels) prior to cutting any fabric. I usually build patterns – a posteriori – as a mean to record a shape I ended up with, if it turned out to be pleasing.
All in all, there are 14 different panels of various sizes that came into building the main compartment (shoulder straps not included). I only created a pattern for the major parts, and cut the rest out of “experience”.
The best way I’ve found to build durable patterns is to cut them out of thin Tyvek as I explained briefly here. It’s a little more investment than simple paper, but it holds a lot more abuses.
It’s always difficult to make a distinction between nice-to-have and must-have features. Here is a breakdown you might find useful in your deliberations.
A
3mm Cord load lifter with LineLoc.
B
Cam side release buckle on 15mm strong webbing.
C
Daisy chain out of strong 15mm webbing.
D
Side compression systems out of cord, hook, and LineLoc quick release buckle.
E
Side pockets (different heights for different purposes).
F
Hip belt out of 25mm webbing and high-quality quick release.