The back panel of the Ski Touring pack

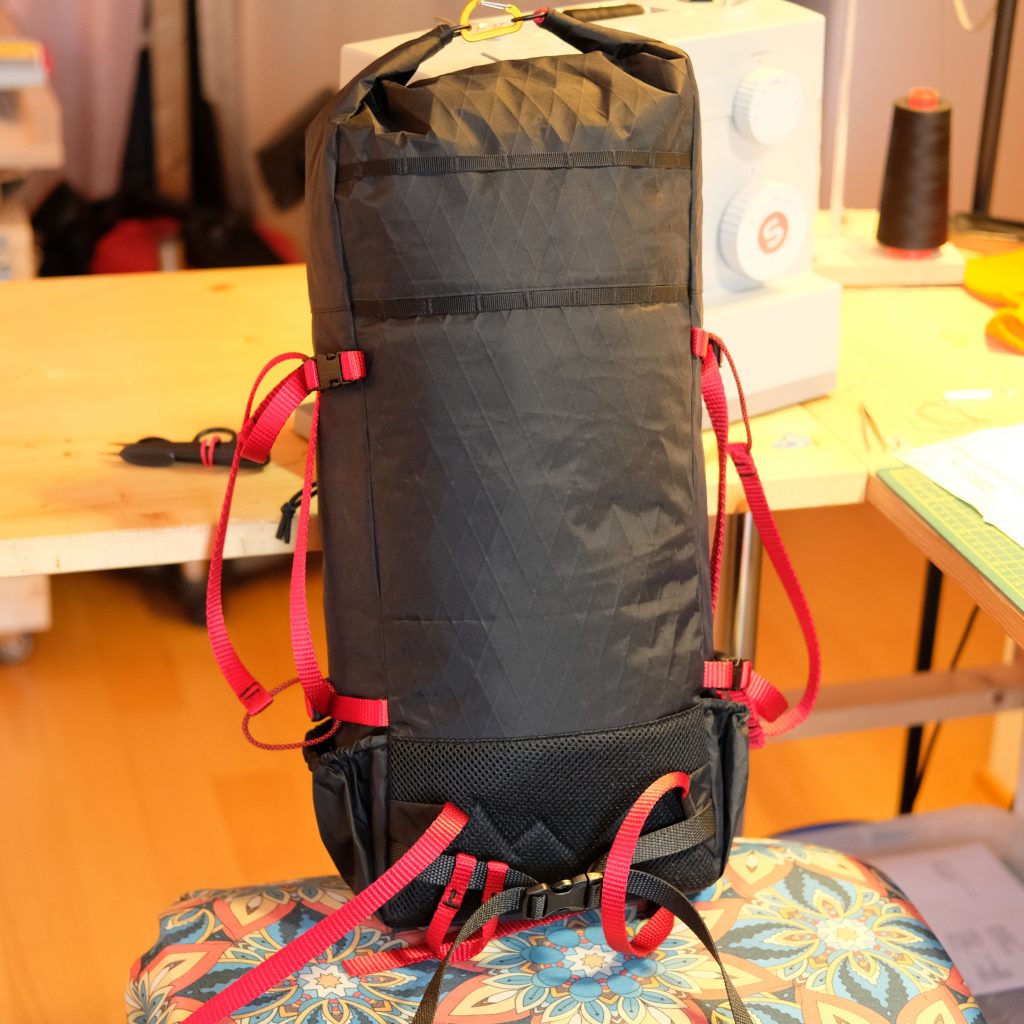
The back panel is probably the most interesting part of that pack. Since it is an ultralight children’s pack, I added a shoulder strap’s height adjustment option to let the pack grow with the owner.

The back panel also contains a padding sleeve with a hook and loop tape closure to be able to add a foam pad and some more structure is required.

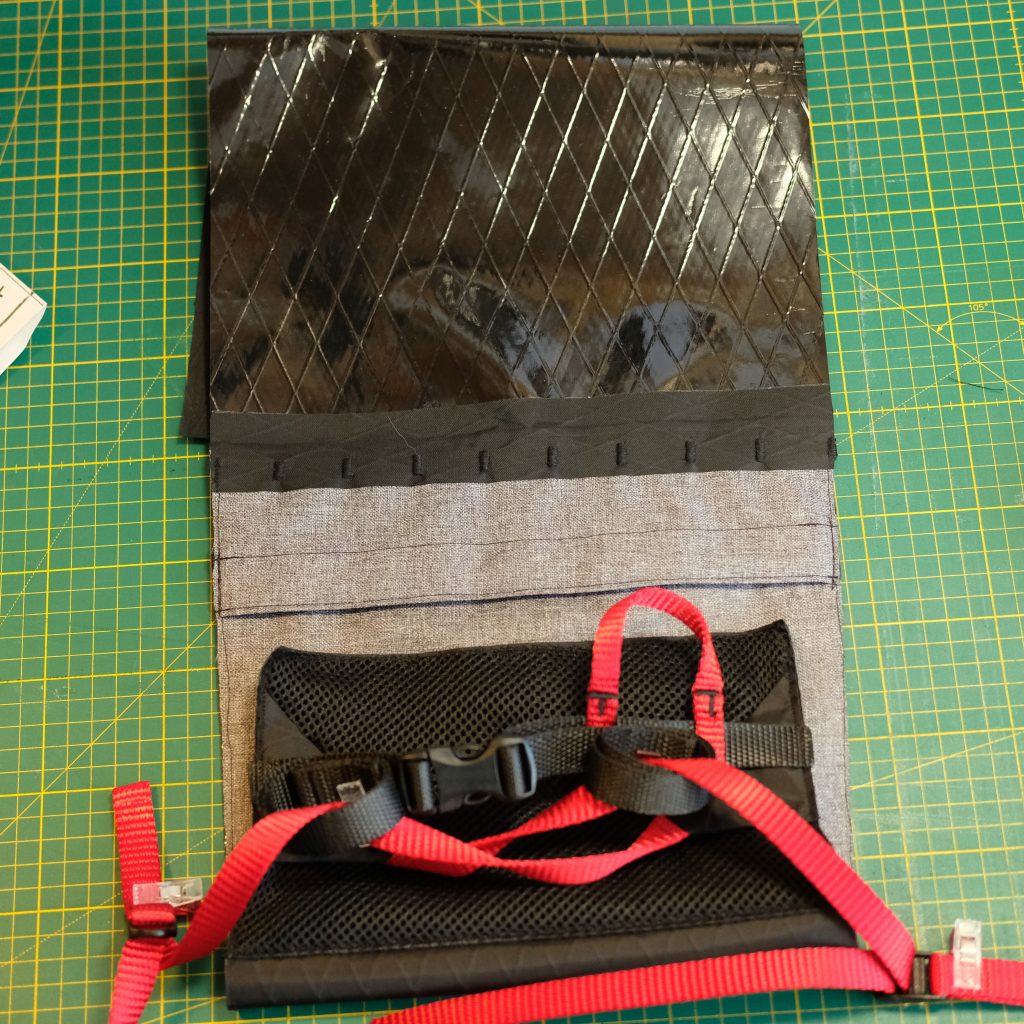
The daisy chains will be taking some serious load when the pack is full and skis are hanging on its sides. So the daisy chains will need to hold under strain. The achieve that, the pack’s fabric is carefully strengthened along the daisy chain. In the following pictures, the daisy chain is blending with a folded seam. It also is the point where the padding sleeve is sewn into the back panel, which backs the fabric without any specific weight penalty. Nonetheless, the seam is sealed and hidden with a strip of VX21 RC, which also adds strength to the bartacks, totaling the layers of fabrics to 3 behind the webbing.

The rest of the back panel is relatively simple. Thee is a thin layer of closed-cell foam and 3D mesh on the lower part, decorated with a mountain-top pattern.

The shoulder straps lower attachment is a standard load-bearing triangle and webbing designed to use with a nylon ladder-lock buckle. A lightweight hip belt is also important, since the pack loaded with skis would have an unusually low center of gravity. I added a removable gear loop on the hip belt

There you have it! These were the most important details of the pack’s back panel.

Since you read it until the end, here are a couple of bonus pictures that did not make the cut.

Have a great day!

Make the Winter Pack from White X-PAC VX07

I have already covered all of the techniques I used to build the Winter Pack in other posts so I will not dwell on the details too much. The pack is relatively simple in terms of features, it has an almost vertical daisy chain, a side zipper pocket, a roll-top closure and a padded back. Plus some quality of life details.

For most of my builds, I design the front (1) and back (2) panels first, then I sew on the side panels (3, 4) to the front panel. The last pieces of the puzzle are to set the height of the roll-top with multiple parts if required, and only after that do I sew on a wide panel for the roll-top across the 3 front and side sawn panels.

Representation of the cut panels (not to scale)

The bottom panel itself is more often than not the last thing I put together, and stitch it to the front and side panels before finishing the pack by attaching the completed back panel (2,5,6).

I wanted a decent back padding for this pack since I might have to carry pointy or uncompressible gear (water bottles, alcohol stove) and not a lot of temporary padding. I went for an inversed T-shaped pad with 8mm closed cell foam topped with 3D mesh. All directly sewed on the back panel to keep every light and water resistant. To avoid wasting a lot of mesh, I decided to stitch two parts together with a flat-felled seam. The foam itself ended up being a three parts piece.

To secure the shoulder straps, I usually embed the ends in between separate panels (2, 5). I also use the same technique to add the load-lifters and the roll-top compression strap (2,5,6). The smaller pieces of the back panel will define the height of the last roll-top piece (7).

The shoulder straps are just my usual design, with an outer shell out of Cordura and 3D mesh inside. I always add daisy chains to to the full length of the shoulder straps to attach the chest strap, or smaller equipment. For this build, I went with ladder-lock buckles instead of Lineloc buckles since weight was not a huge concern.

There isn’t much else to talk about really. The front panel is very lean, with just the daisy chain attached to the main fabric without reinforcements (if the daisy chain was planned to attach heavy equipment, I would back the VX07 fabric to avoid future tear outs.

The pocket itself is just a flat pocket sewn onto on side panel. Since I am right handed, the most logical side to put the pocket on was on the right side (when wearing the pack) so I can slide the bag on one shoulder and access the pocket while walking.

That’s it! I did not cover the side compression straps since there is really nothing special about it. Enjoy!

The Skinny Pack’s Pattern

You might be wandering what the “buffers” are for. I added them to the pattern so that even with even seam allowance, you should end-up with more fabrics on the tricky parts, which you can then trim later during the pack build.

As always, go slow, and use clips!

If you don’t have a printer to print patterns, that’s fine. I don’t have one. Instead, I take some thin Tyvek, and I draw the patterns by hand. Why Tyvek? It very durable, so I have a pattern I can abuse, clip, tape, and reuse for ever.