The complexity of your work will gradually increase as you build up confidence and skills. When that time comes, you will need to temporarily mark your fabrics and no longer just marking seams and cut lines where no-one will see the permanent marker’s strokes.
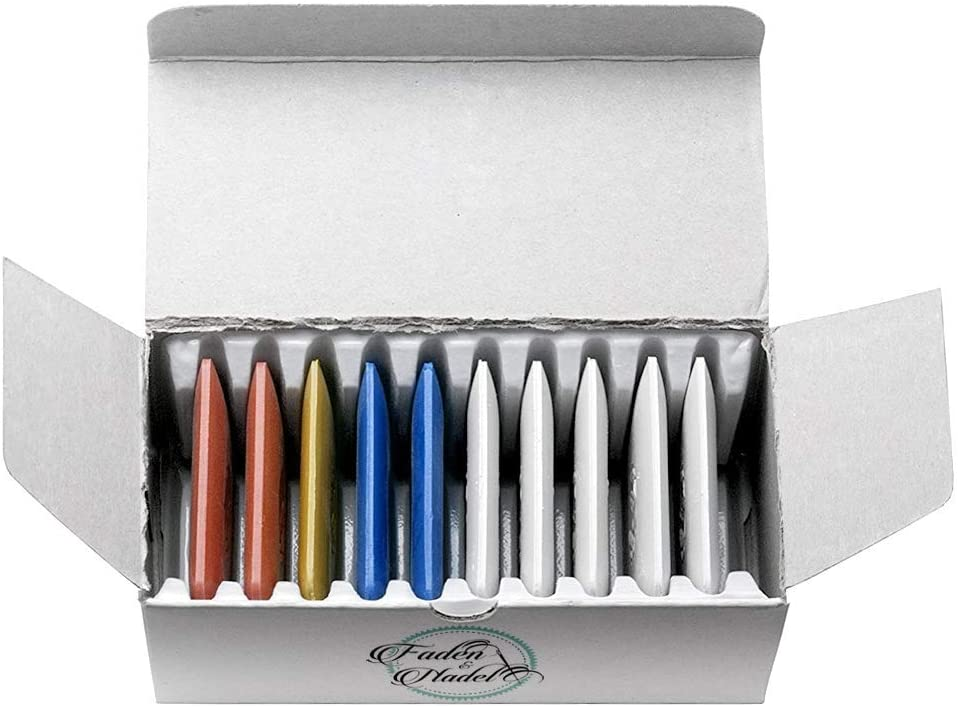
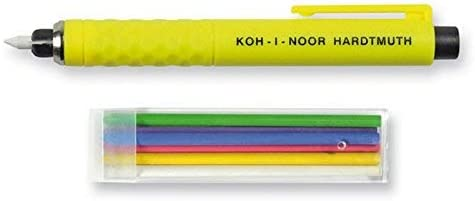
I find that even on high-tech fabrics, the most versatile and reliable method to mark temporary guides and lines is chalk. I use a combination of a Tailor’s chalk pen and 4.5x3cm Tailor chalk rectangles in an assortment of colours to be able to always have contrasting markings on any colour fabric. On full set will probably last you forever if you are a casual builder like me.
You will want to precisely mark your webbing and draw lines and patterns on a lot of your materials to help with alignment, folds, assembly orders, and many other writings but also want to be able to easily wash it off when the build is complete.
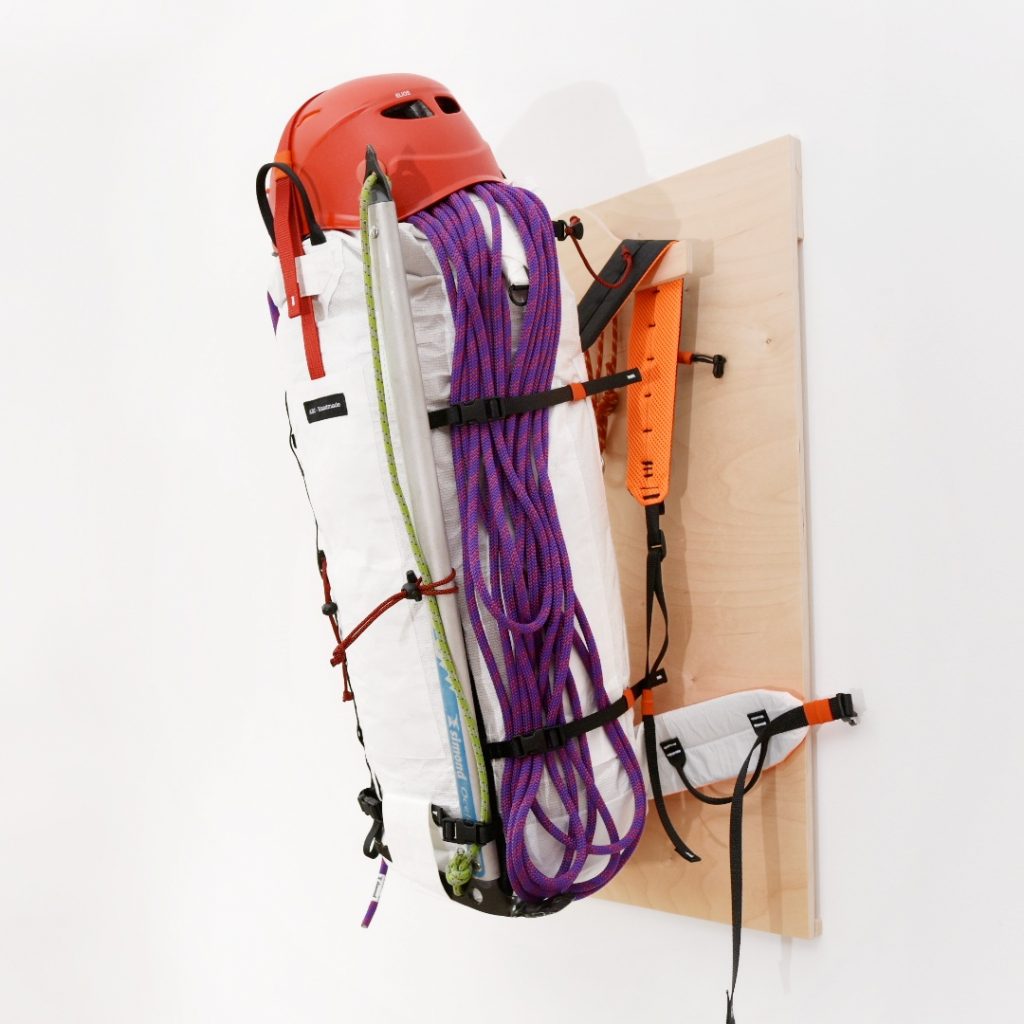
I recently finished a one-of-a-kind ~35 liter Alpine backpack completely custom made for an Instagram follower who reached out to discuss a custom version of The Alpine Pack I recently posted about. We spent a lot of time together designing the pack, carefully selecting the features, and studying his previous backpacks for important points to consider and I think we achieved something really amazing.
I must admit, it was hard to let this one go after about 60 hours of combined work over a couple of months. But I think that particular bag will have the life it deserves, filled with hiking, climbing and ski touring equipment!
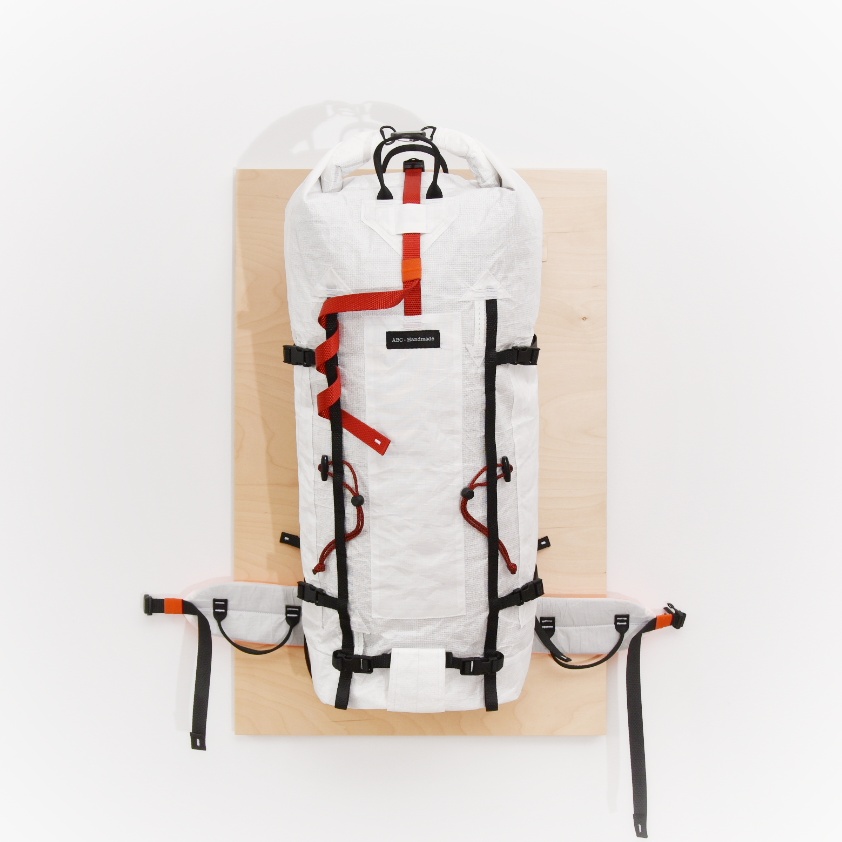
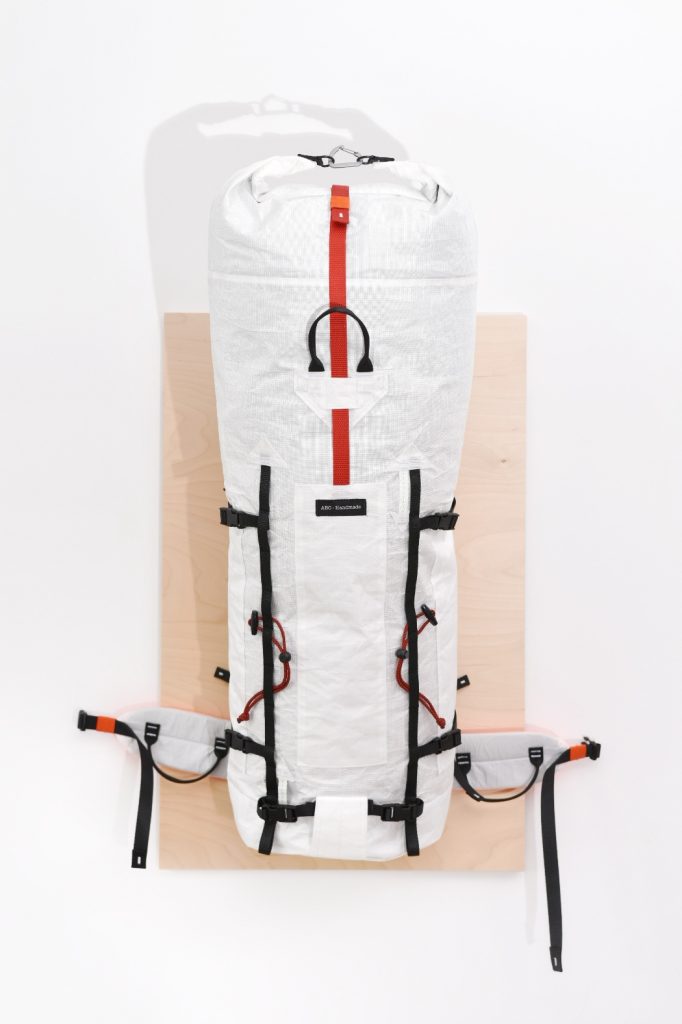
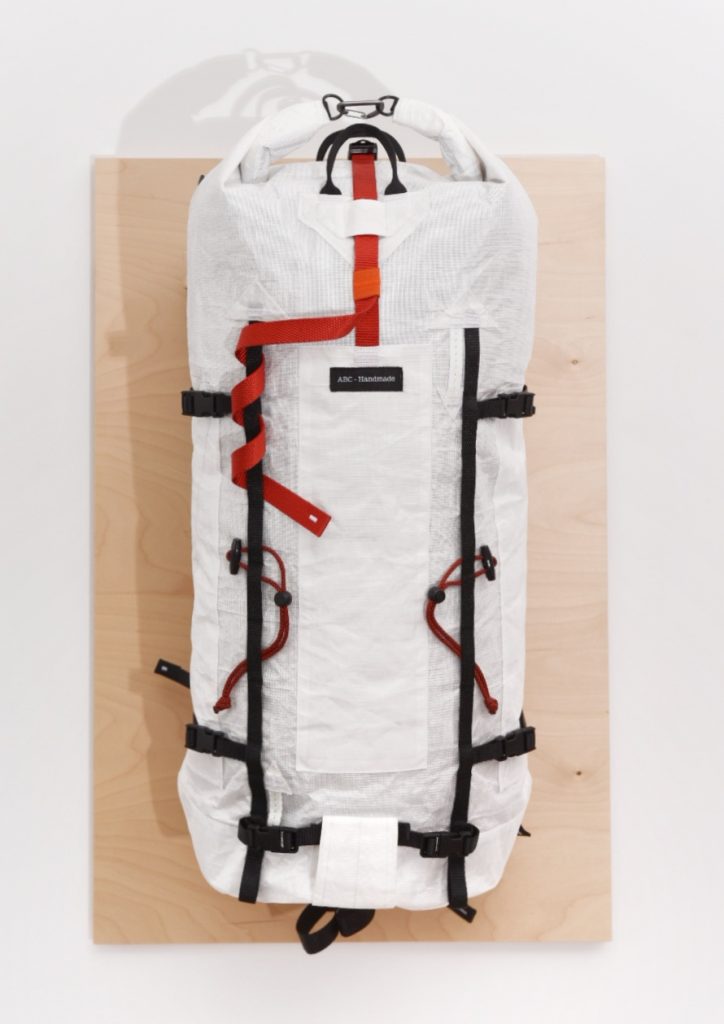
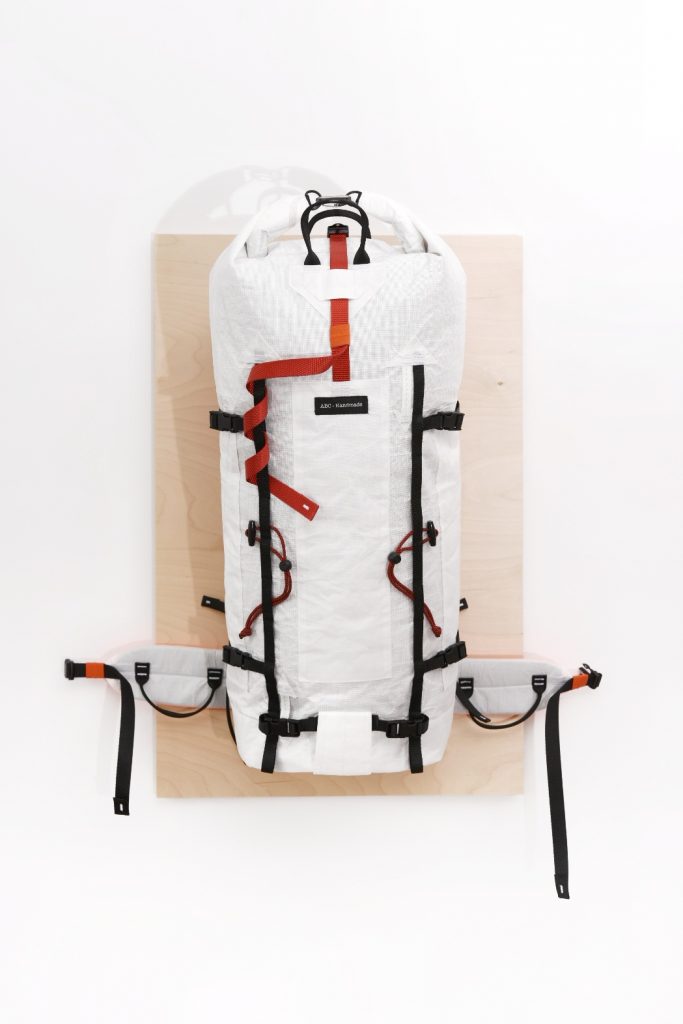
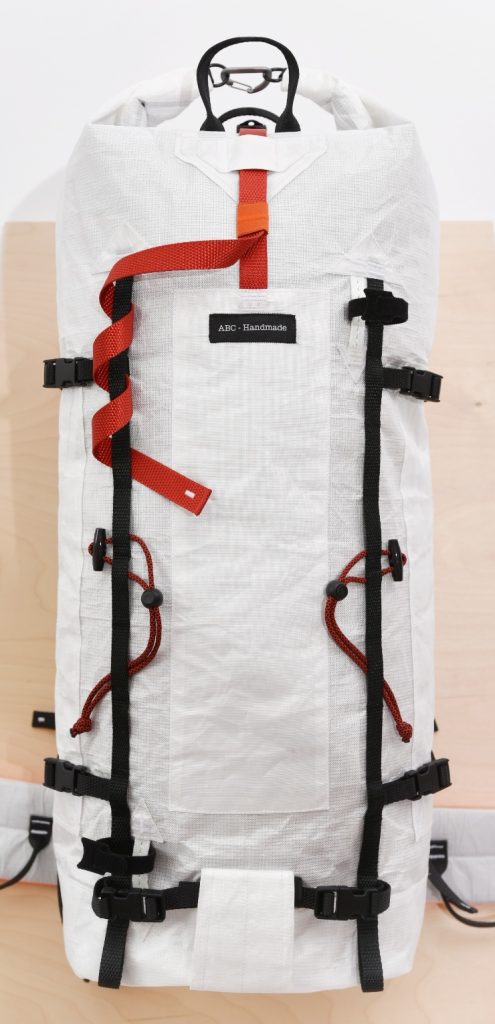
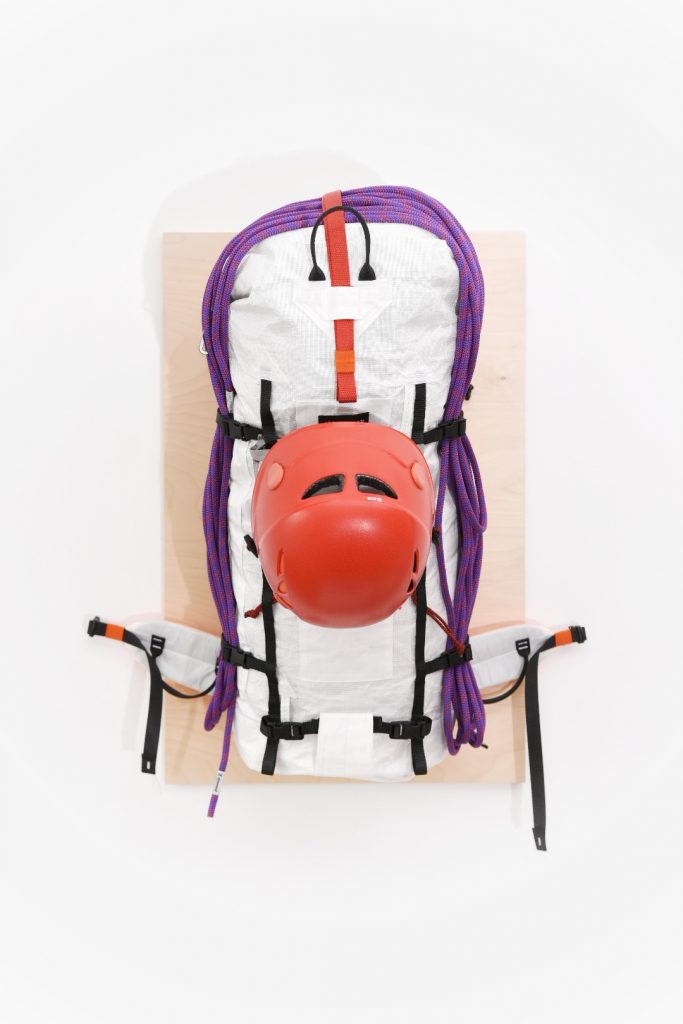
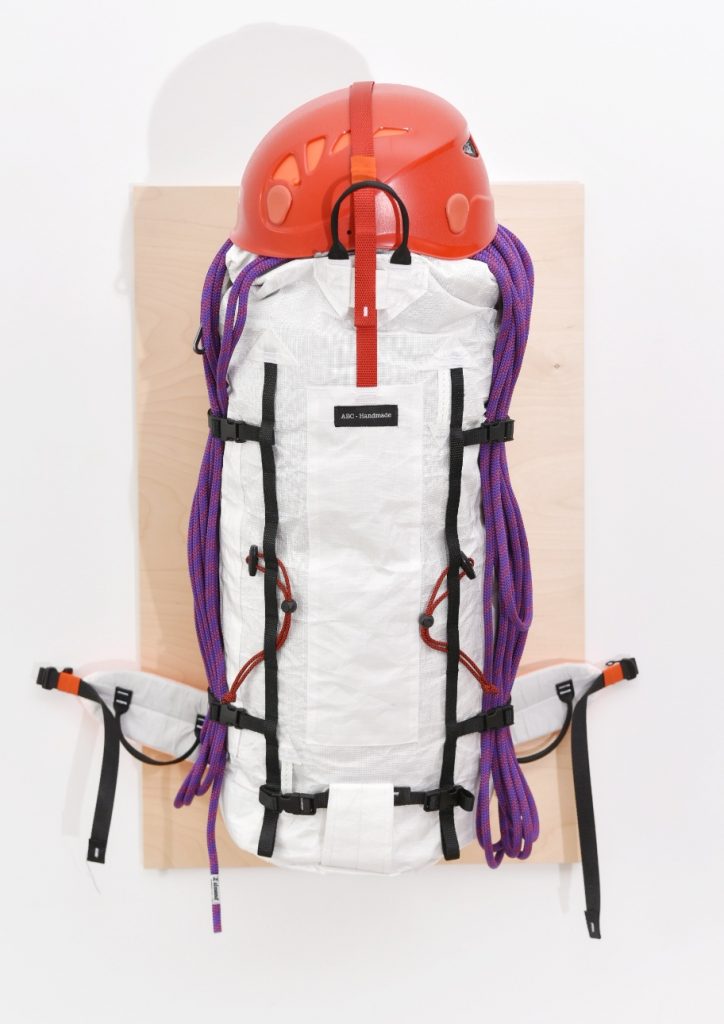
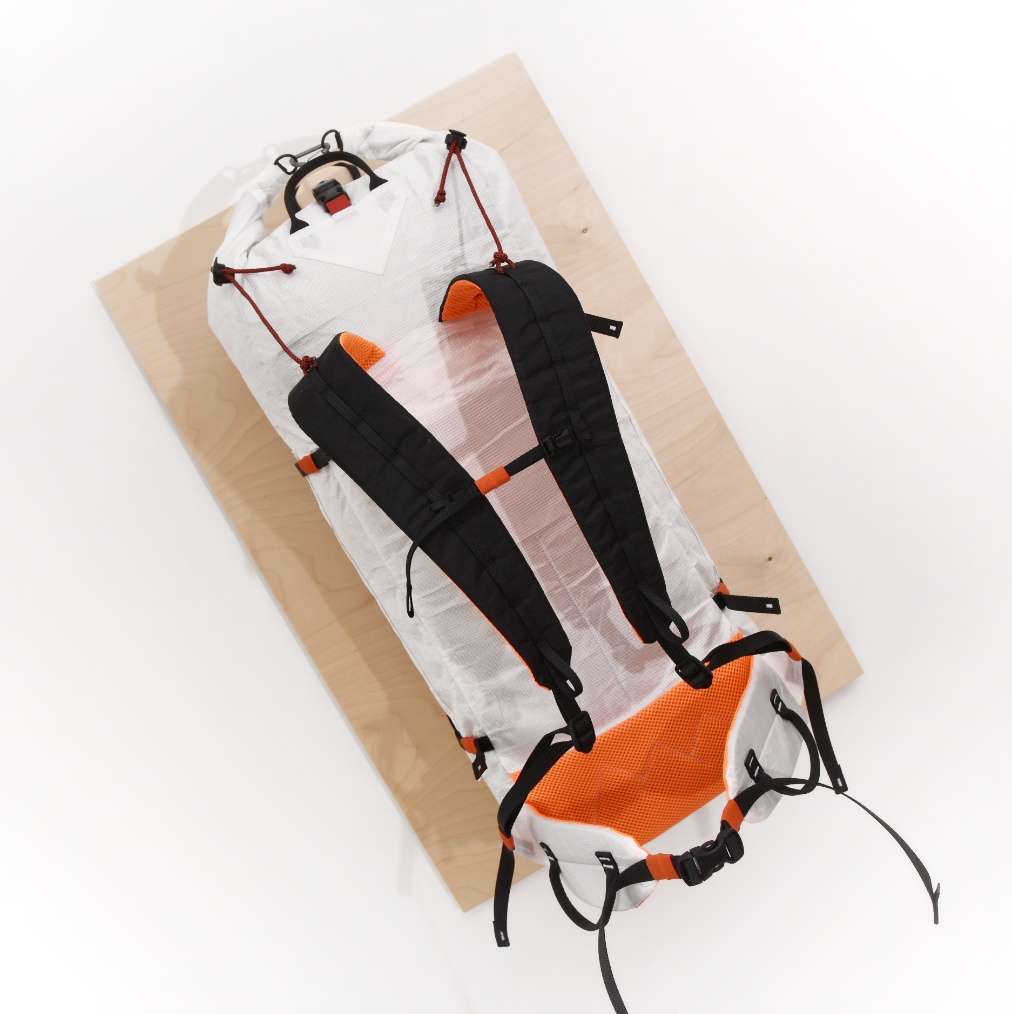
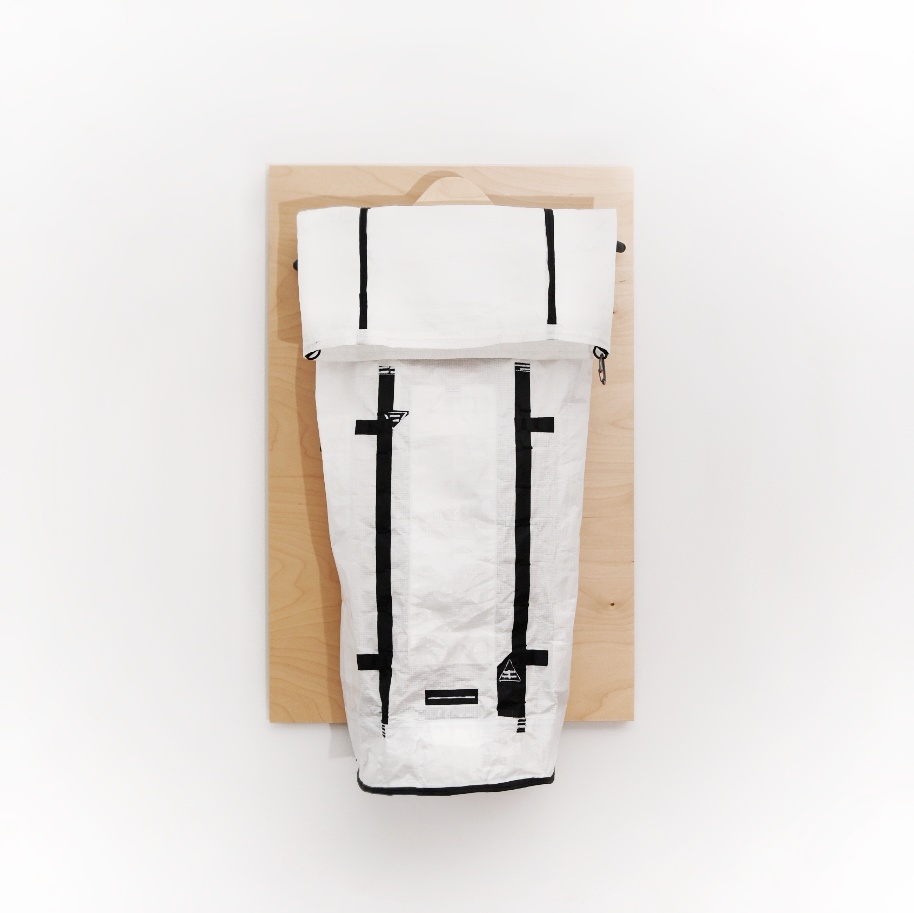
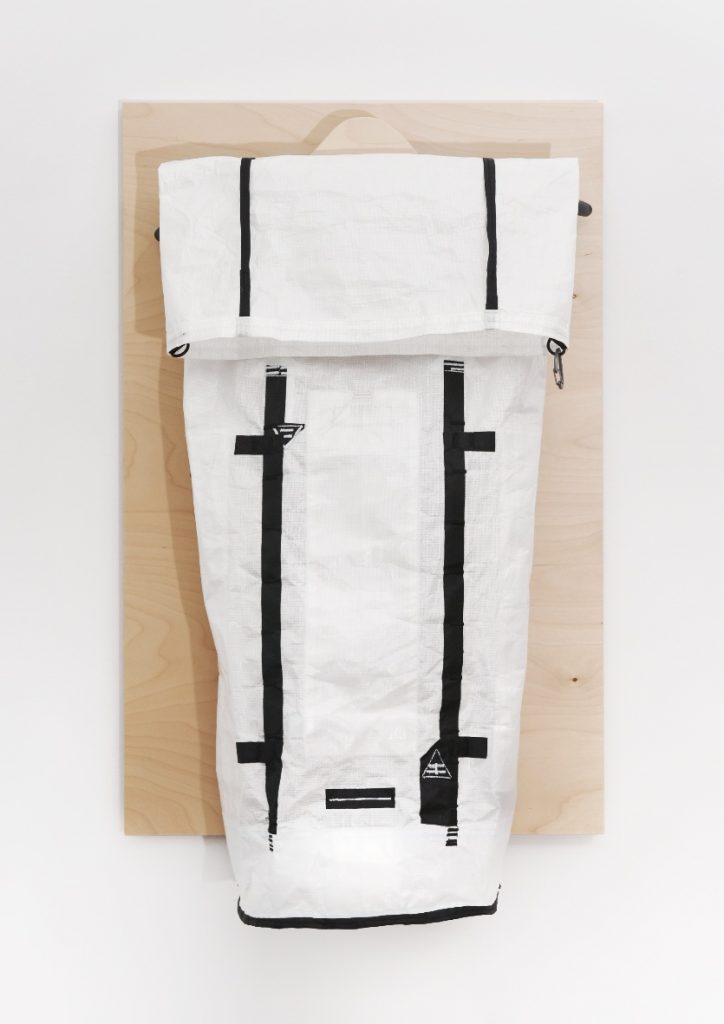
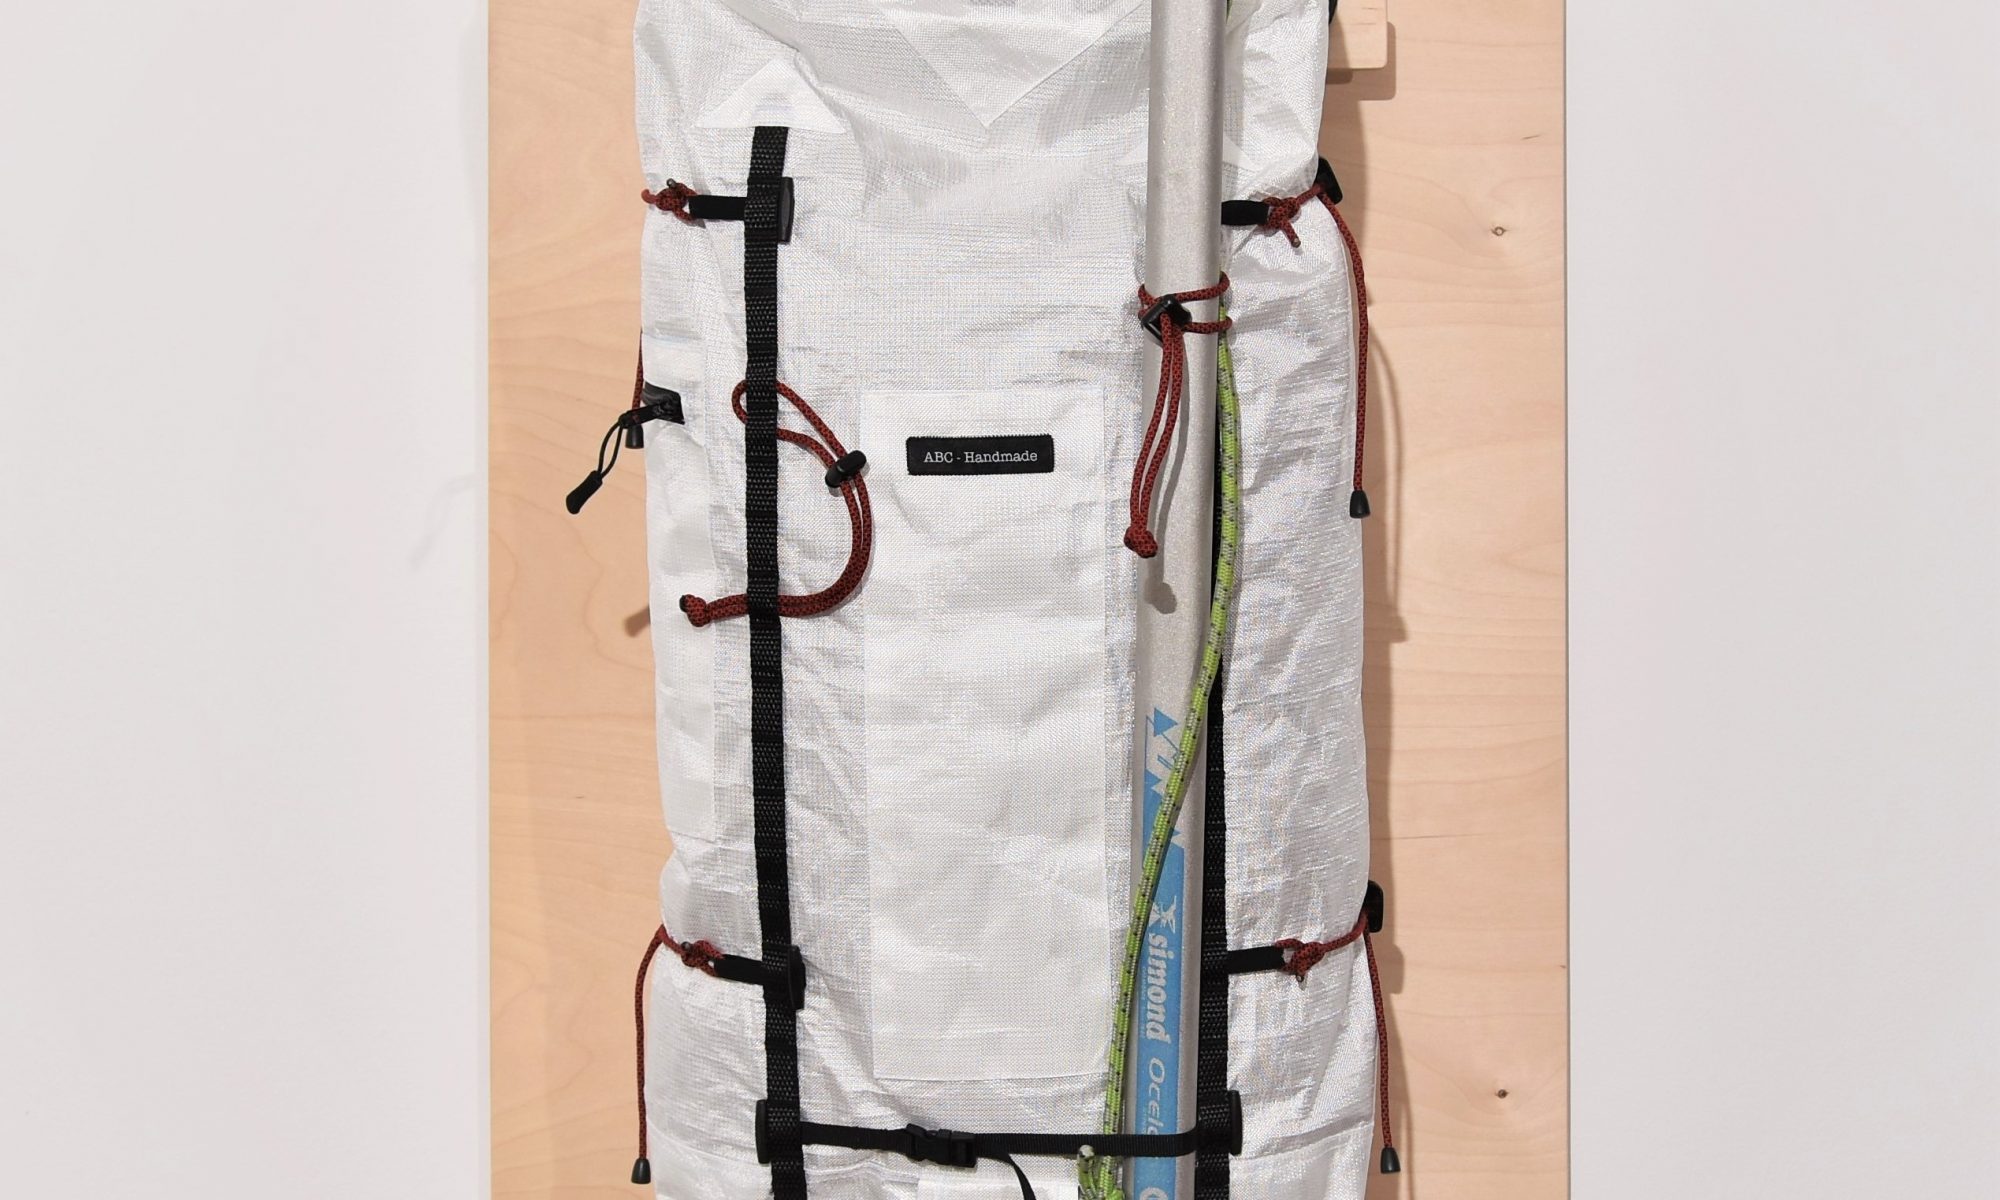
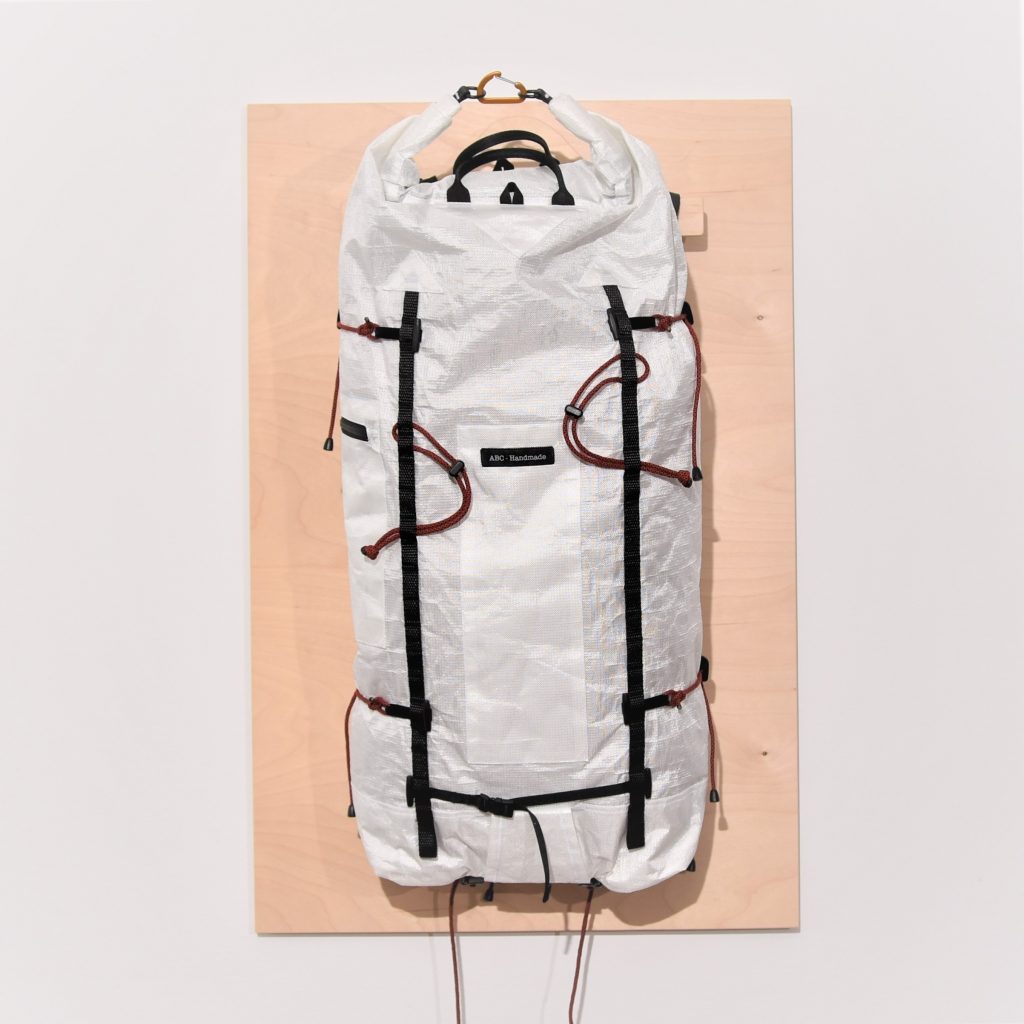
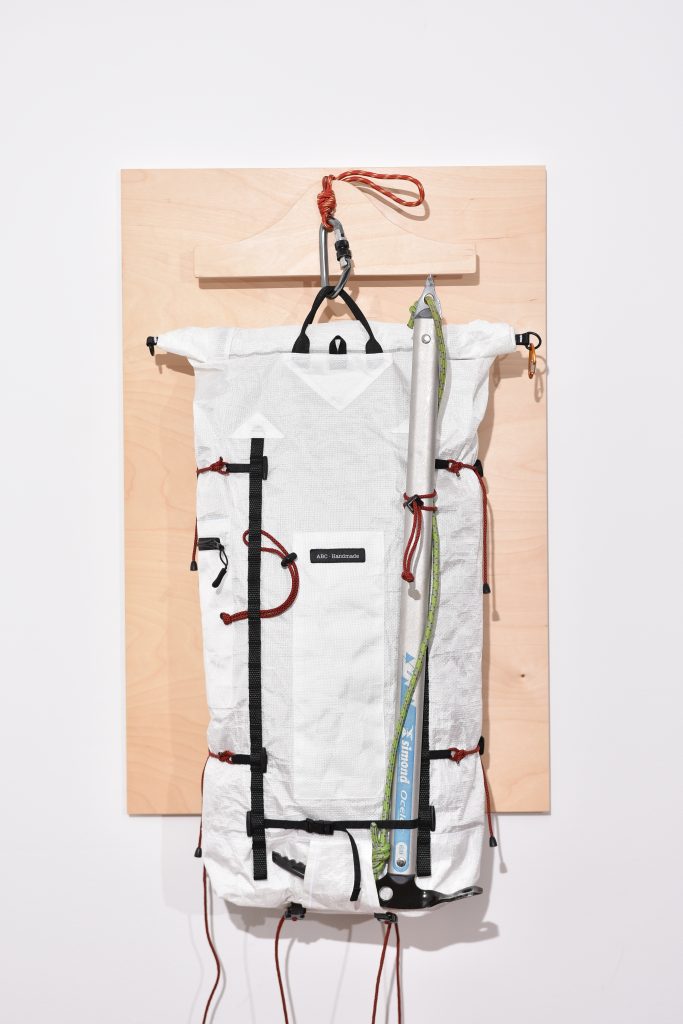
This backpack is a slightly bigger version of the previous alpine pack I made, but is built like a tank! It has many reinforcements on all four sides, and other areas prone to wear and tear. It is made almost entirely out of white Ecopak Ultra EPL 400 (a hybrid UHMWPE and recycled polyester fabric which is incredibly abrasion resistant) and boasts sturdy padding and a hip belt, a set of ski attachments (front and A-frame options), dual ice-axe attachments, rope tie-ins and a relatively huge roll-top extension for the approach.
The need to accommodate long hours of climbing and belaying meant that the bag had to have a relatively low profile when closed to not interfere with a helmet when belaying from below, and is therefore a little “fat” compared to previous designs. That being said, its owner being in fantastic shape, the increase in diameter should not interfere with arm movements in the slightest.
In the end, the complete pack weighs in at exactly 700 grams, which I am really proud of achieving with as little compromises as possible.
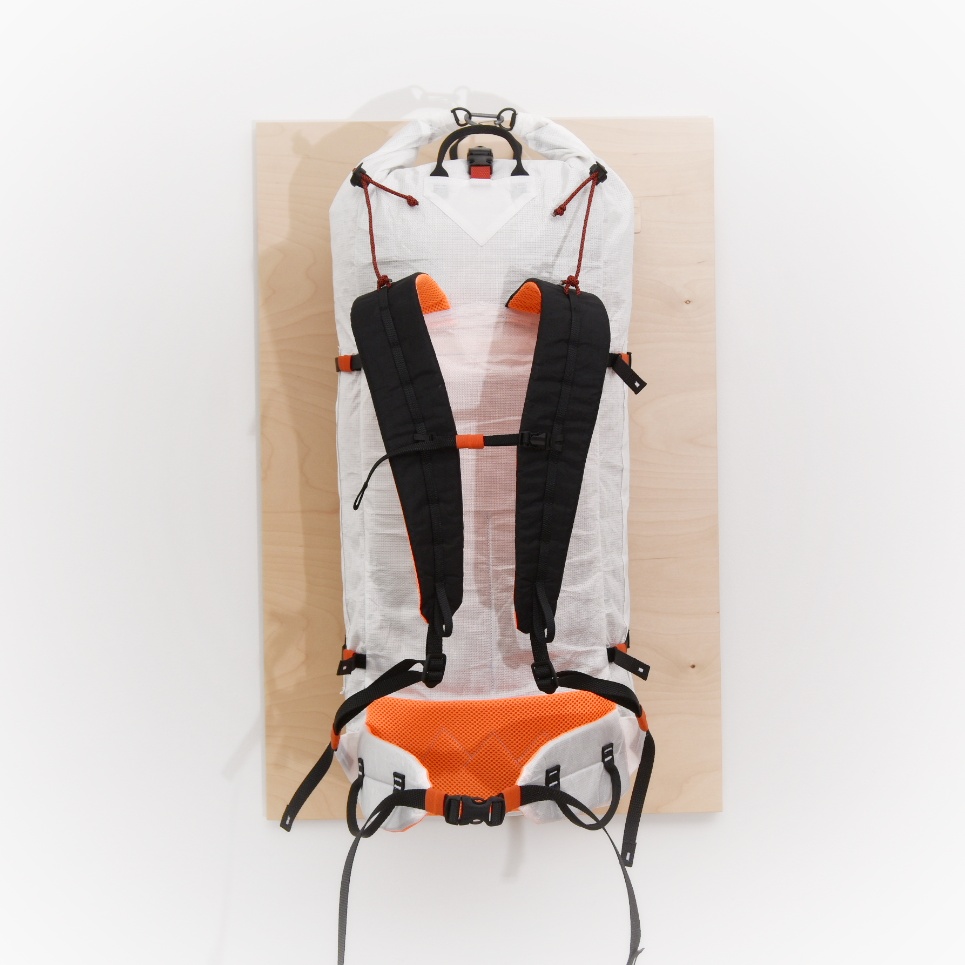
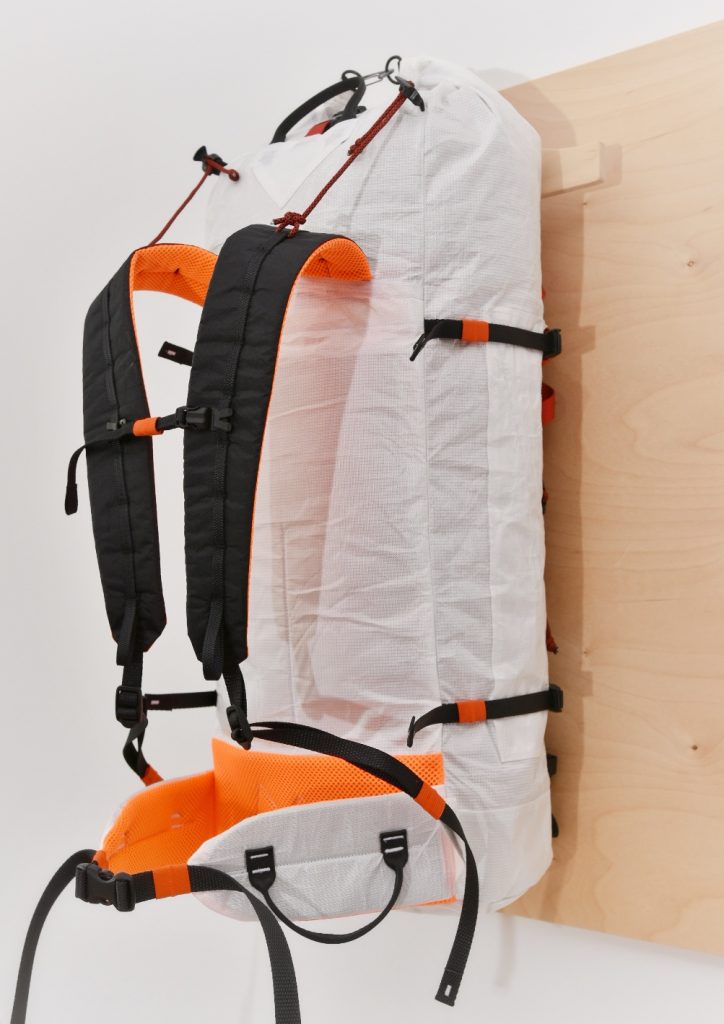
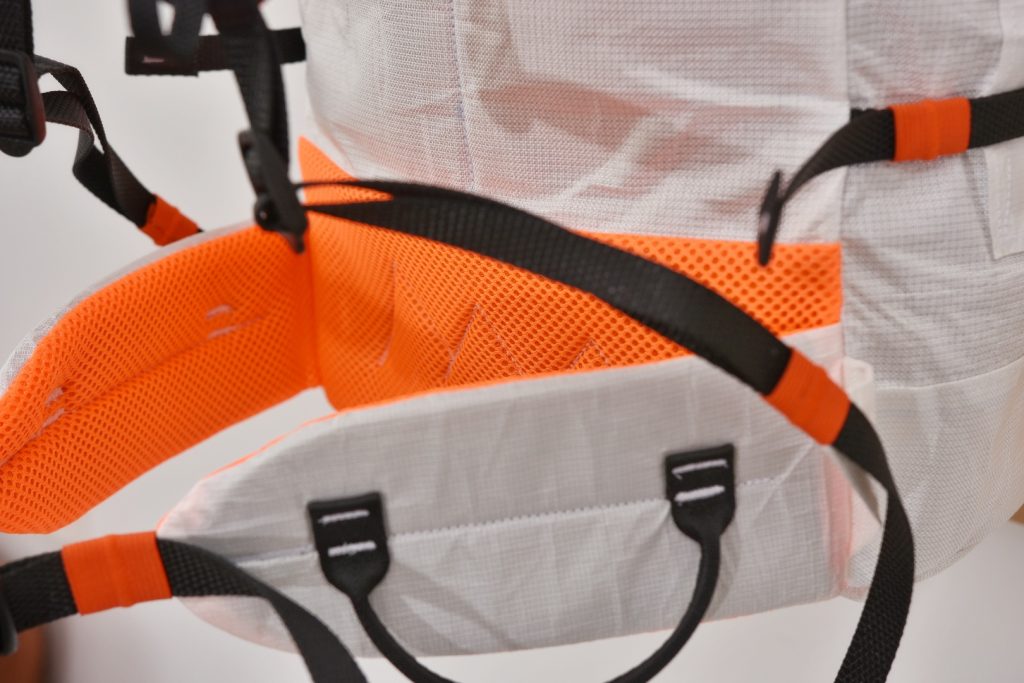
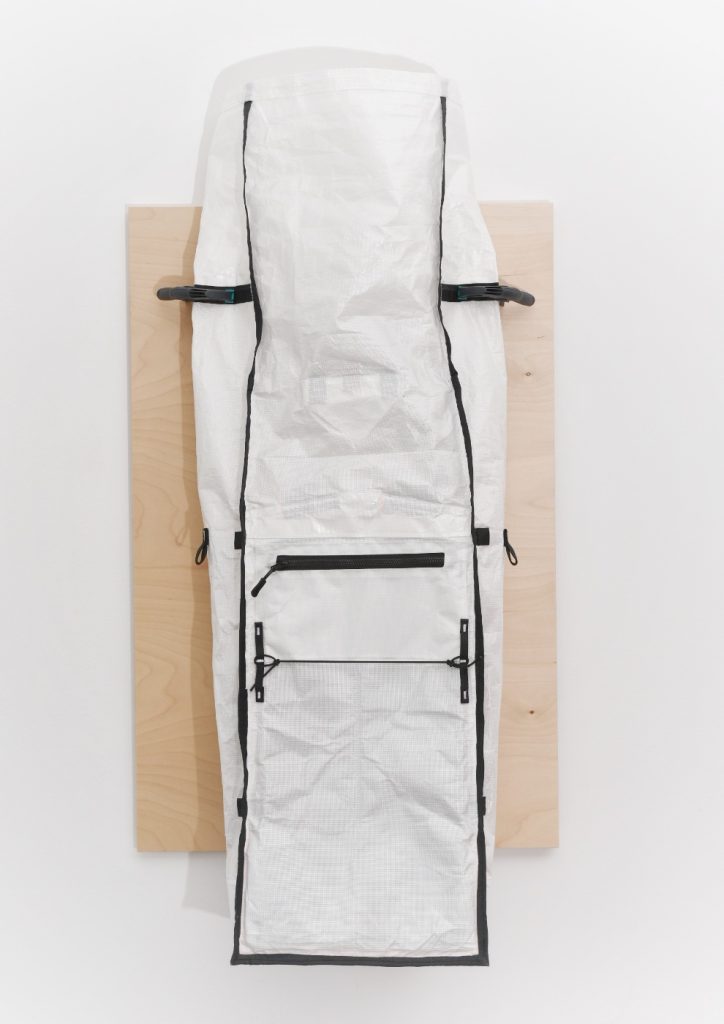
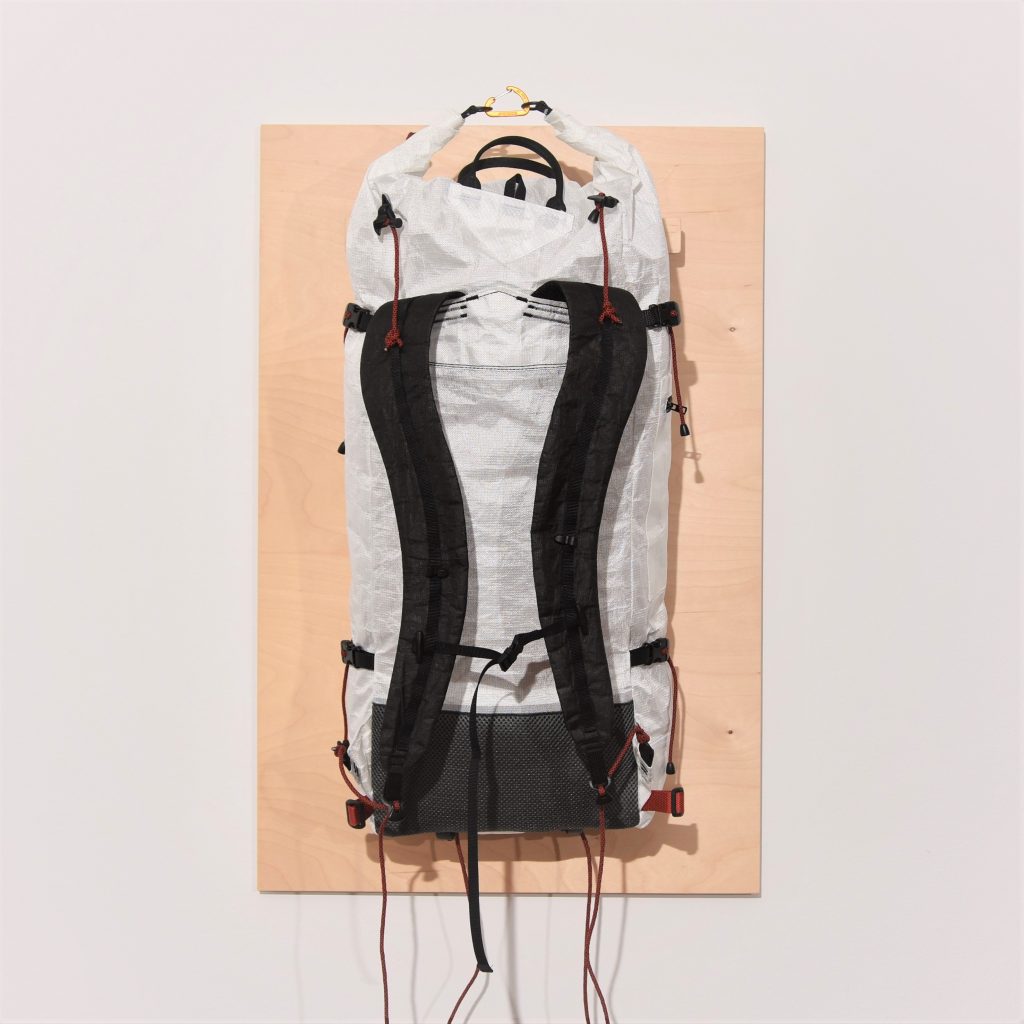
The back panel is of a relatively simple construction, and also out of Ecopak Ultra EPL 400 for its abrasion resistance if the pack needs to be hoisted. The complete back panel, the shoulder straps and hip belt are padded with high quality closed-cell foam for durability and to bring a little comfort when carrying high loads.
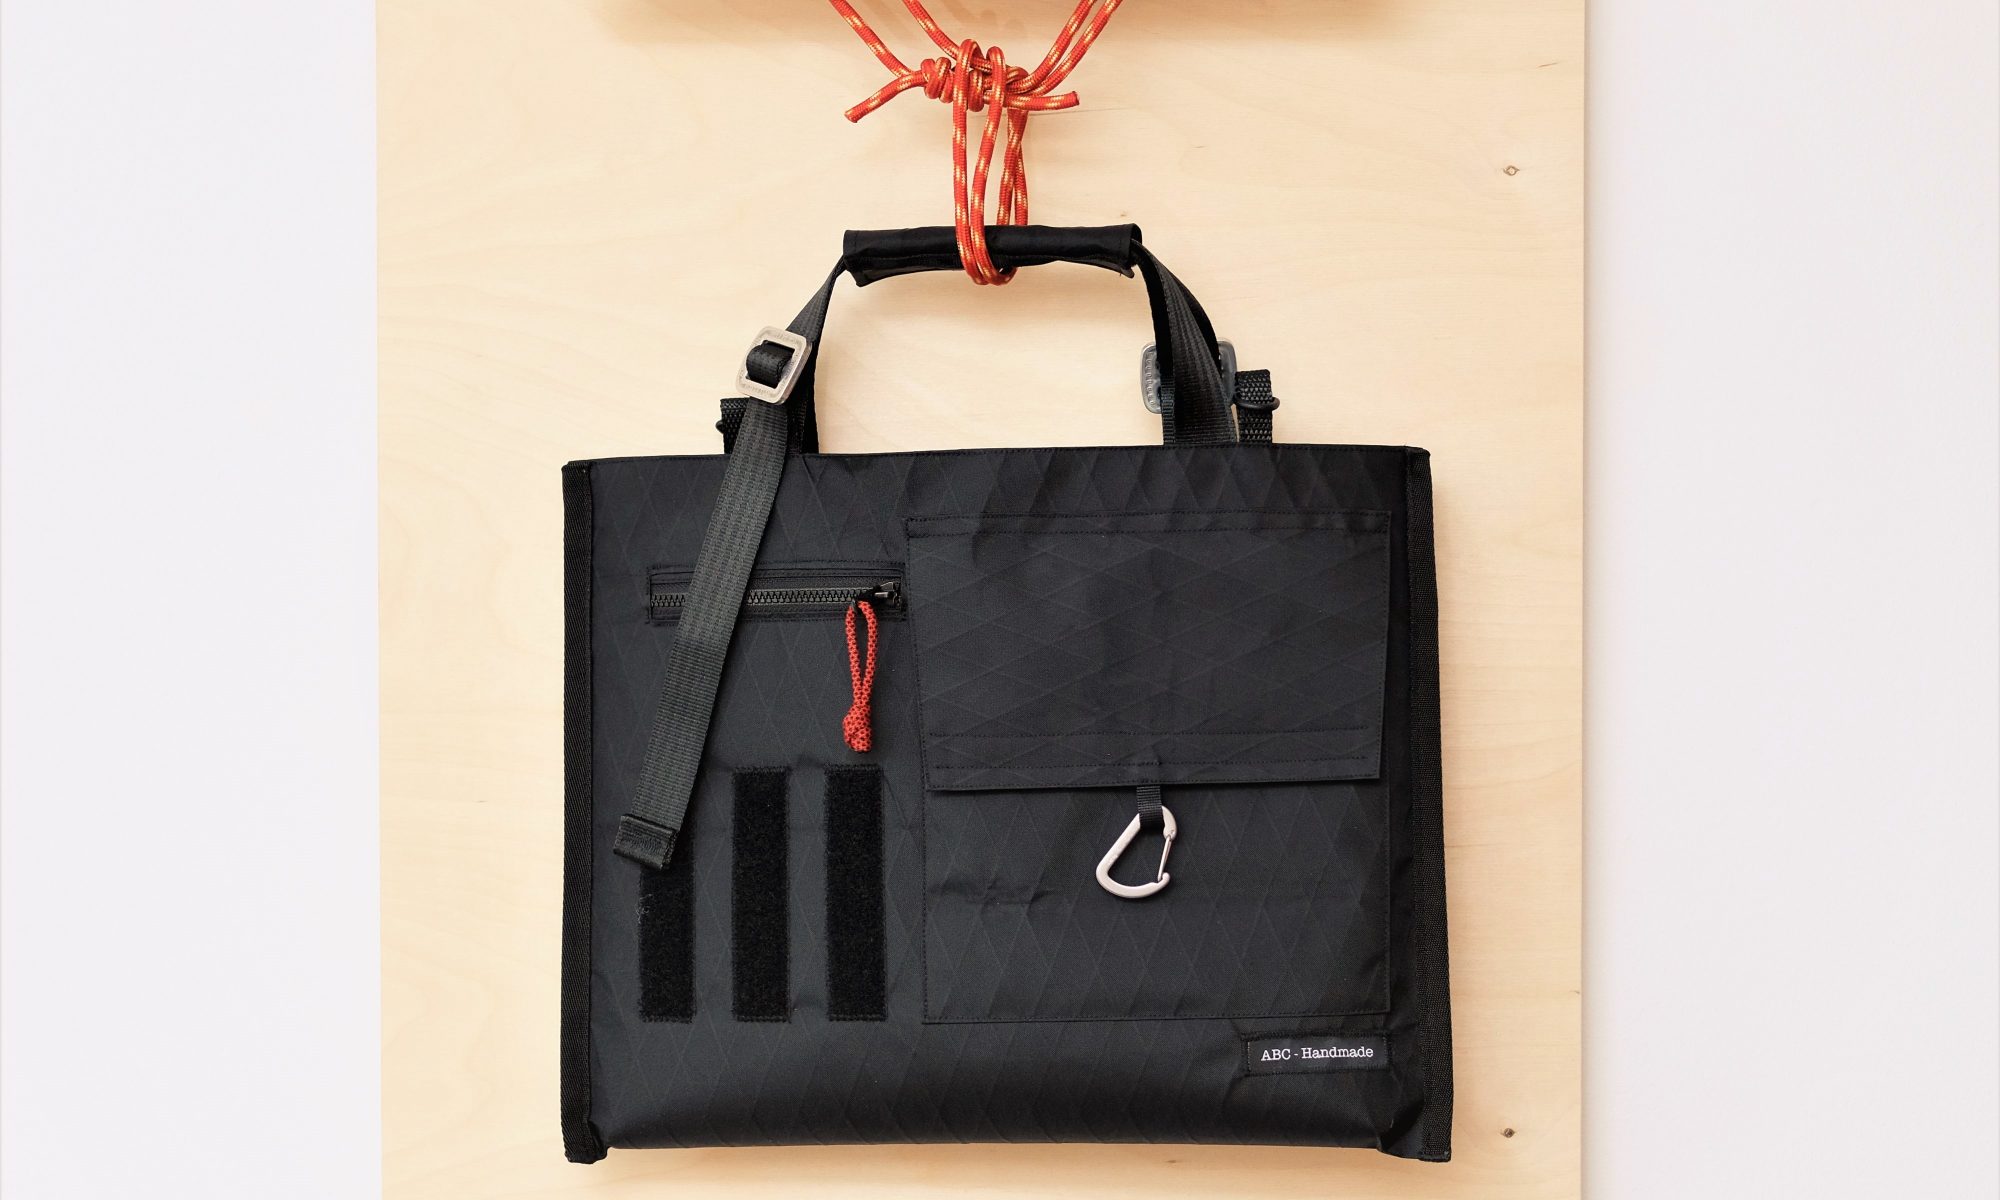
The interior is also very lean, and only offers a couple of gear loops and a small zipper pocket for IDs and other small items. All the seams and the load-bearing bartacks are reinforced and double stitched to prevent fraying of the Ultra EPL fabric in case the backing material starts to degrade. In retrospect, I think I would reinforce the seams and bartacks with a white backing fabric next time to blend in with the rest of the pack better. Since I make that backing “tape” myself, I can easily make it in the colors/fabrics of my choosing. This particular black liner is a 210D Diamond ripstop polyester fabric with polyurethane coating to act as a mild waterproofing tape as well..
This post contains Amazon affiliate links. I receive a small commission if you use these links to purchase something at no additional cost to you. Thank you for the support!
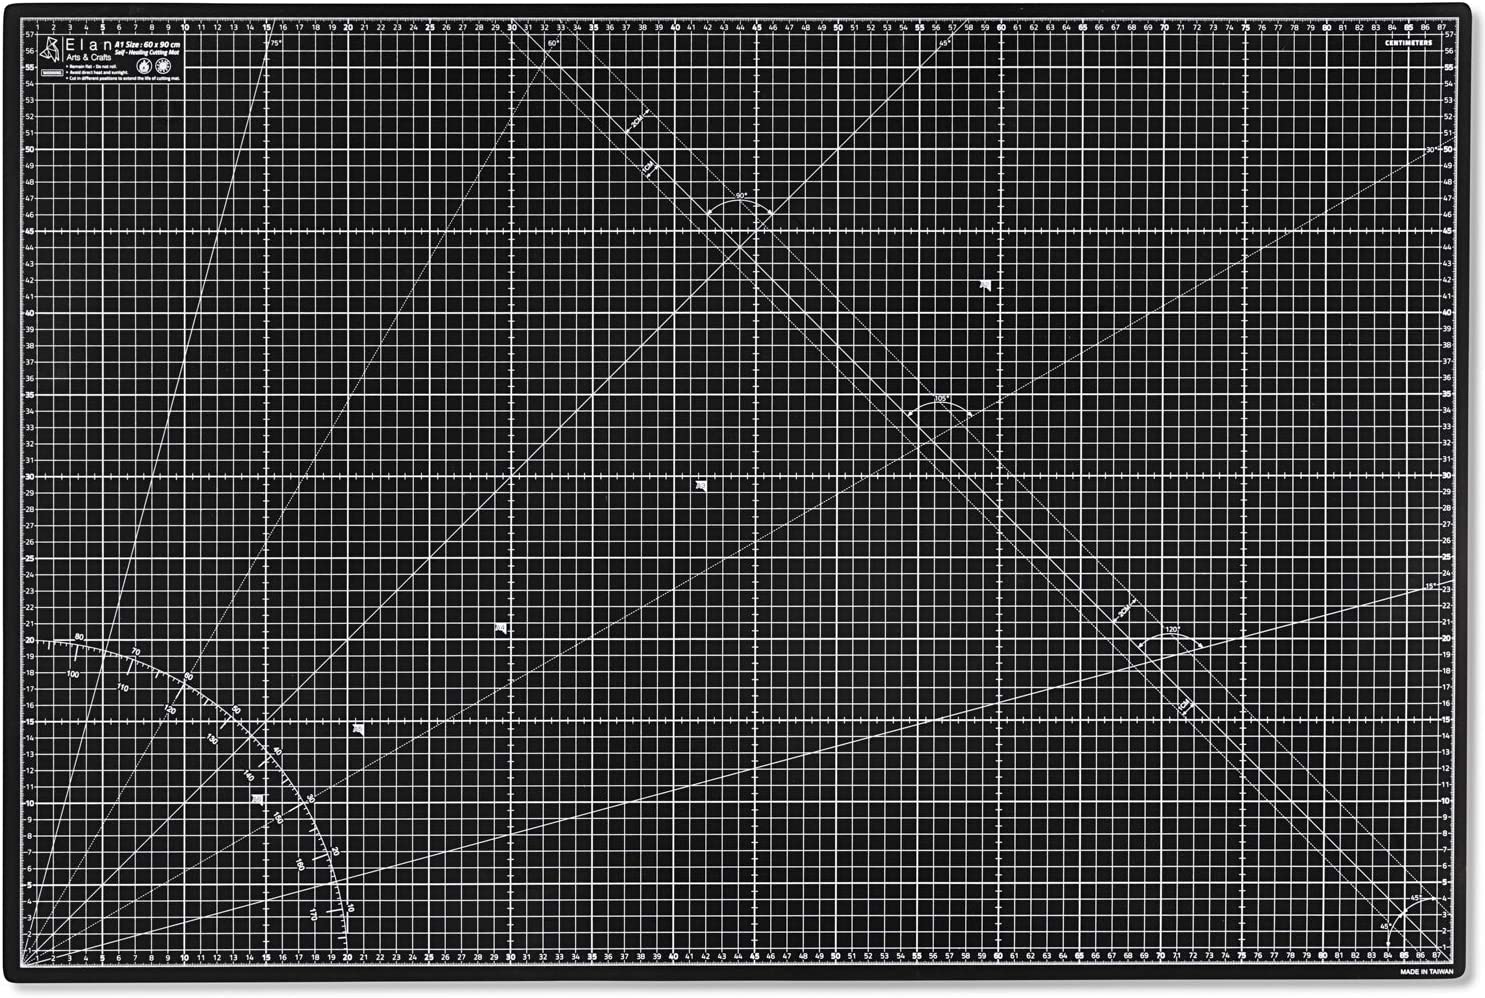
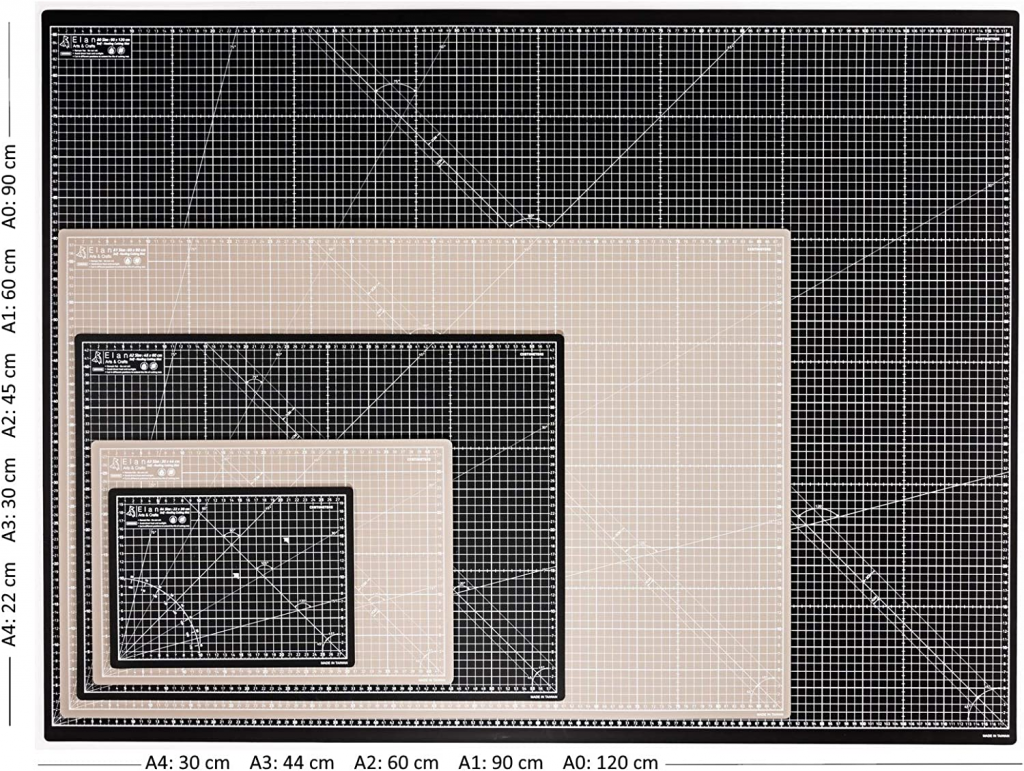
Since I mentioned the rotary cutter being an absolute necessity in another post, it goes without saying that you will need a cutting mat. There are outrageously cheap ones out there, and then there are better ones. They will all let you cut what you need, but I have found that, over the years, the printed patterns and accuracy of the mat’s design matter for quick prototyping and for repetitive work.
I use the mat to measure webbing to length, to gauge dimensions by eye. I use it as a reference for straight 90° cuts, and so much more than just a self-healing cutting surface. So I would recommend a high contrast, clear pattern such as this black Elan A1 Cutting Mat with both a 1×1cm and 5×5cm grid (different line width) and a couple of useful angles and other markings that will just speed things up.
For making backpacks, anything smaller than A1 will make your work much slower, but you need to make sure this fits on your desk or table.
This post contains Amazon affiliate links. I receive a small commission if you use these links to purchase something at no additional cost to you. Thank you for the support!
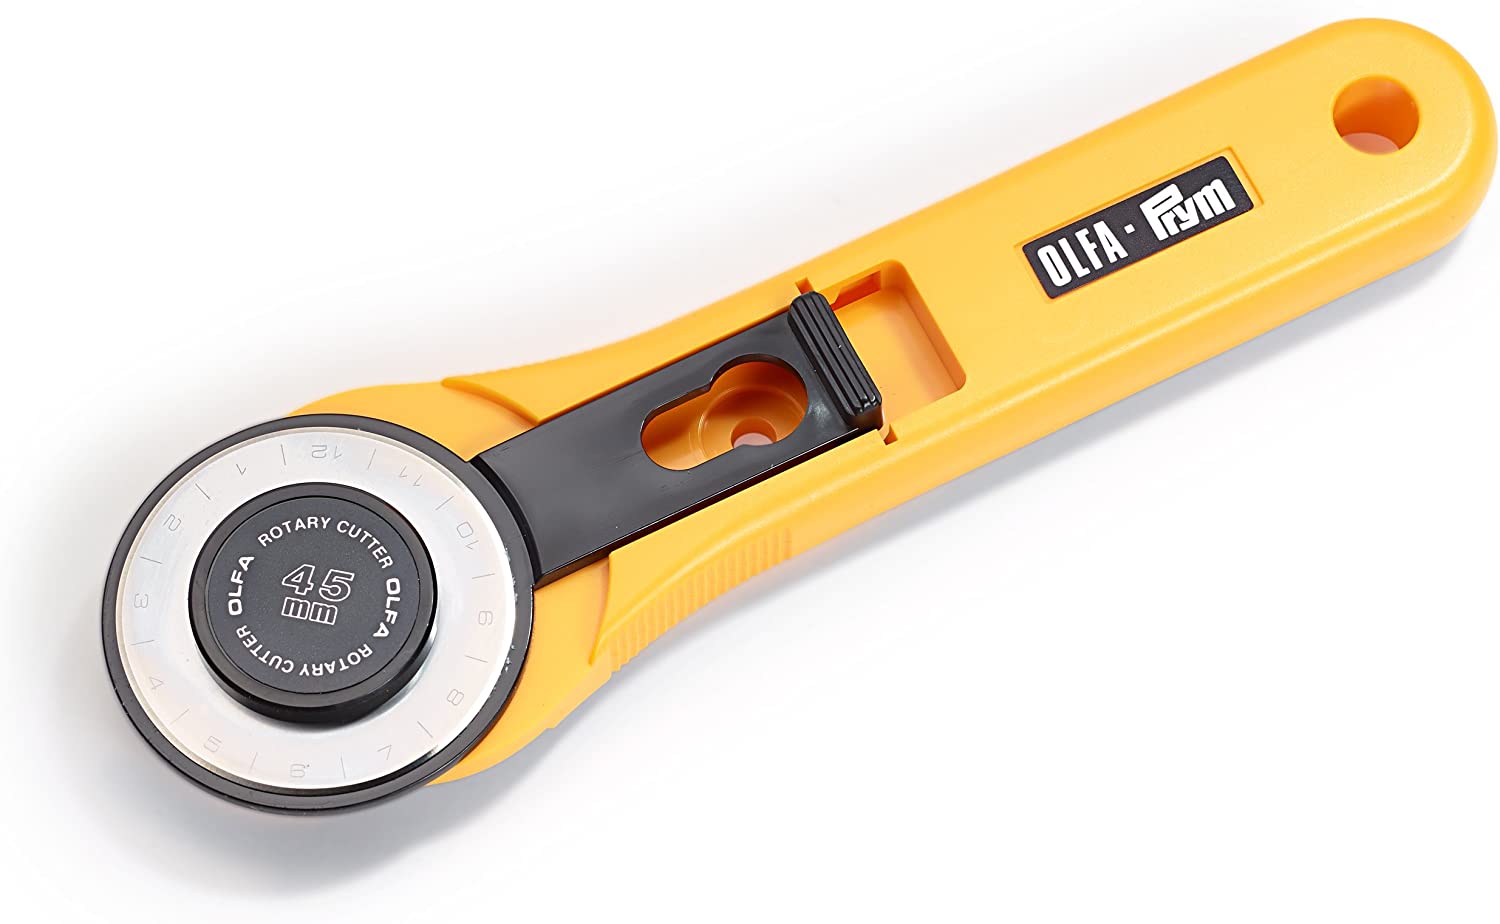
You will absolutely need a rotary cutter, as well as some good quality shears. If you need to pick one, get the Prym 45mm Maxi rotary cutter. I have been using mine since 2017, and after 5 years of intense use, it still cuts everything I need.
Rotary cutters come in different sizes. I find that a 45mm diameter wheel is the right size for what I normally work with. It cuts strait, but can still cut small curved edges cleanly. If you want to do a lot of wavy cuts, you probably want to go for the 28mm rotary cutter instead.
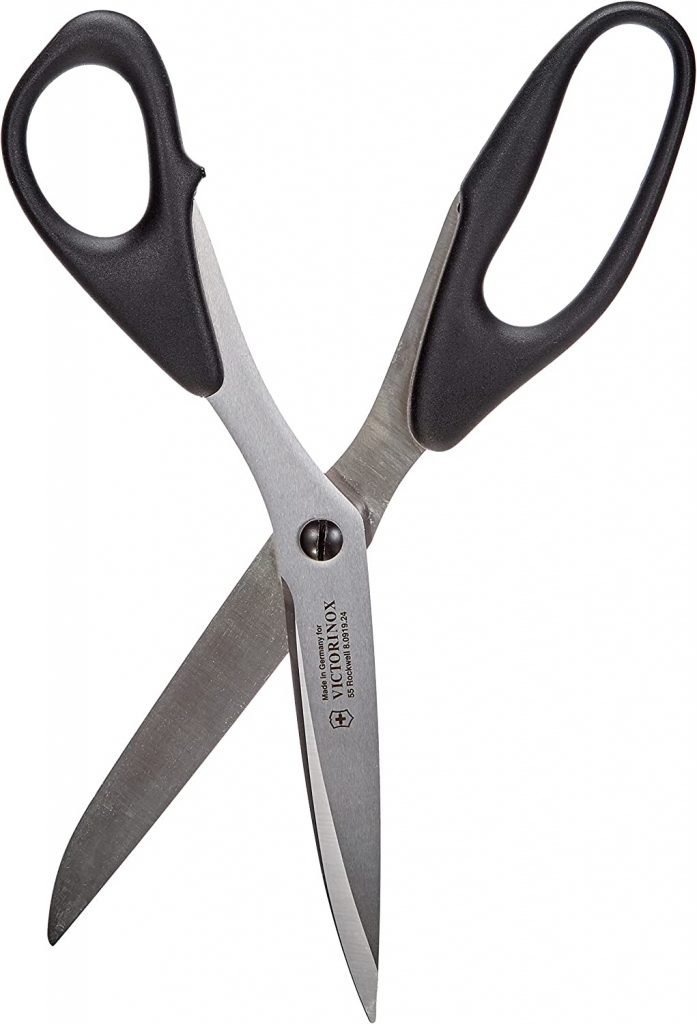
As for shears, I really like my Victorinox Dressmaking Scissors which are holding their sharpness decently well, and have the perfect handles for my big hands. If you have relatively smaller hands, you might be happier with the Fiskars Dressmaking Scissors instead.
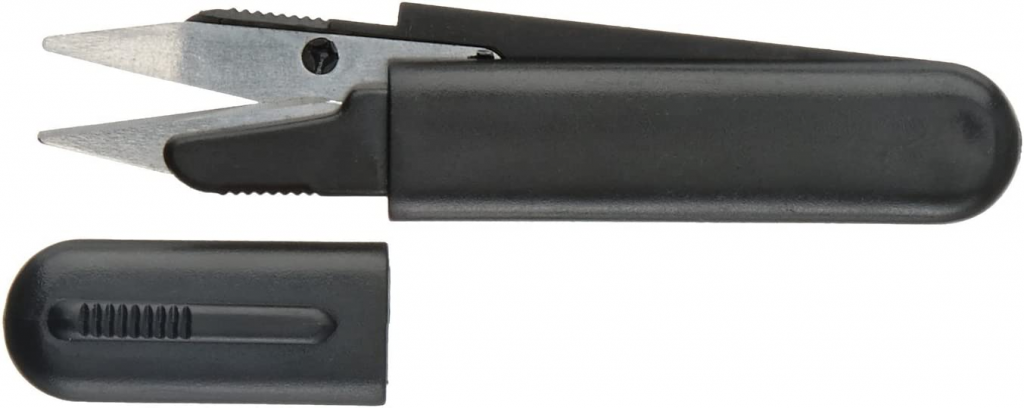
Additionally, if you can spare the money, a pair of small thread scissors will really pay off!
This post contains Amazon affiliate links. I receive a small commission if you use these links to purchase something at no additional cost to you. Thank you for the support!
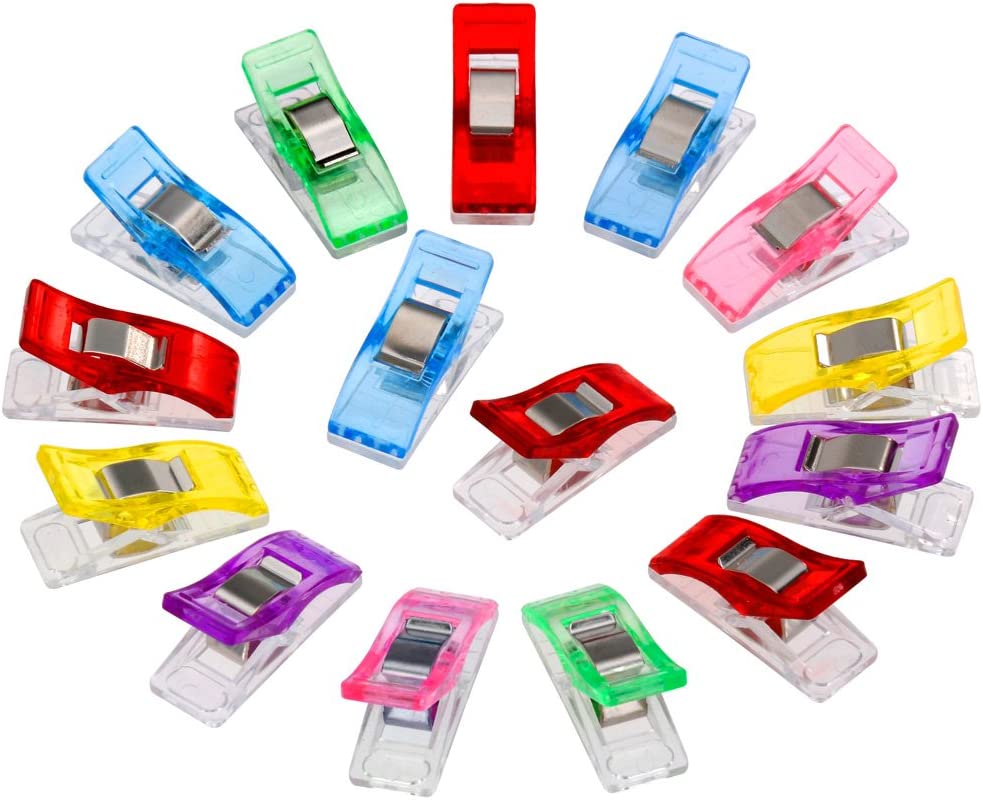
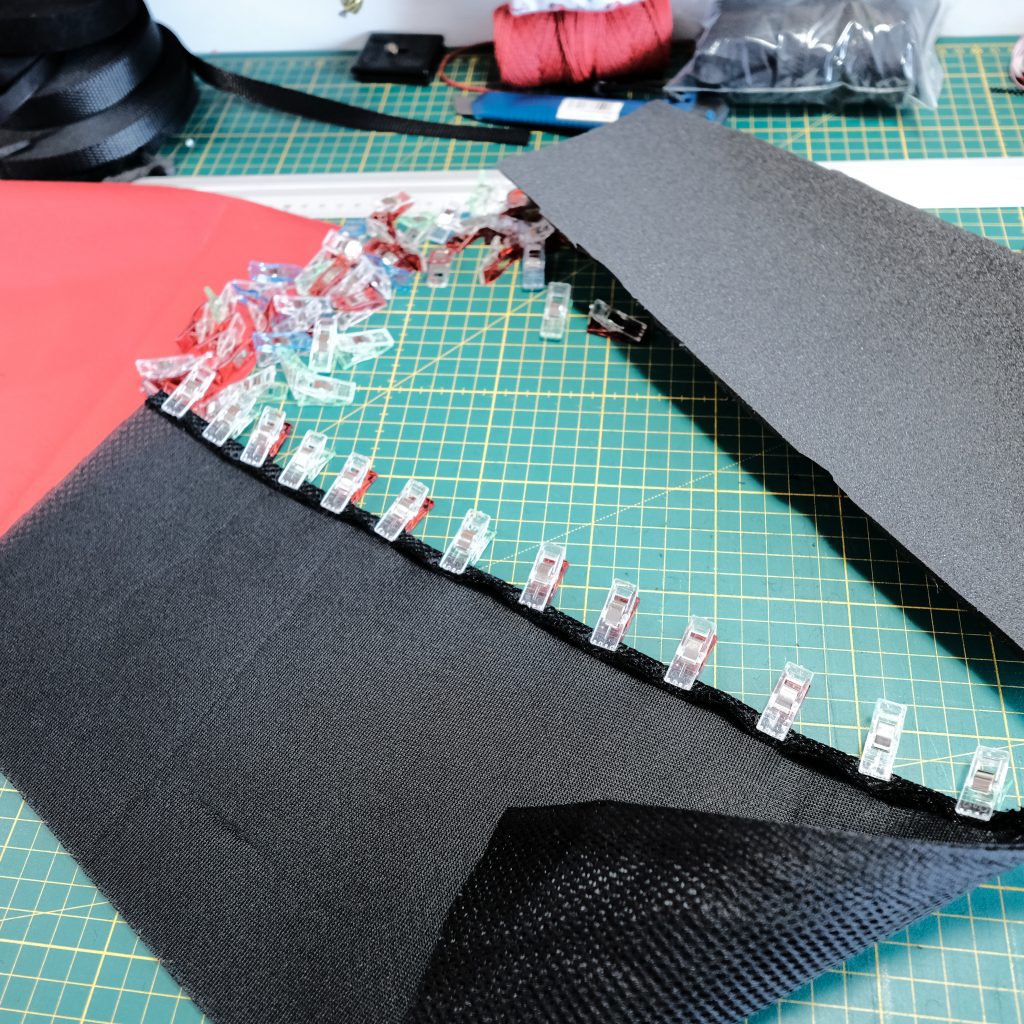
Whether you need to hold a piece of webbing in place, or just dry-assemble a couple of panels together to get a sense of the look and feel of your creation before stitching every into its final position, you will need small plastic clips. I have more than 100 of these, and I have ran out of clips more than once.
You don’t need anything too big, and clips 2 to 3 cm long are in my opinion the best compromise between strength and ease of use.
This post contains Amazon affiliate links. I receive a small commission if you use these links to purchase something at no additional cost to you. Thank you for the support!
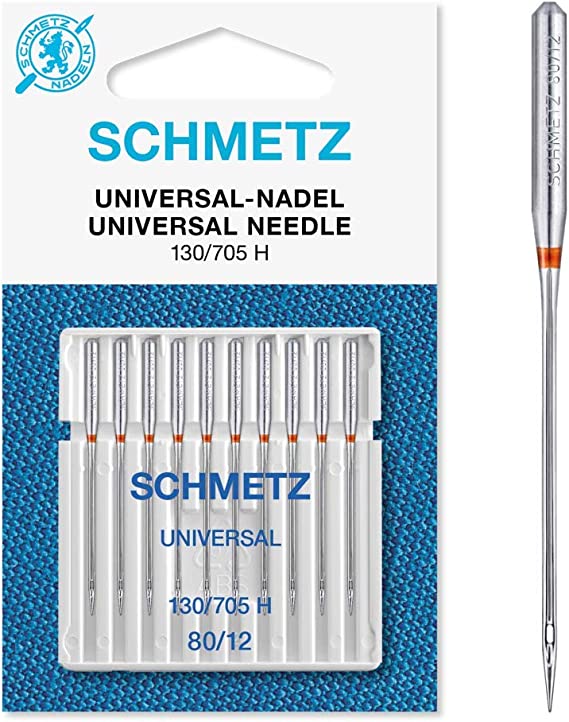
If you are starting, the choice of needles is probably overwhelming at the beginning. The choice of needle should be based on the type of fabric and the thread you plan on using. I use a high quality polyester thread made in germany (Alterfil S100) and I mostly alternate between universal 80/12 and universal 100/16 needles from Schmetz. I only stock up on these which makes having enough spares for a project a certainty. You will need more 80s than 100s since they bend and/or break more easily.
If you only want to order a few needles to start with and find what’s working for you, an assorted needle set is always a good option so you get to build up your own experience but you will probably will end up with two or three sizes that will really work for you and for your work.
This post contains Amazon affiliate links. I receive a small commission if you use these links to purchase something at no additional cost to you. Thank you for the support!
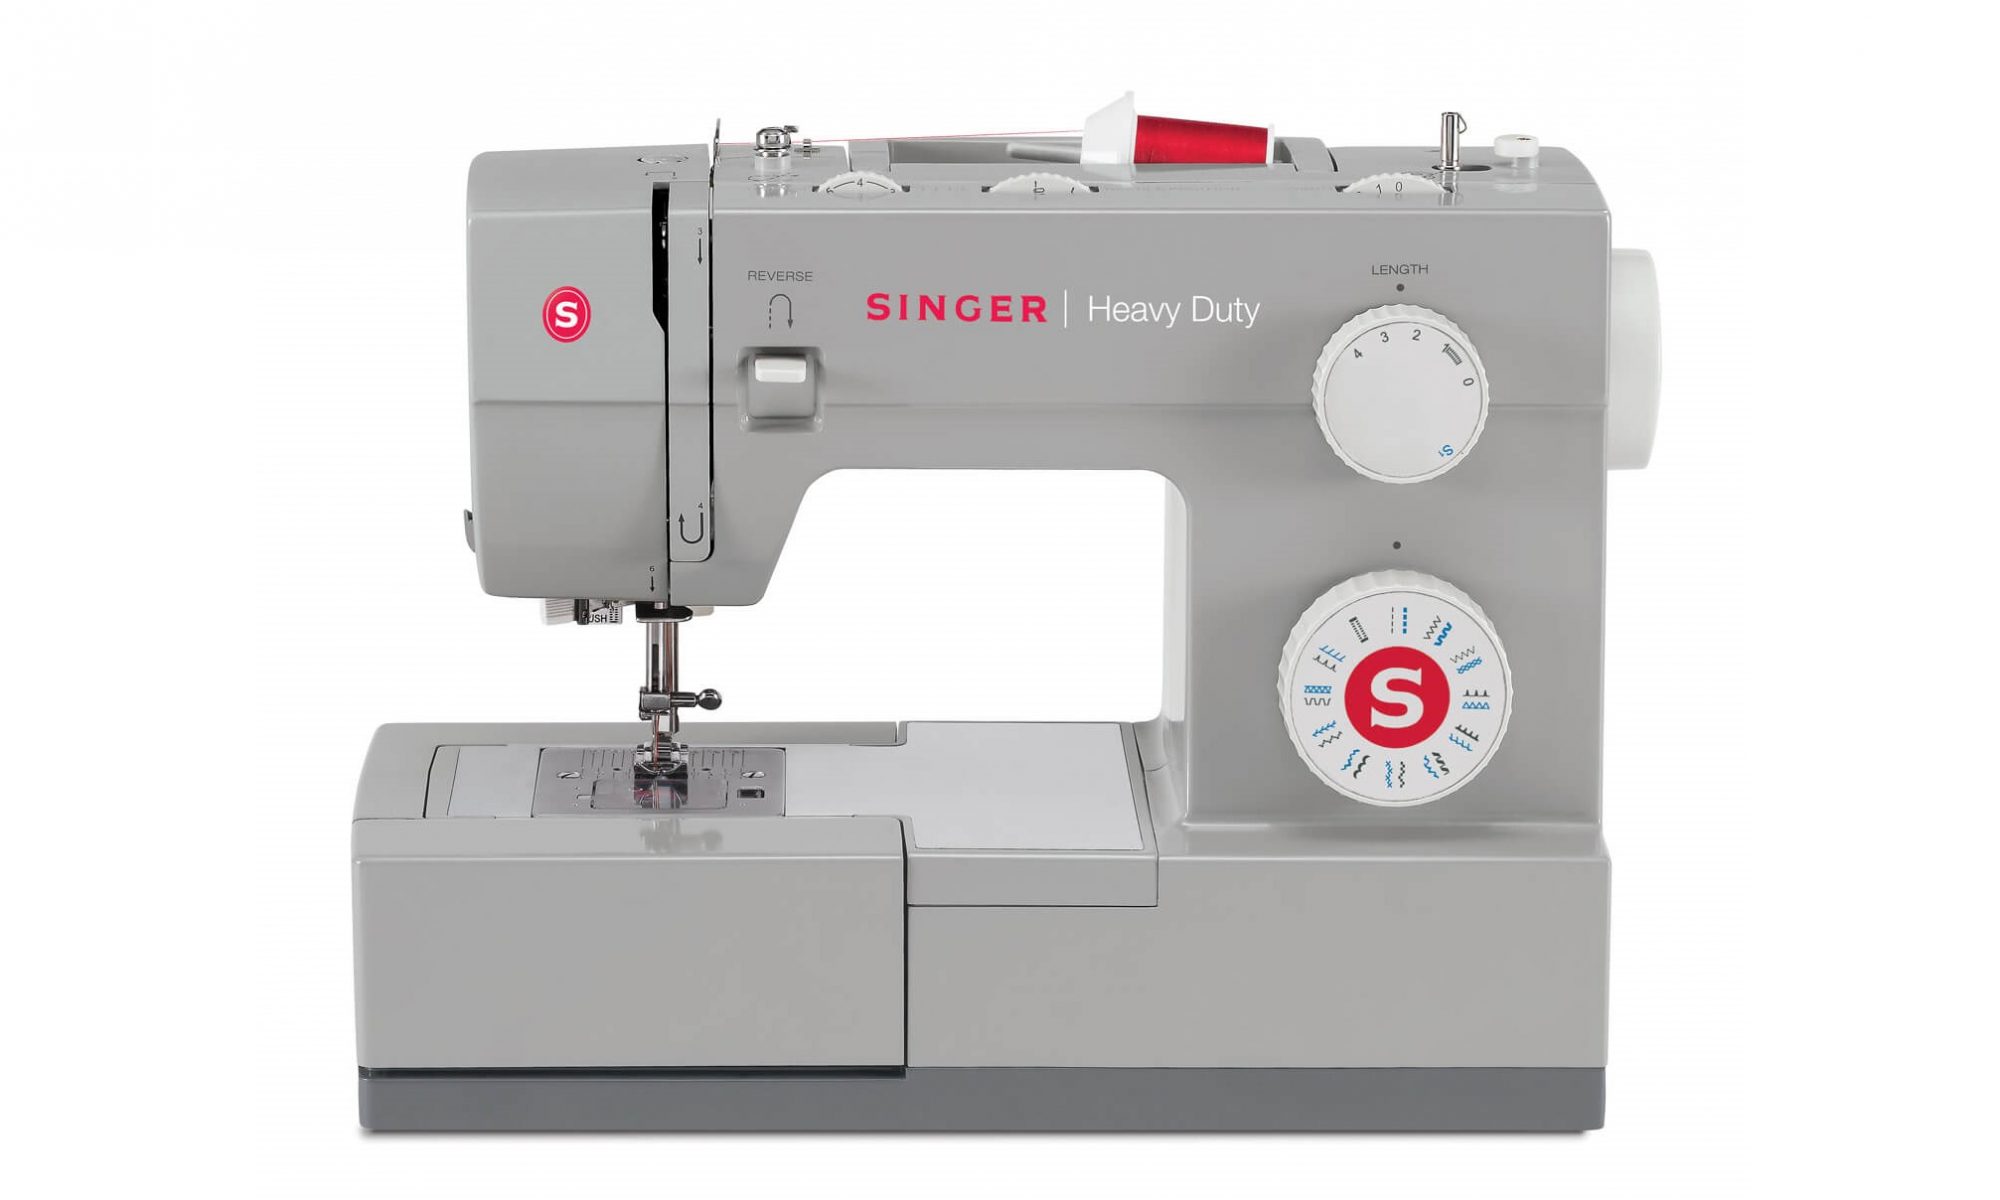
I would absolutely recommend the Singer 4423 if you are serious about learning the craft but you are looking for a small new machine. It’s other siblings simply offer more stitch types, none of which I would ever use for what I make. Simpler is better when it comes to fine machines.
I find it to be a good machine overall for its price, and it will get you a long way. It is my second brand-new machine which I bought in April 2019 and I still have it and use it regularly today. It can sew through a few layers of medium weight fabrics with ease. The feed is decent, and grabs well on medium and heavy fabrics alike. The feed dogs might be a tad too aggressive for very fine fabrics like 30D Nylon fabrics found in kites for example.
This machine has plastic gears inside, so might not be the most durable machine for heavy-duty work despite the name as the gears might get worn out over time, but so far mine is in great condition 3 and a half years later and rarely skips a beat.
One of my favourite features on this machine is the clear top-loading quick-swap bobbin window which allows you to always see the amount of threads remaining in the lower bobbin, and replace it in a heartbeat.
Maintenance is relatively easy and I had to reset the needle/bobbin timing a few times already (about once a year). Oiling the machine is really simple and quick, and I use fine machinery oil to keep the cogs, shafts, and bearings movings smoothly (100ml will last you forever).
Additionally, the fact that this particular sewing machine is well documented both from Singer itself and from other sources like Youtube makes it a great platform to learn on.
When it comes down to ultralight packs, the number #1 feature for me is volume to weight ratio. Unfortunately, while weighing a pack is easy, measuring volume is not so simple, so sometimes an estimate just has to be good enough.
Generally speaking, the backpacking industry tends to over estimate (or over advertise) pack volume which makes it relatively difficult to settle on a method that my audience can visualize. For ABC packs, I am following three simple rules to estimate their volumes.
Estimate the main compartment's volume as if it was a cylinder.
Do not account for pockets (even cargo pockets).
All measurements performed on a closed pack in the optimal position.
I will break down the math for you but it really is a simple process. Before I get the tape measure, I fill the bag with some pillow or cushions to give it a realistic volume and look. if you have only sleeping bags, even better. After that, I only need to measure the following two dimensions.
Height from bottom panel to the lowest part of the closed pack.
Circumference of the closed pack at mid-height.
Now let’s say the pack is a simple brick design, then the “circumference” is just the added width of the front, back and side panels after they were stitched together. It is a relatively crude approach, but it reflects the reality of how a pack deforms and sometimes stretches when full. So let’s do some simple math.
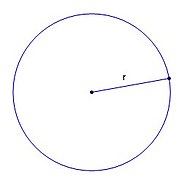
A circle and tis radius
The circumference of a circle is given by the following formula based on the radius r:
Circumference [cm] = 2 × π × Radius [cm]
Now if you take the standard formula giving the volume of a cylinder, it basically says that the volume is the product of the surface area of the base circle and its height and some contants.
A cylinder, its radius and its height
In other words, given that h is the height and r the radius:
Volume [cm³] = π × Radius [cm] ² × Height [cm]
If I now take the formula of the circumference and extracts the radius from it, I can inject the radius into the volume formula.
That’s it, that’s all you need! In the metric system, I would use centimeters for all my measurements, so I end up with a volume in cubic centimeters [cm³]. To convert this to liters:
Volume [L] = Volume [cm³] ÷ 1000
Et voilà, you now have a rough estimate of how much gear you can stuff in a bag. It’s not accurate since it is measuring a squarish form as a cylinder and making a lot of assumptions, but when packed to the brim, you can expect to be able to fit at least that volume in the pack. Note that in general a roll-top can also compensates for calculation errors, other closure types might not be so forgiving.
Afterword
But how does that help you if you are not making a pack but buying a custom pack from a maker? Well just send them this page and ask for them to measure their packs this way, then take this measurement and compare it to your measurements of the bags you already have. That way, you have one simple system. The exact volume does not matter, what matters is that you know what theoretical volume you use for different activities. Over time, you will develop a sense of what you need for a winter day hike, or a week long solo camping trip above the arctic circle in full autonomy.
Why would the exact volume not matter? Well, we all pack differently, and have different gear. Some gear compresses well, some gear creates empty space that cannot be filled, some gear needs to be inside the bag, while other gear just hangs on the outside… It mostly boils down to you and how you achieve your outdoor goals. The volume is an indicator of what that particular pack will hold “for you” in a particular configuration. The features you would request with that pack are what matters most after the volume of the main compartment. And that same volume of pack for two different configuration might not both do what you need.
I’ve been thinking about making a specialised alpine pack for a long time now. There are a couple of considerations to take such as weight, abrasion resistance, equipment attachment points and all without impeding the wearer’s freedom of arm movements.
I’ll cover the reasoning and building process in more details in some future posts, but to achieve a decent ratio of weight to material strength, I selected a tough woven UHMWPE fabric (ultra high molecular weight polyethylene more popular name is Dyneema). These woven fabrics are extremely resistant to wear and tear. In the end, I settled for a relatively new fabric from Challenge Sailcloth called Ecopak Ultra EPL 400. The future will tell if this was the right choice, but after working with it, I like it a lot.
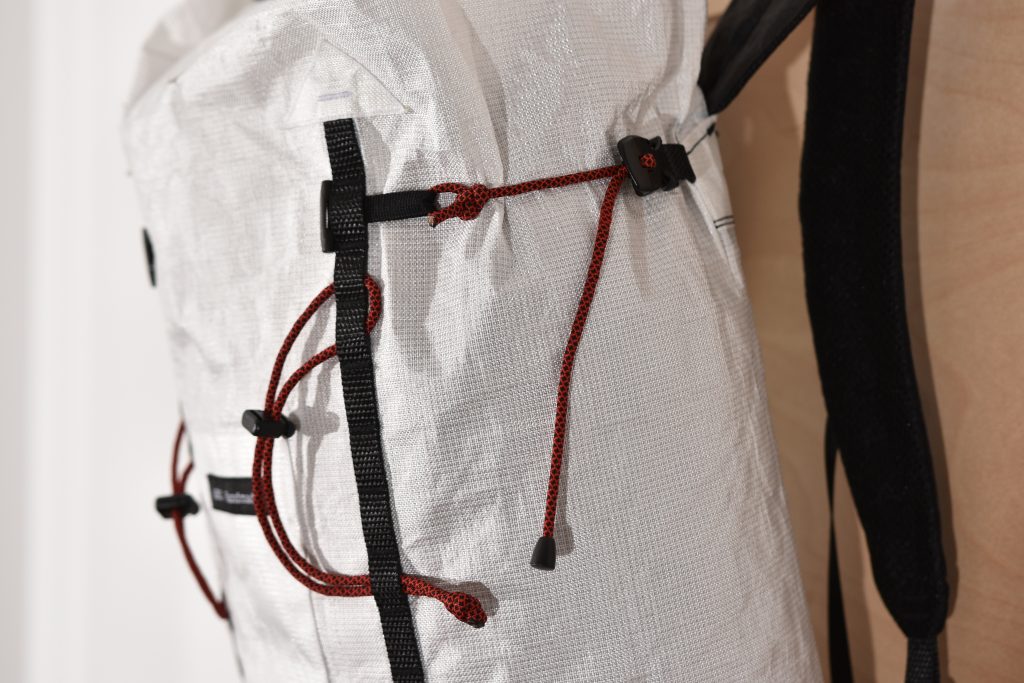
Since Alpine packs get more abuse than most bag – if you ever had to haul a pack up a wall, you know – I wanted to be able to remove most of the straps and cords in a pinch to replace them, or to be able to prevent snagging in more difficult conditions. I also reinforced the most exposed parts to prevent critical failures during an expedition.
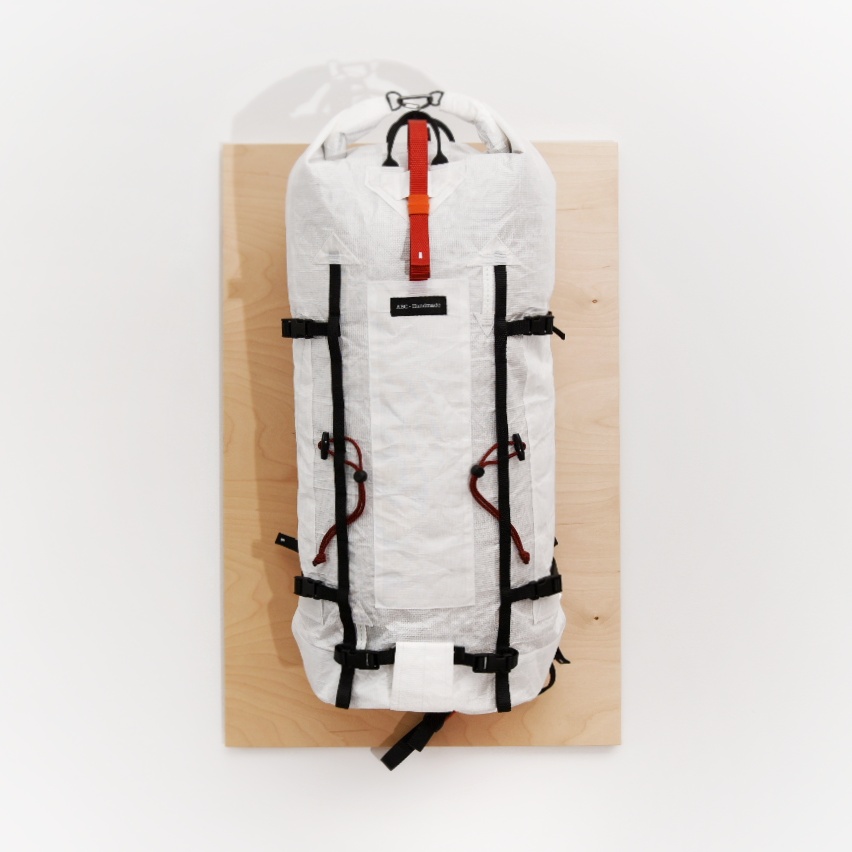
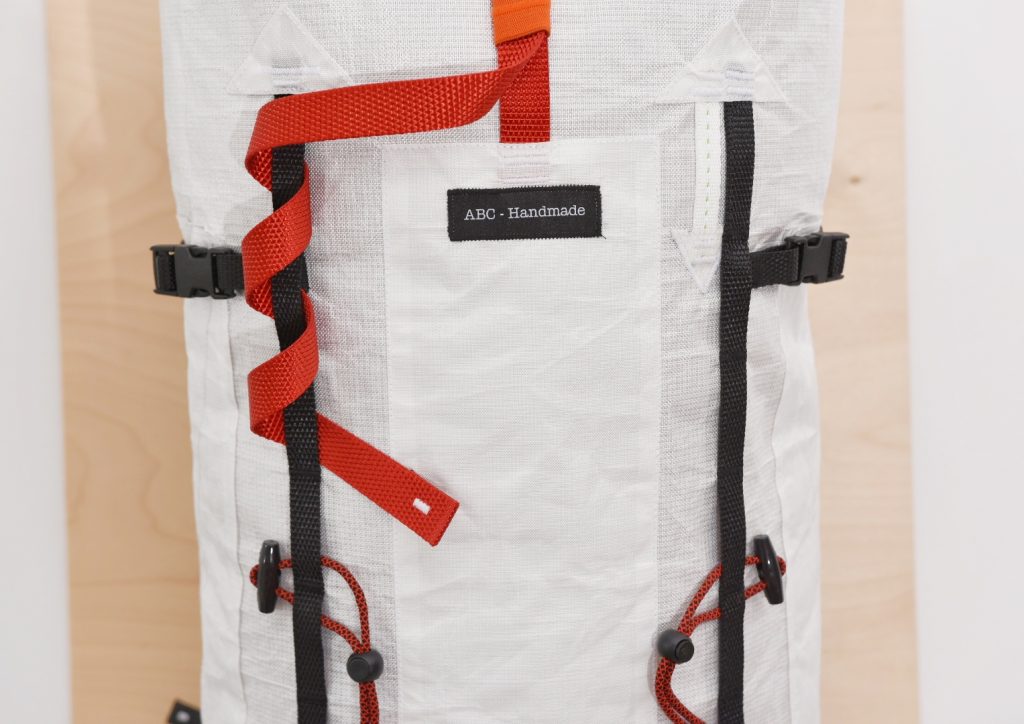
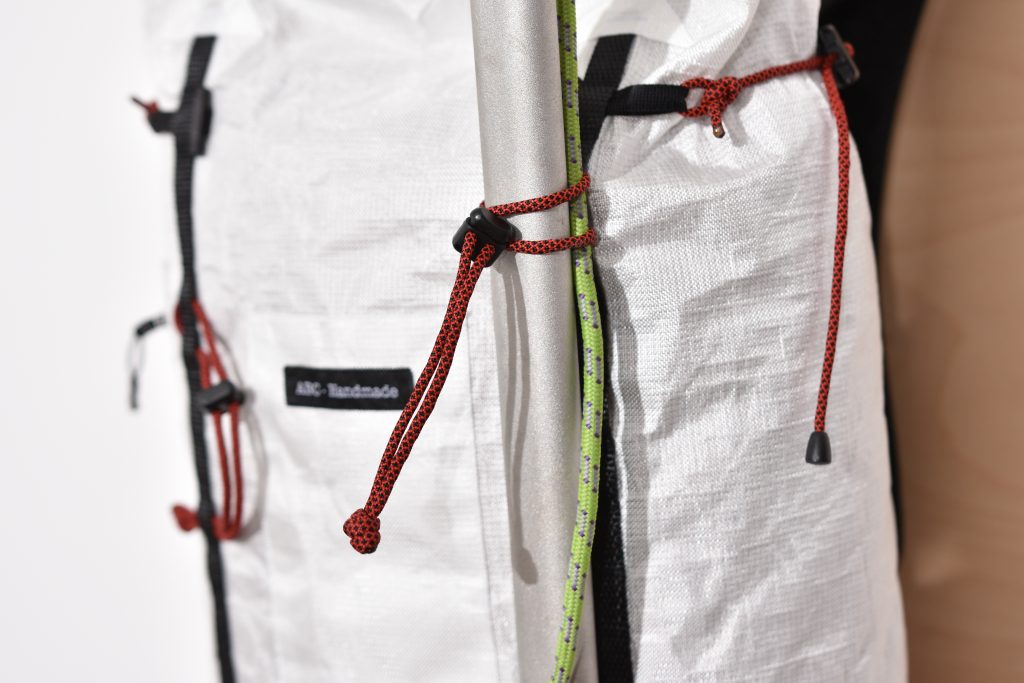
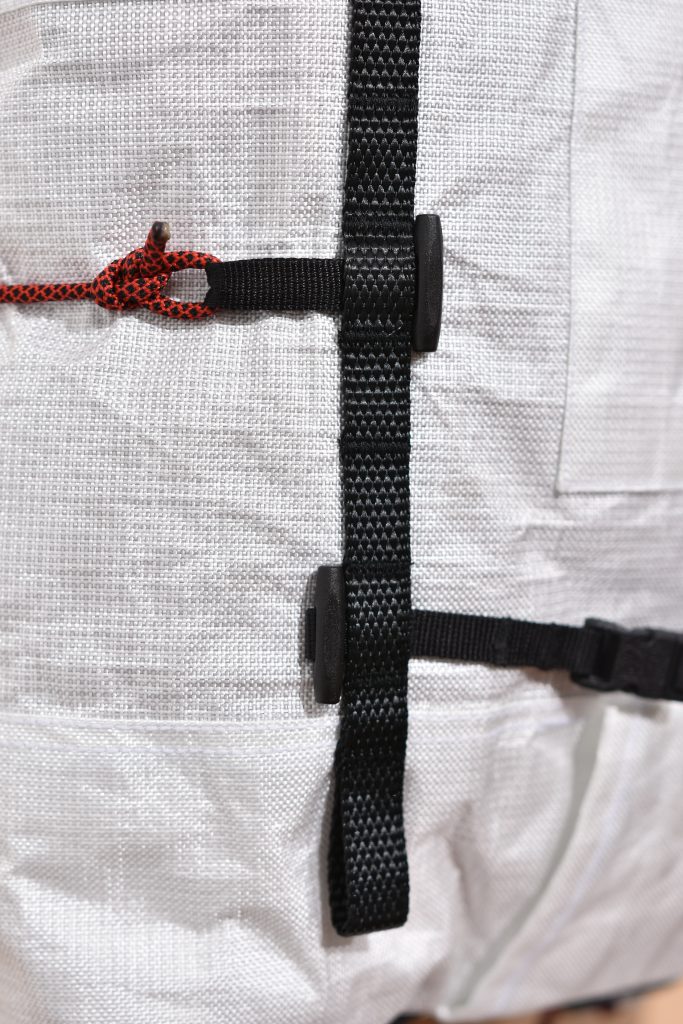
In order for the compression straps and ice-axe attachment to be replaceable and removable, I decided to use the daisy chains as the main static feature. Each of the removable element ties into them using T-bars. In the end, this also allows me to rearrange the attachments if I need a different configuration or longer compression cords for some reason.
In order for this to work though, the daisy chain spacing for each “loop” must be relatively small (about 22mm) which would potentially make it difficult to attach climbing equipment directly to it. Since this was not my primary concern, I went ahead with that design. You’d be surprised how much every detail counts in a design like this.
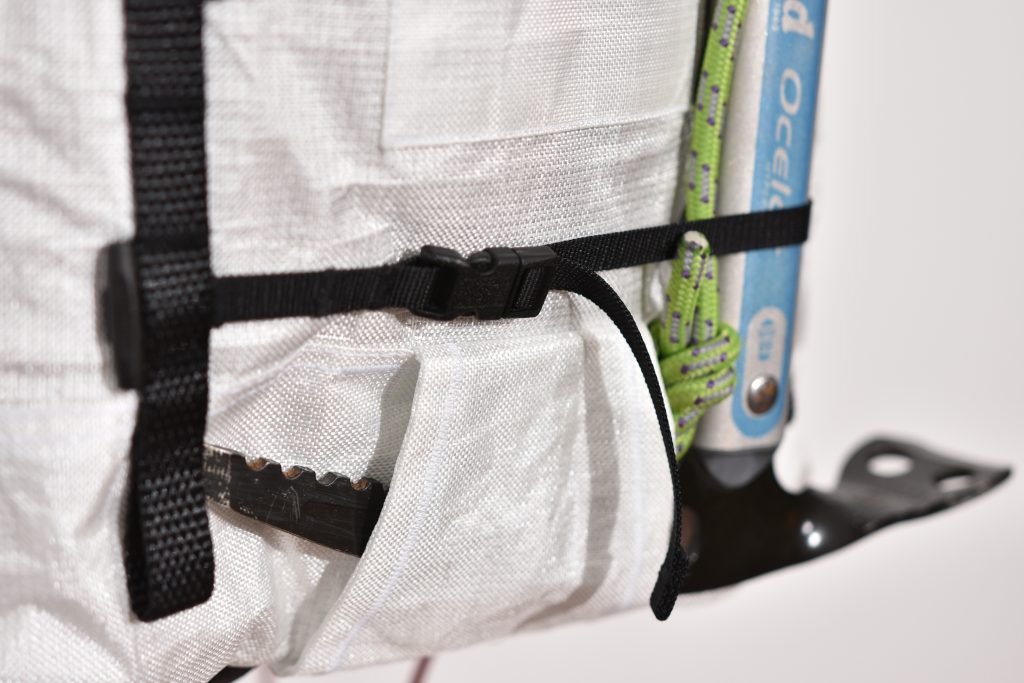
The side compression straps themselves do have a fixed point (non-removable part) where the quick-release LineLoc ties into the bag. But beyond that, the cord and the T-bar can be removed in a pinch.
On most bags, I do like to have one small quick-access pocket where I can store papers, energy bars, keys and so on. Since I still wanted to avoid any potentially snagging, I went for a very low profile design with a zipper closure. It will not hold much, but it will do the job and not protrude from the bag.
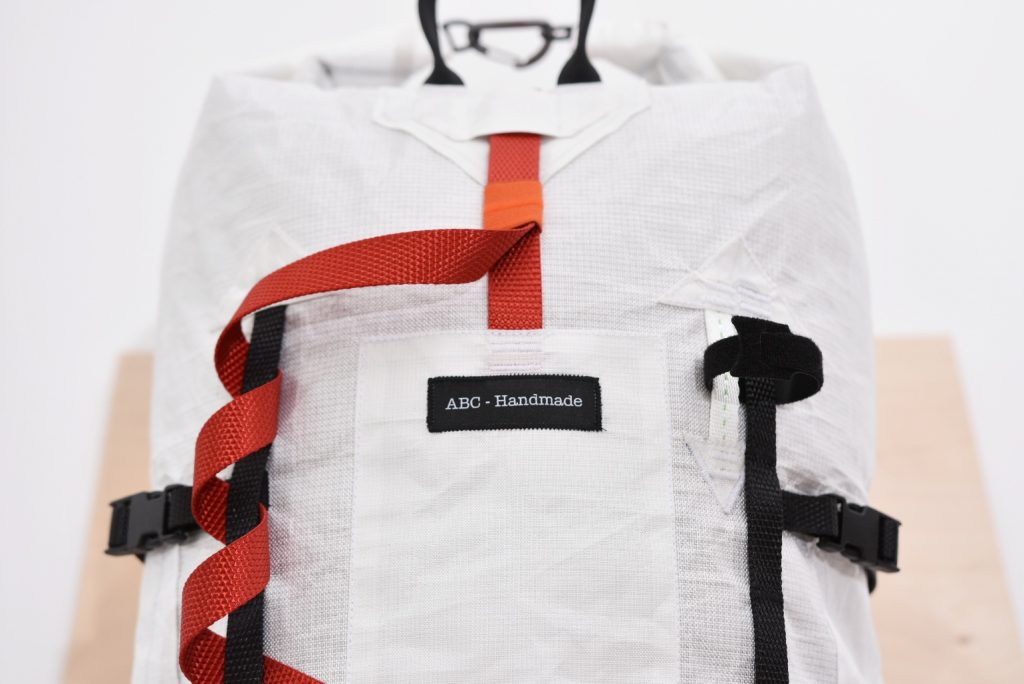
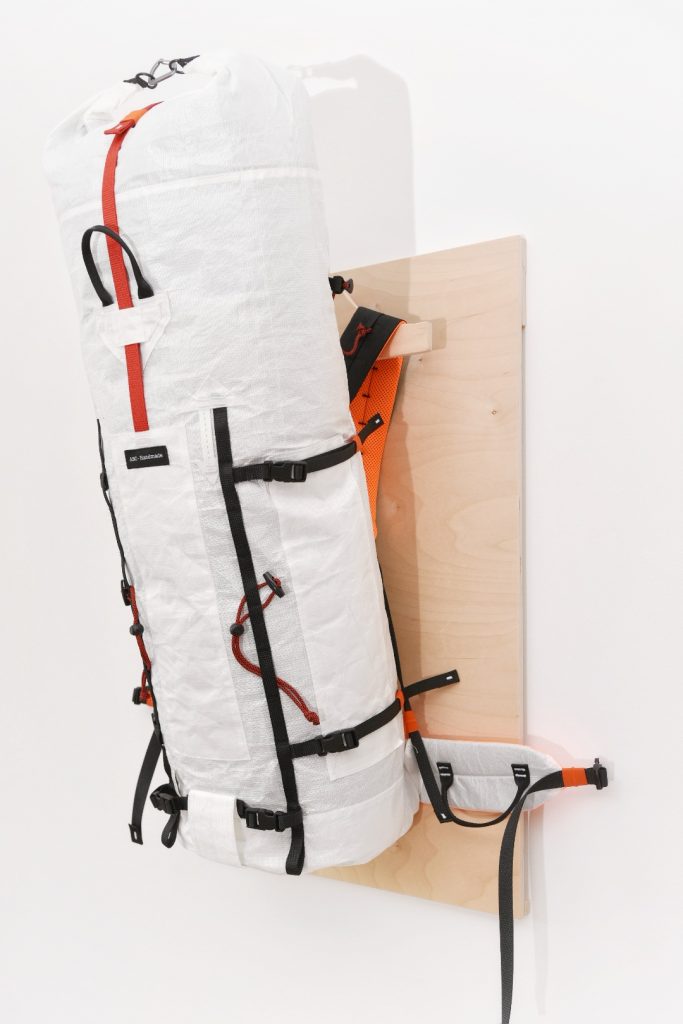
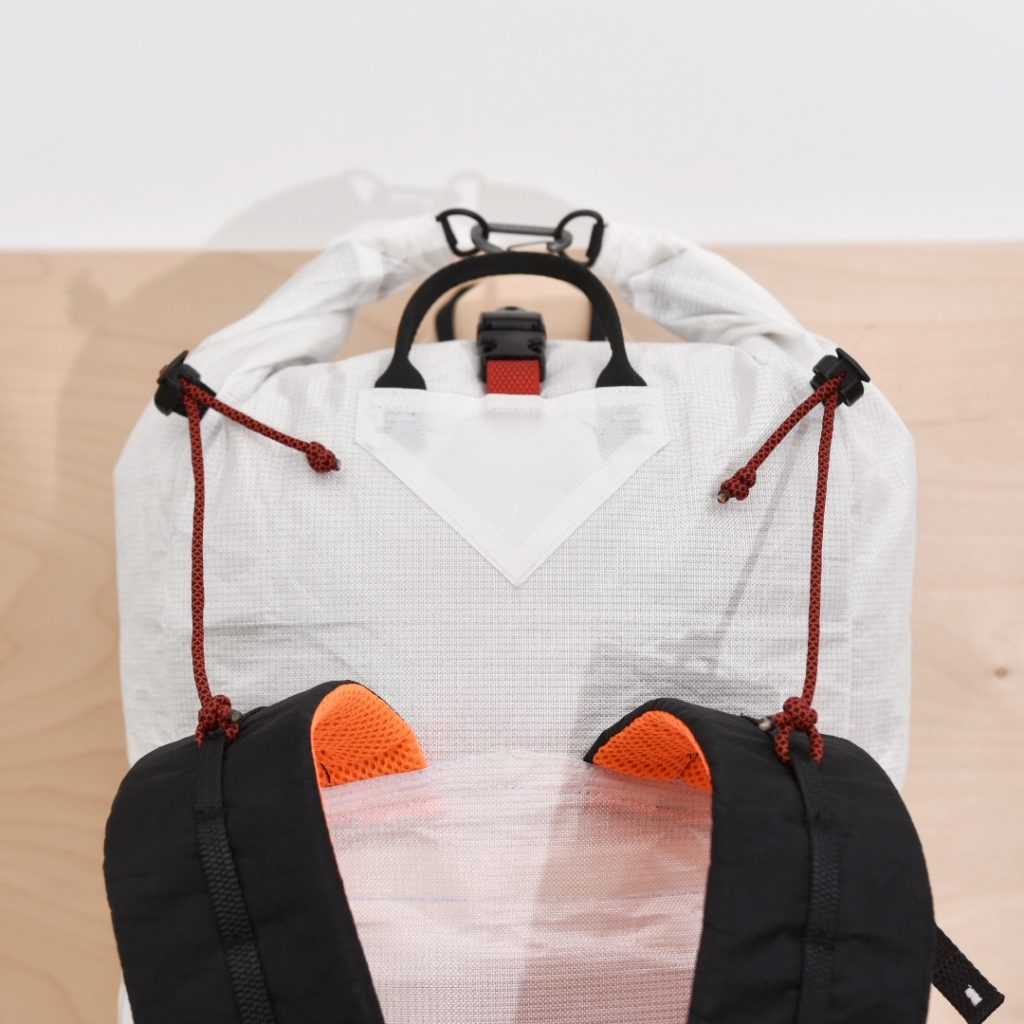
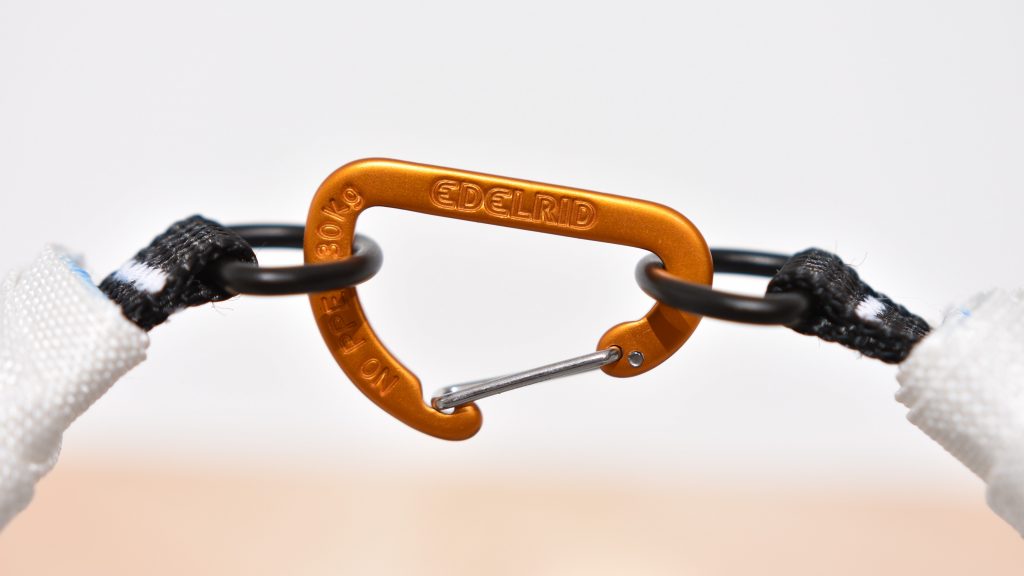
As we were talking about hauling earlier, I was debating options for a while. I always build strong roll-tops so I can carry my bags grabbing the loop they form. I use small high-end carabiners that can take up to 30kg of load and always use metal D-rings instead of the usual Nylon to make sure this won’t fail over time. I decided that would make a poor rope attachment point for hauling since the D-Rings are too small for a climbing carabiner and you could reach 30kg of pulling force on a bad day’s haul.
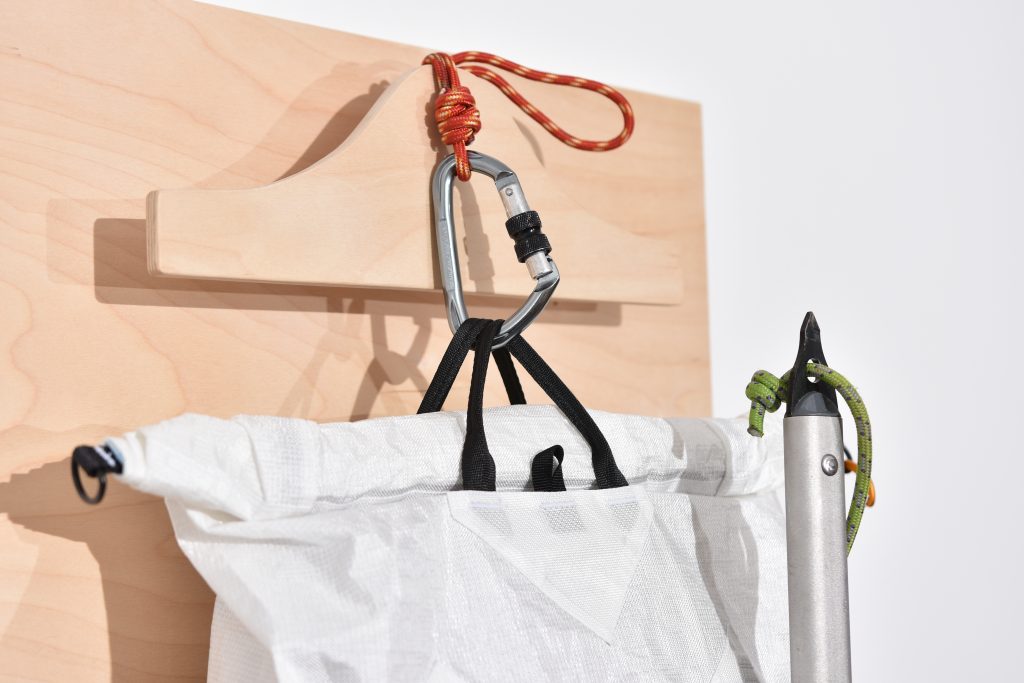
Instead, I went for a handle style carrying attachment that would fit the needs for hauling quite well and double as a handles if you prefer a straight roll-top rather than dry-bag style closure. Since I wanted the bag to stay levelled and haul straight, I decided to add symmetrical attachments so that the pack would be balanced. Each handle was tacked well and should be handling loads in the 20kg range without any problem.
I would not expect the pack to be filled to the brim for a haul, but if it is, this design will not be ideal if the roll-top stands higher that the handles. In this case, one should haul with only one handle and hope for the best.
The last feature worth mentioning is probably the ice-axe attachment although there really isn’t much to talk about. It is a very simple design, tried and true. It can support a single axe or a hybrid setup (2 smaller axes). To secure the lower part of the axe, a simple webbing and quick release is tried between the two daisy chains. This strap can be lowered or raised depending on the axe configuration, but there is probably no need for this. I admit I was a bit worried about the strength of this puny little quick release that fits a 10mm webbing. After fiddling with it for hours, I figured it would do the job. It’s anyway easy to replace and upgrade but if anything ever fails on this bag, I assume this would be it.
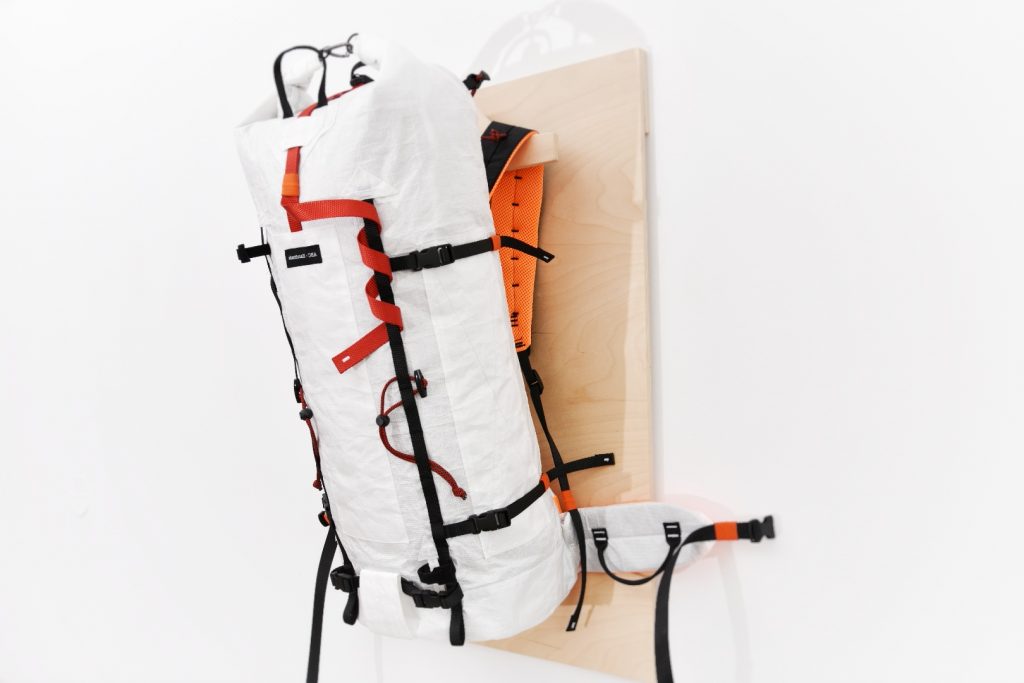
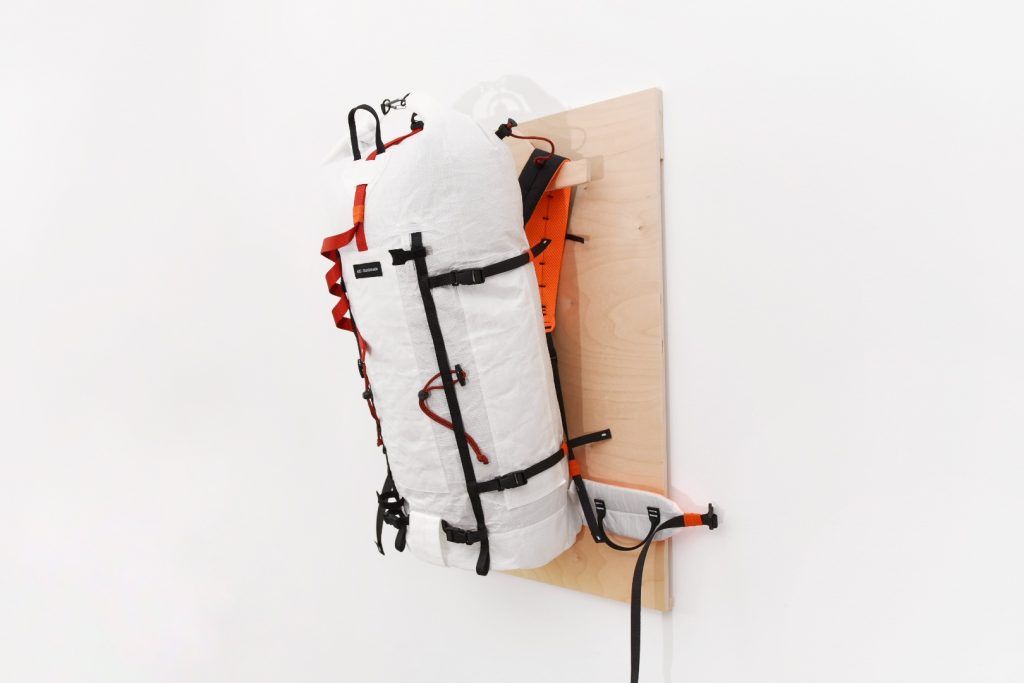
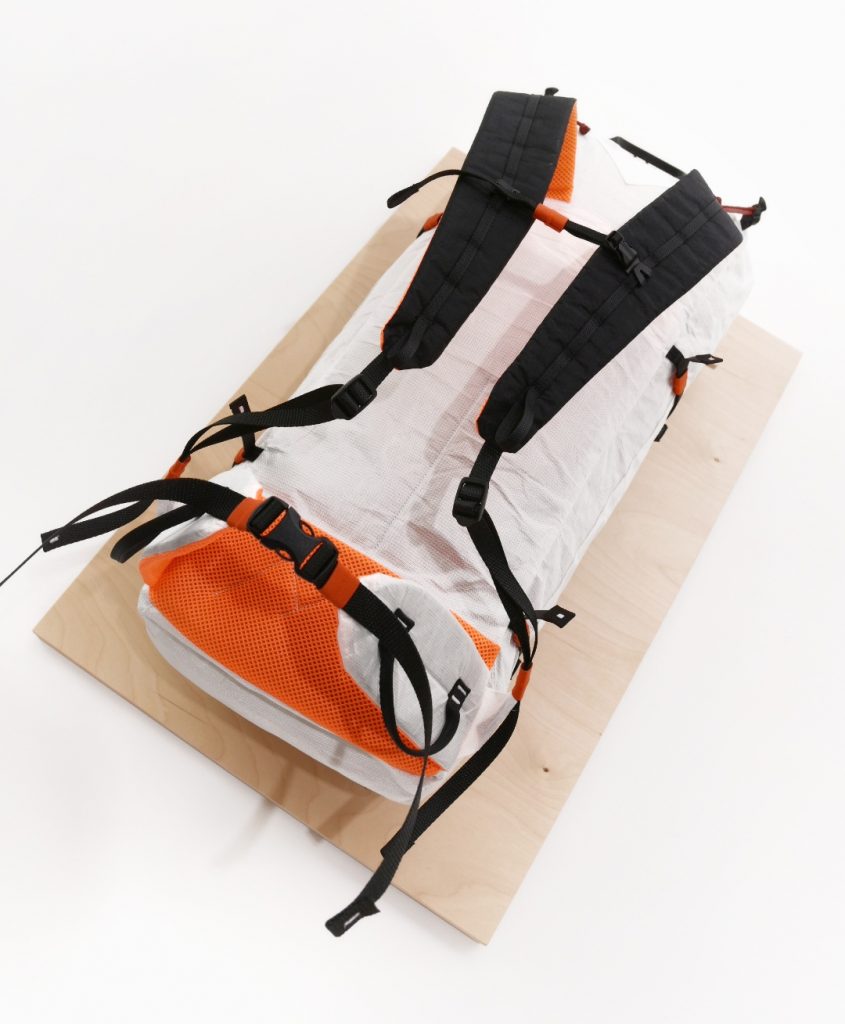
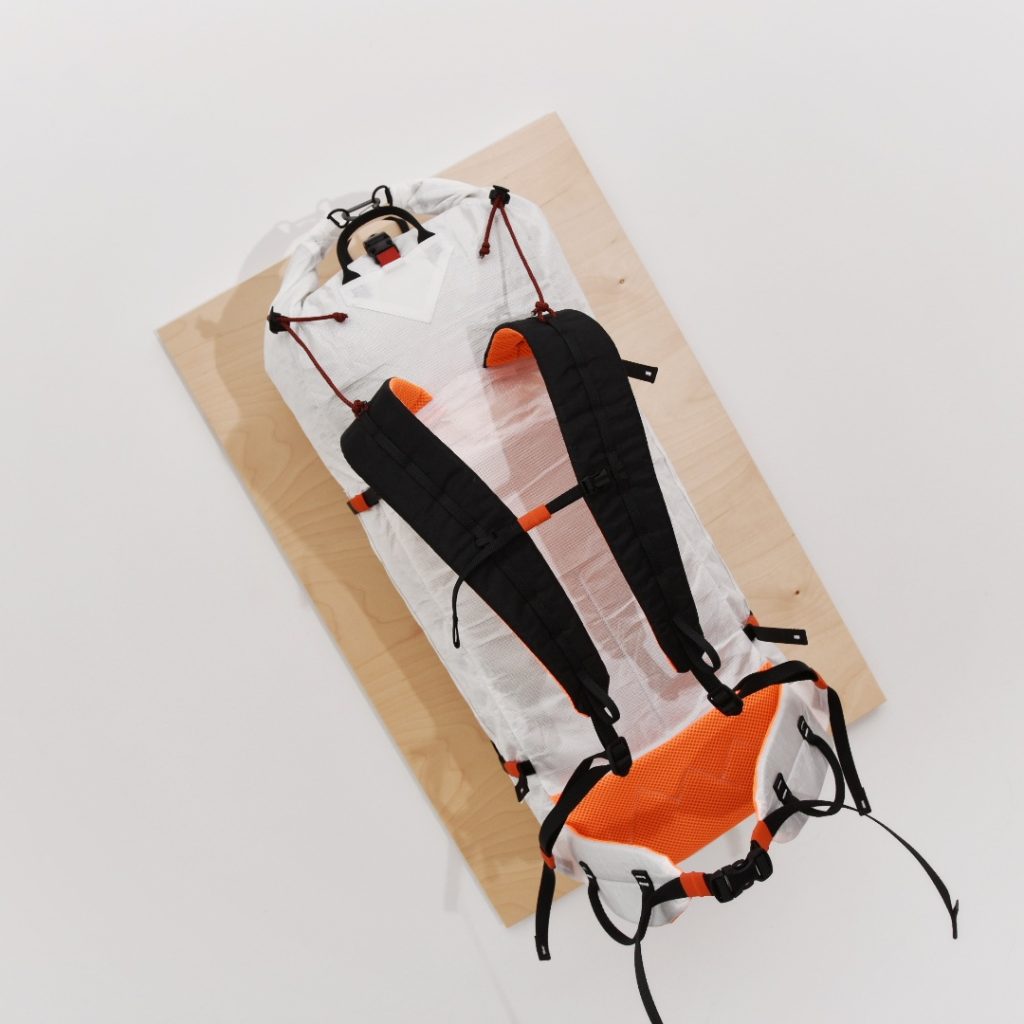
Since we only talked about the front so far, it’s only fair to show you the back. The padding is minimalist, with some 3D mesh on the lower back, and the shoulder straps are lightweight as well. I rarely use foam in ultralight shoulder straps, but it also limits the maximum load that one can comfortably carry. Everyone is different, but for me these stay comfy up to about 7kg.
And the best part is, it only weights in at 410 grams. Ok, now enough with the talking, let me just dump a boatload of pictures! Stay tuned for more detailed discussion about this bag!
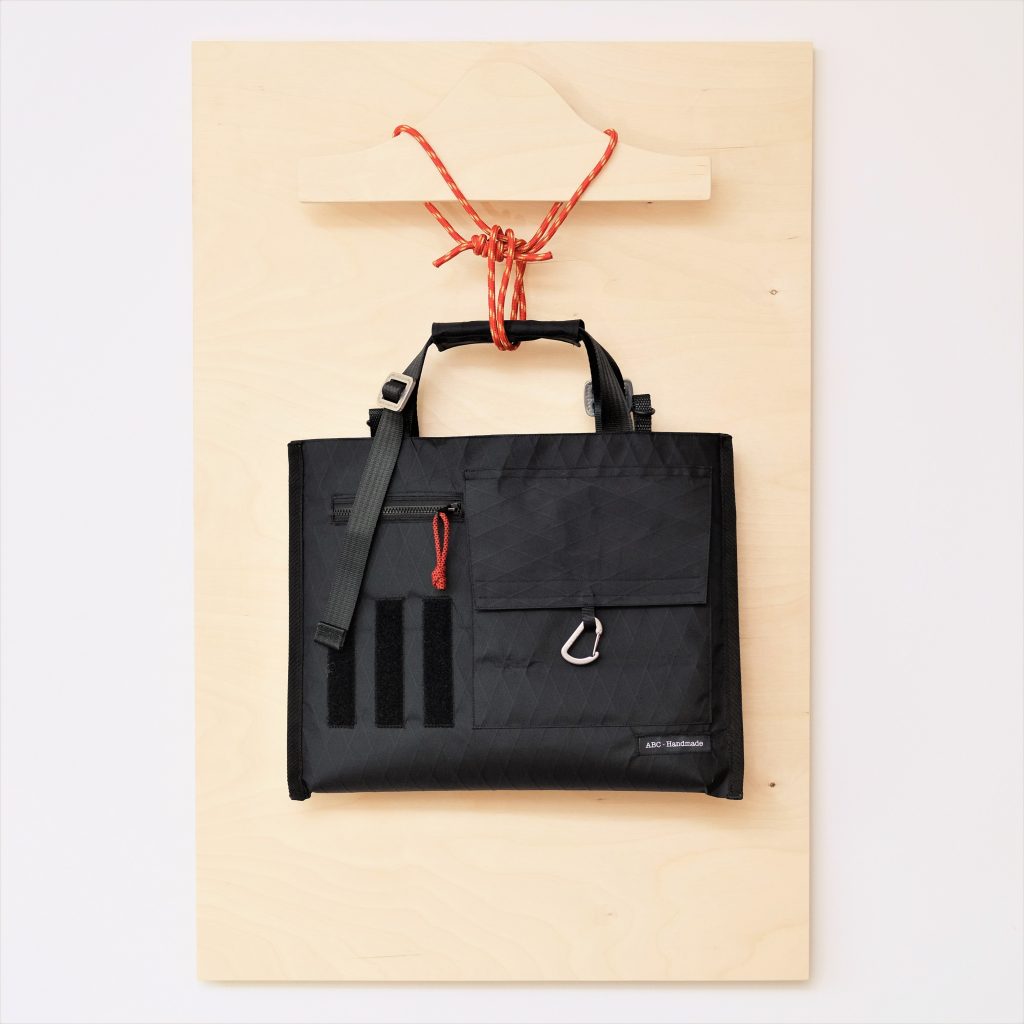
If – like me – you are staying at home in these uncertain times, keeping busy is a necessity and healthy practice. Since I am looking for some practice project and I need a new laptop bag, I figured I’d put 2 and 2 together and make just that.
I have a 13in laptop, so I went for the smallest laptop bag I can fit it in. What do you think?