Time for a Custom Christmas Pack

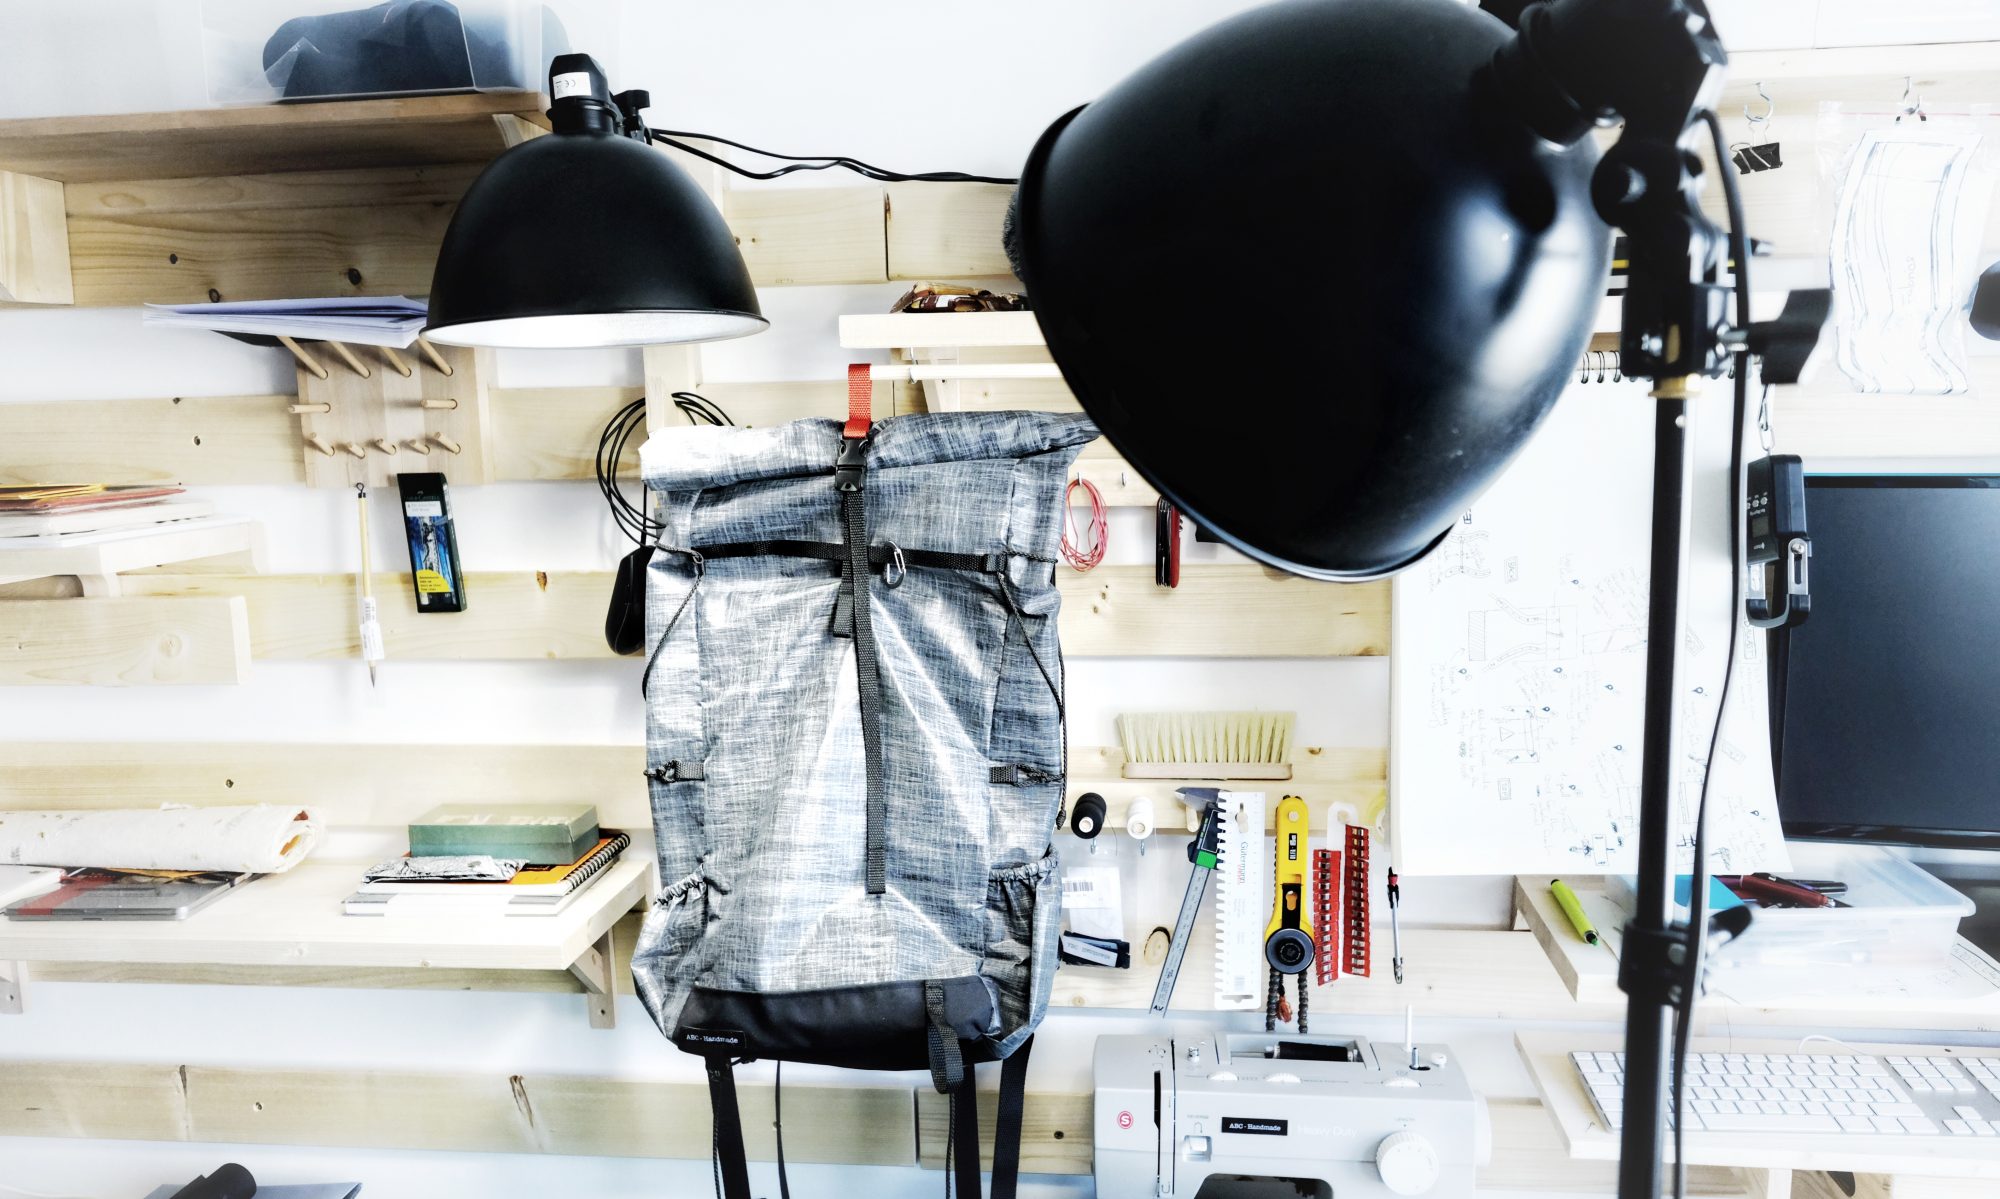
Although I’ve had limited time to work on new designs in the last months, I still had one goal for Christmas! Make Santa’s carrying sack . So I got my hand on some bright red X-Pac VX-21 which I knew was going to do the trick, and had some white VX-07 on hand for the smaller details!

Red and White is the only choice.

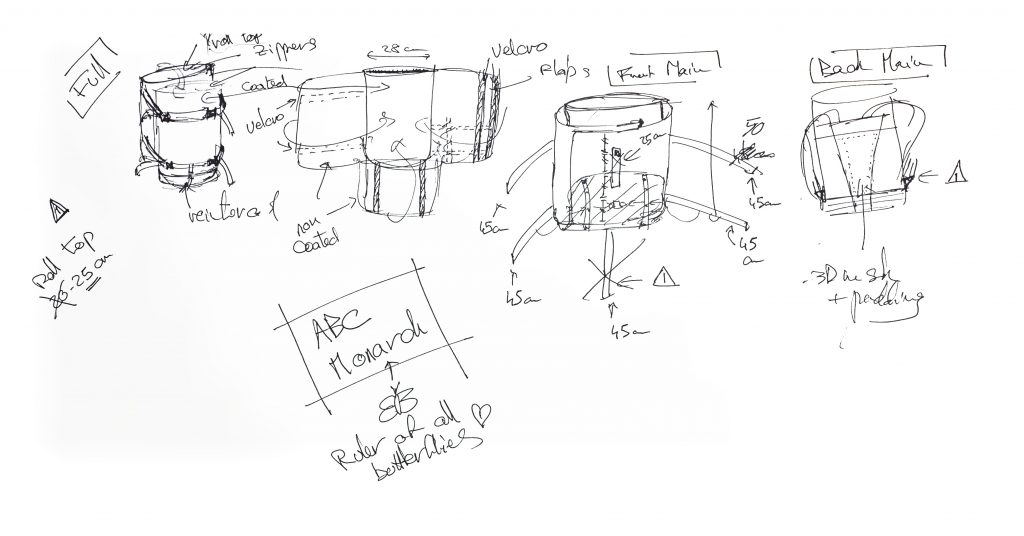
The first step to designing a new pack is – for me – always about sketching a few ideas on a piece of paper to get a feel of what I could do and whether or not I will achieve what I set out to do. I started out with the shape and curves of the Skinny, but wanted to get more volume out of it, so I bumped the dimensions a bit and especially worked on extending the roll-top. I was hoping I could bring in different features that would make this pack first and foremost a day-pack, but also make sure this would still be a suitable choice for a hike. So I considered a bunch of options such as a cargo pocket, daisy chains for attachments, lightweight but decent back padding, among other things. I drew a few options and quickly settled on one look. You’ll see it when I post the project pictures.

Sometimes, sketches are just a 5min decision medium.

Note – Keep in mind that the dimensions written here are just bread crumbs I left myself before even starting, and I more often than not readjust them while cutting things out. So don’t take these too seriously.

Stay tuned!

Backpack Design 101: You’ve got to start

I must have been spending hours on the concept itself, and just mentally iterating through constructions and ideas, starting from a burrito shape, to ultra complicated constructions, until I finally landed on a appealing concept. After that, I easily spent 20 hours building the pack itself. But between the build idea, and the first cuts, there really wasn’t time at all.

That the last scribbles I made before jumping right in.

You’ve guessed it, I worked slow to avoid mistakes because I was still improvising quite a bit. I sketched a few different drawings and highlighted the details I wanted to add, then marked all the small things that are easily missed, and I got cracking almost immediately. If you look closer at the sketches above, the idea I started with was to have a third compartment that would have been strapped atop the flaps, securing the secondary compartment, creating essentially a sandwich pack. As you can see with the finished pack, I quickly dismissed that idea.

This workflow is somewhat an evolution to my normal process. I usually spend a lot of time sketching and doodling and measuring and thinking, before starting to work fast. But I definitely recommend the exercise every so often! It’s a good way to test your spatial acuity and your building habits.

On a side note, this is the second backpack I build with unpadded shoulder straps, the first one was also a spur of the moment thing. I was just tired of struggling while trying to slide the foam inside the straps, and decided to give that a try instead. I’m quite happy with the comfort the 3D mesh provides for small to medium loads (up to 6kg) and I’ll probably stick to this construction for a while. But sometimes, an idea will make things worse, just keep that in mind!

The shoulder straps are just made of 3D mesh (3mm) and a top layer out of Cordura.

The Skinny Pack’s Pattern

You might be wandering what the “buffers” are for. I added them to the pattern so that even with even seam allowance, you should end-up with more fabrics on the tricky parts, which you can then trim later during the pack build.

As always, go slow, and use clips!

If you don’t have a printer to print patterns, that’s fine. I don’t have one. Instead, I take some thin Tyvek, and I draw the patterns by hand. Why Tyvek? It very durable, so I have a pattern I can abuse, clip, tape, and reuse for ever.