Let’s use some Cotton Canvas for once

So after spending the last years building packs with mostly mid to high-end technical fabrics, I figured I should try something else. Plus, I’ve received so many requests for creating and selling less-technical packs – mostly city day packs or business packs – that I figured I should give that a try. If that’s a success, the next step would be finding nice printed cotton fabrics to make more of these. Ethically sourced would be great, but it’s hard to find in such low quantities!

So I settled for some cheap heavy-duty 100% cotton canvas, usually used for outdoor tents (garden variety tents) weighing at 350g/sqm. We’re far from the ultralight category, but that’s the whole point.

A few custom designs in the same vain.

Working with this super inexpensive cotton canvas is fantastic for prototyping on the cheap. I really like the feel of the end product, and I haven’t even spent much efforts making it look nice. The third attempt is by far the nicest finish as it is fully lined with the same canvas as the outside, and a dedicate 13″ laptop ‘pocket’.

And the third attempt looks decent.

One of my goals was using the absolute minimum count of raw materials, that is, find as much use for a single material as possible, so that these are easy to source, and cheaper to order because of the ‘higher’ volume. So I use the same canvas for making a bunch of the straps, lining, pockets, loops etc… I did use a nicer 30 mm cotton webbing for the satchels’ straps because I liked it, but I could use the canvas for that as well, like I did for the day pack. Apart from that, some metal D-rings and some fancier aluminum buckles which could be simple D-rings if need be.

One huge take-away from using a woven canvas is how much it frays compared to coated canvas or laminated fabrics. So much so that, so far, there would have been no way not to keep the edges bound without hemming them. I’ve used both folded grosgrain ribbon or a more simple blind hem stitch to that end.

On the plus side, building one of these models is a lot less time-consuming, as the complexity is probably half of what I usually build. Last but not least, I found some funny sew-on patches on aliexpress, and I’ll definitely order some of them again when I run out.
Backpack Design 101: You’ve got to start

I must have been spending hours on the concept itself, and just mentally iterating through constructions and ideas, starting from a burrito shape, to ultra complicated constructions, until I finally landed on a appealing concept. After that, I easily spent 20 hours building the pack itself. But between the build idea, and the first cuts, there really wasn’t time at all.

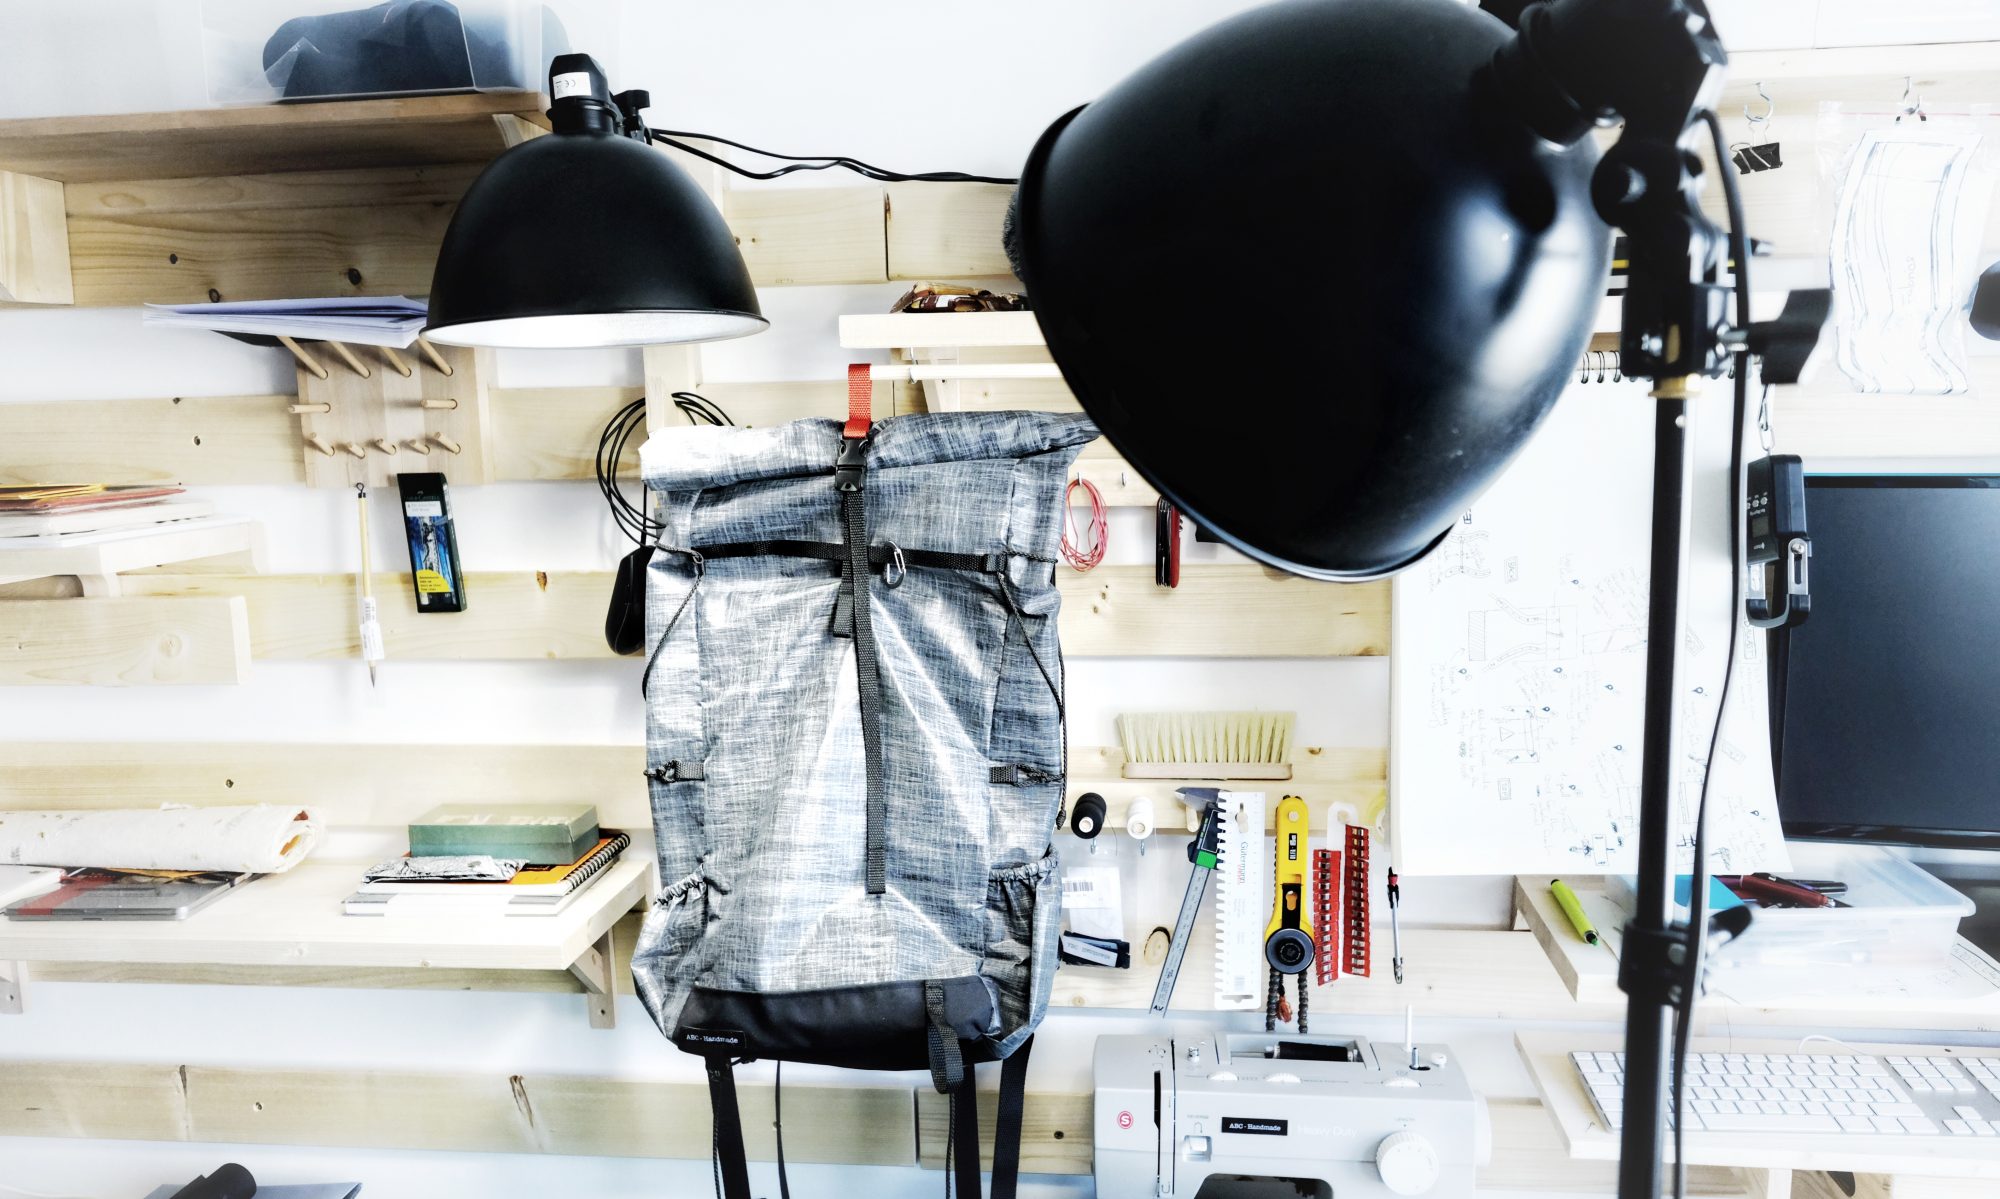
That the last scribbles I made before jumping right in.

You’ve guessed it, I worked slow to avoid mistakes because I was still improvising quite a bit. I sketched a few different drawings and highlighted the details I wanted to add, then marked all the small things that are easily missed, and I got cracking almost immediately. If you look closer at the sketches above, the idea I started with was to have a third compartment that would have been strapped atop the flaps, securing the secondary compartment, creating essentially a sandwich pack. As you can see with the finished pack, I quickly dismissed that idea.

This workflow is somewhat an evolution to my normal process. I usually spend a lot of time sketching and doodling and measuring and thinking, before starting to work fast. But I definitely recommend the exercise every so often! It’s a good way to test your spatial acuity and your building habits.

On a side note, this is the second backpack I build with unpadded shoulder straps, the first one was also a spur of the moment thing. I was just tired of struggling while trying to slide the foam inside the straps, and decided to give that a try instead. I’m quite happy with the comfort the 3D mesh provides for small to medium loads (up to 6kg) and I’ll probably stick to this construction for a while. But sometimes, an idea will make things worse, just keep that in mind!

The shoulder straps are just made of 3D mesh (3mm) and a top layer out of Cordura.

The City Hiker Pack

The City Hiker, as the name says, is build with less outdoor and more city commute in mind. Although using the usual construction techniques of ultralight hiking/trekking packs, this particular pack emphasizes small volume and high comfort with maximum padding of the shoulder straps, and of the back panel with a thick high quality closed cell foam pad (removable).

Aesthetics has a weight cost which should not matter for daily commute, but the whole pack still only weighs in at 410g fully padded. Which makes it a great companion for a day hike as well. This packs also improves ventilation with vertical 3D mesh embedded in the back panel (instead of only on the hip belt like most ultralight packs).

Here are some more pictures of the finished pack. I apologize for the low quality pictures, I ran out of time to document the pack before gifting it.