The Ultimate Alpine Ski-touring Pack

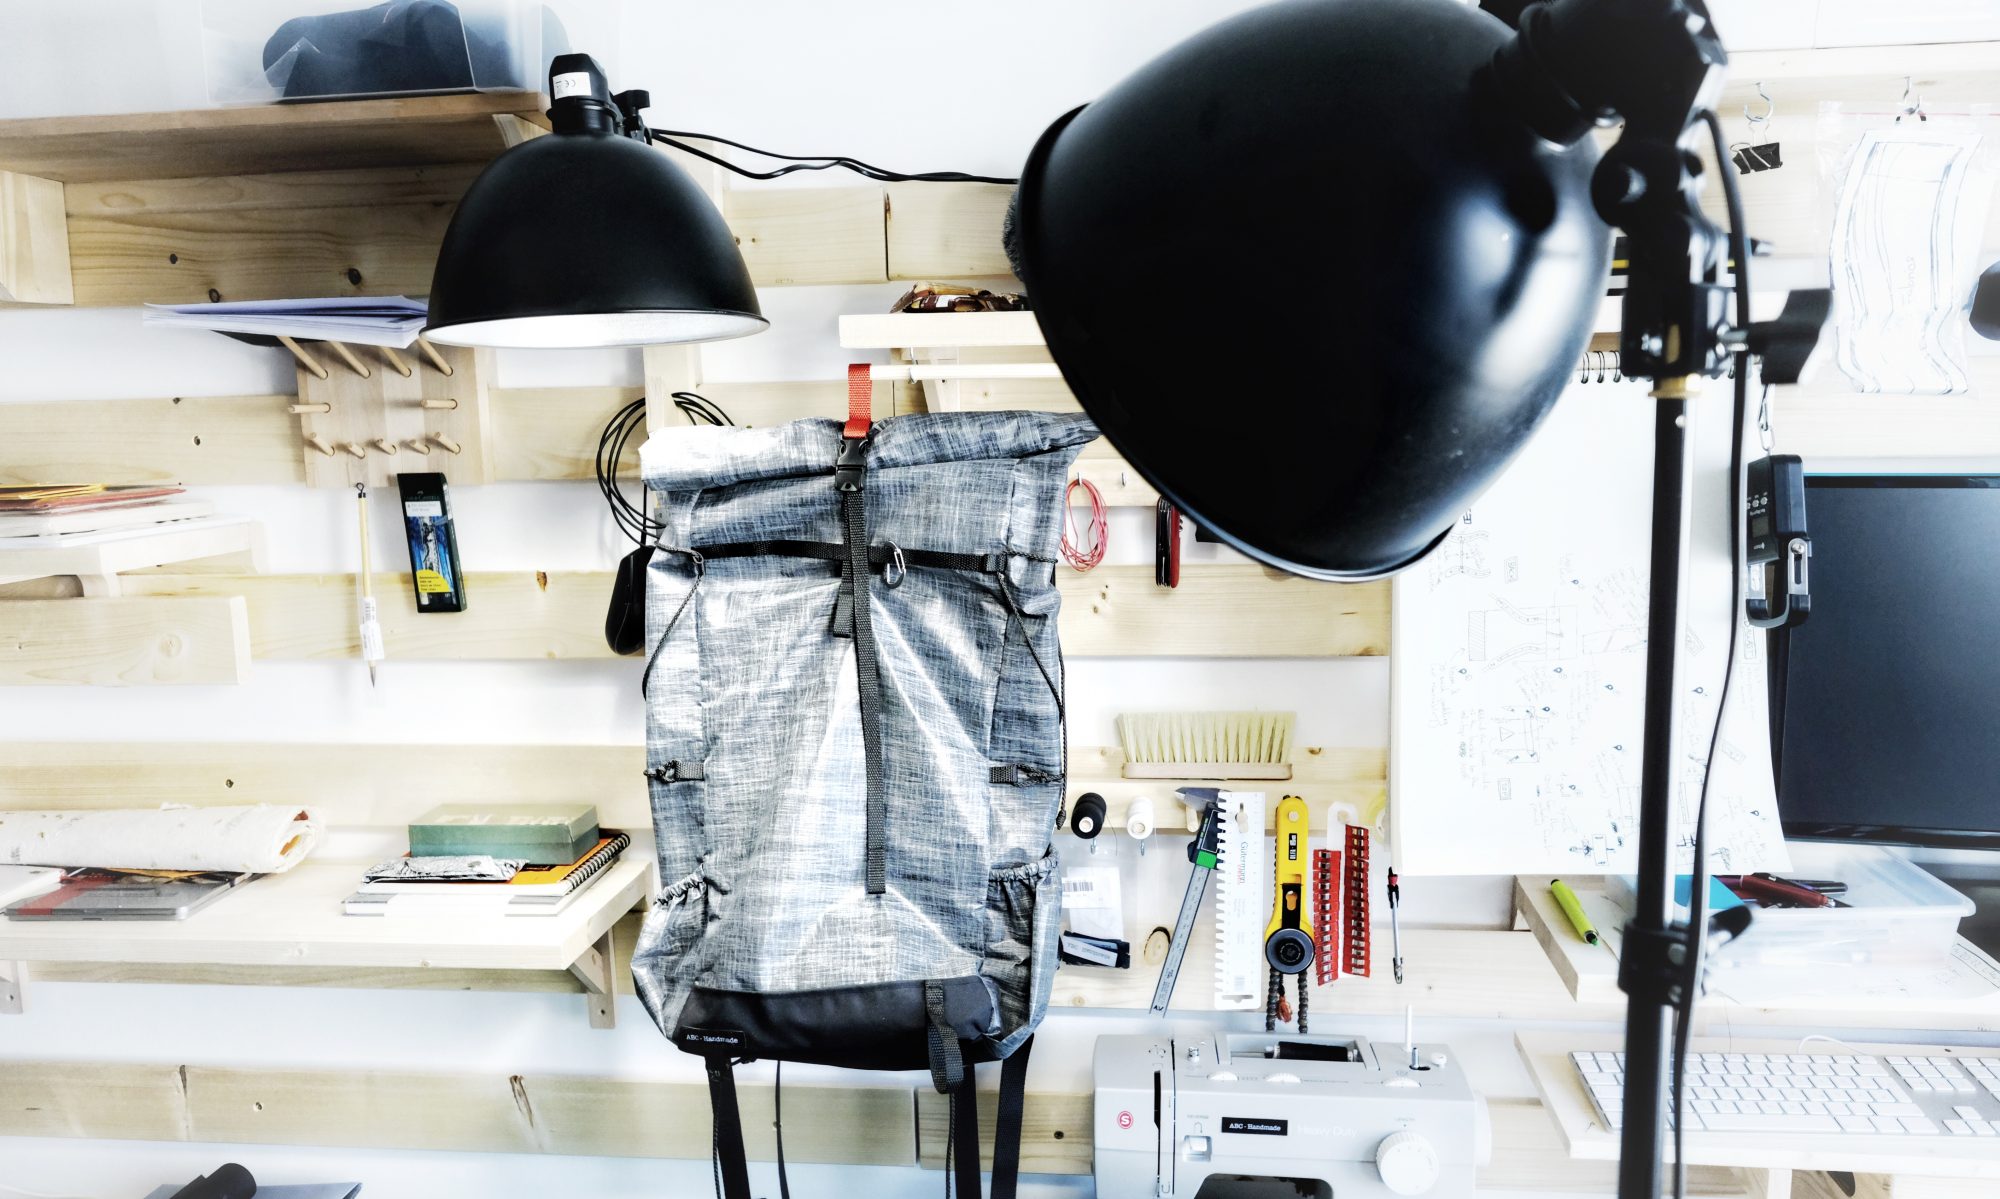
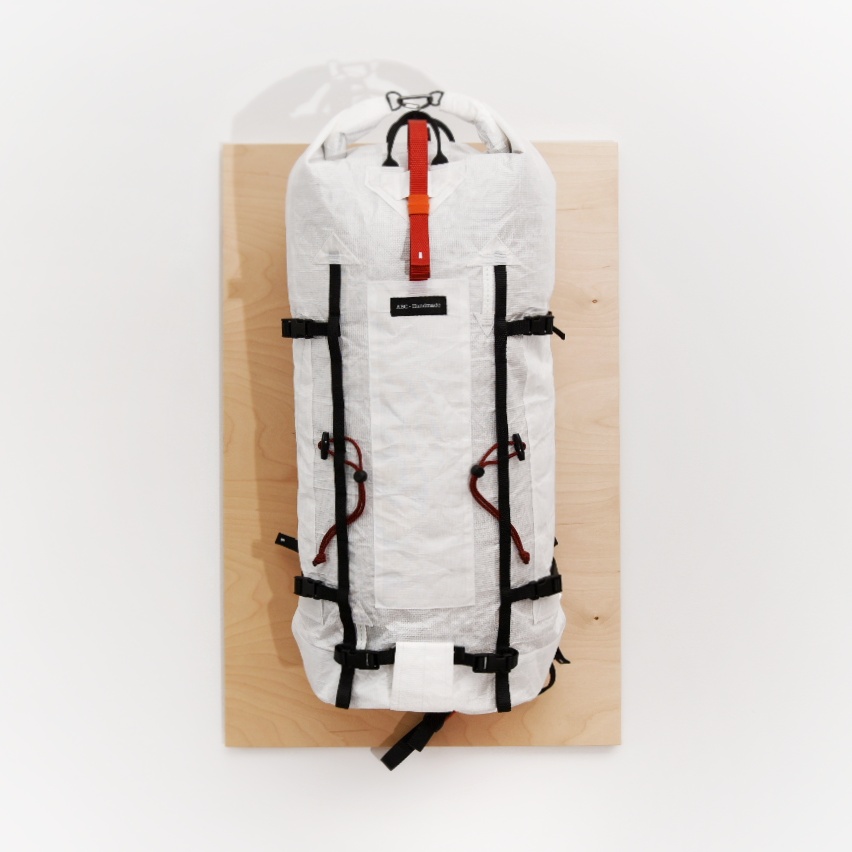
I recently finished a one-of-a-kind ~35 liter Alpine backpack completely custom made for an Instagram follower who reached out to discuss a custom version of The Alpine Pack I recently posted about. We spent a lot of time together designing the pack, carefully selecting the features, and studying his previous backpacks for important points to consider and I think we achieved something really amazing.

I must admit, it was hard to let this one go after about 60 hours of combined work over a couple of months. But I think that particular bag will have the life it deserves, filled with hiking, climbing and ski touring equipment!

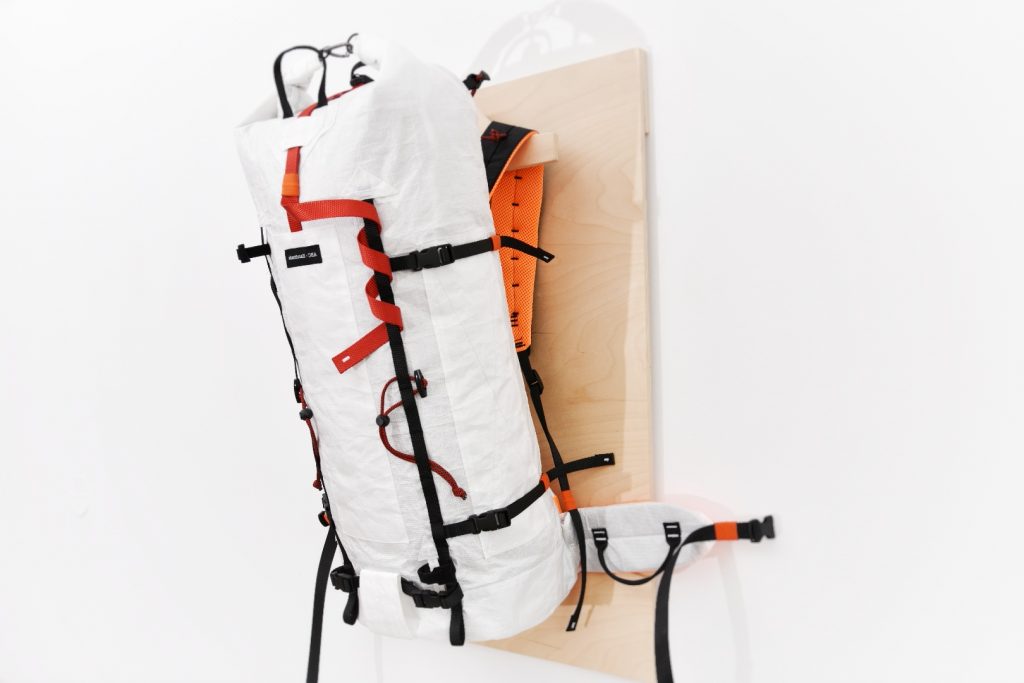
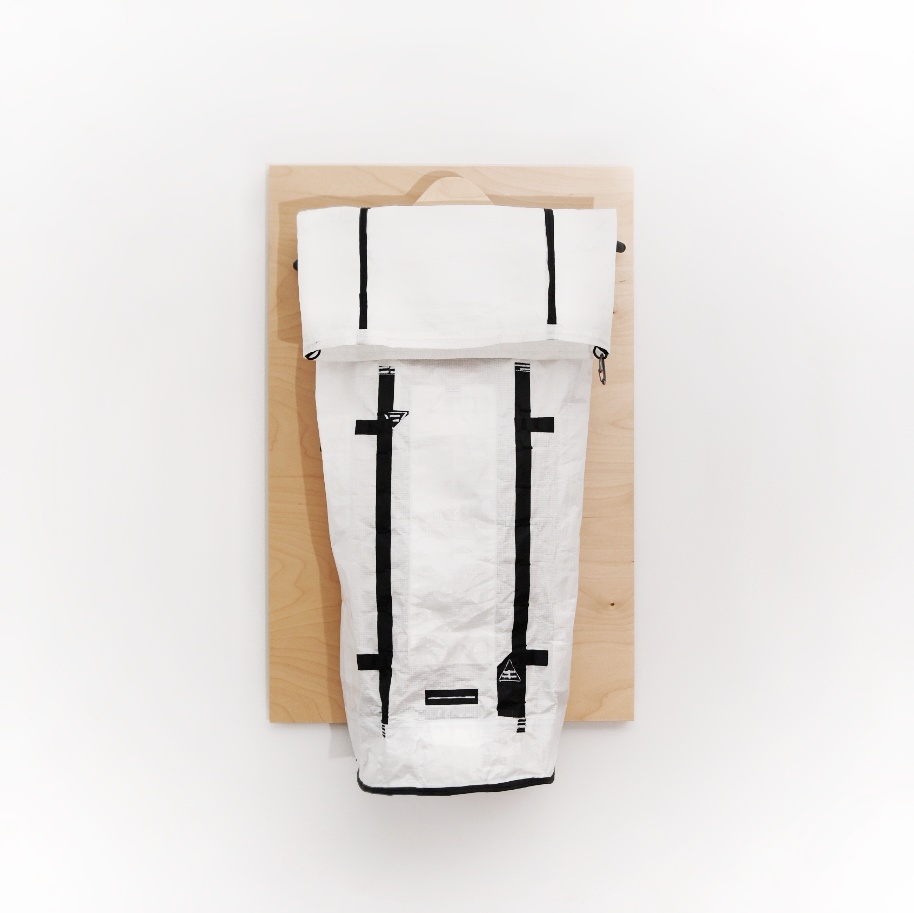
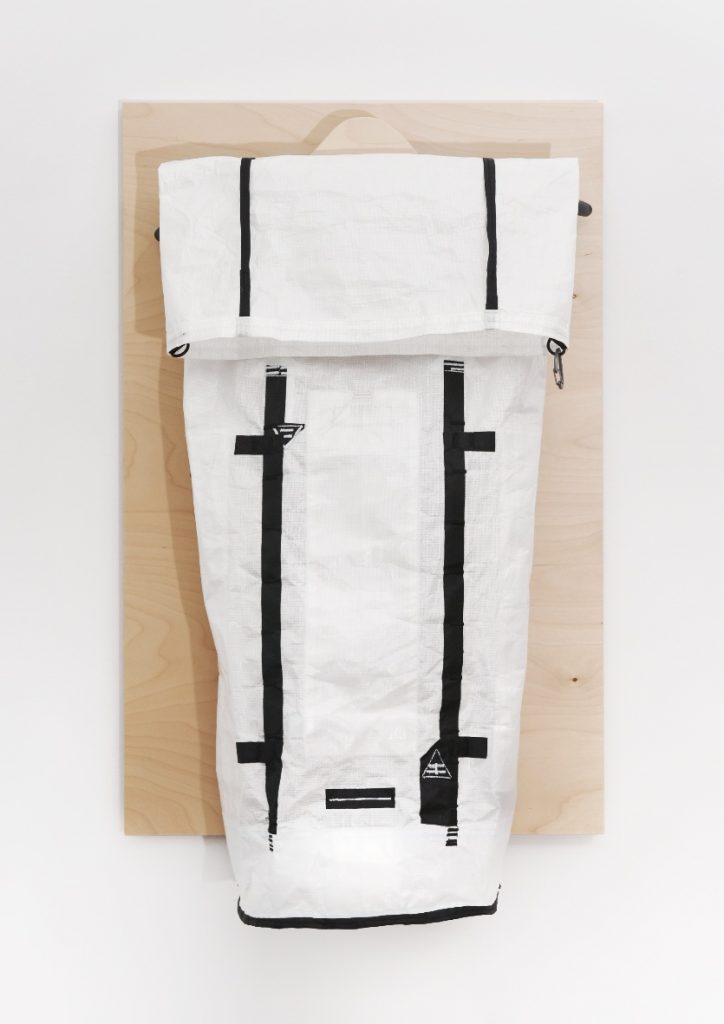
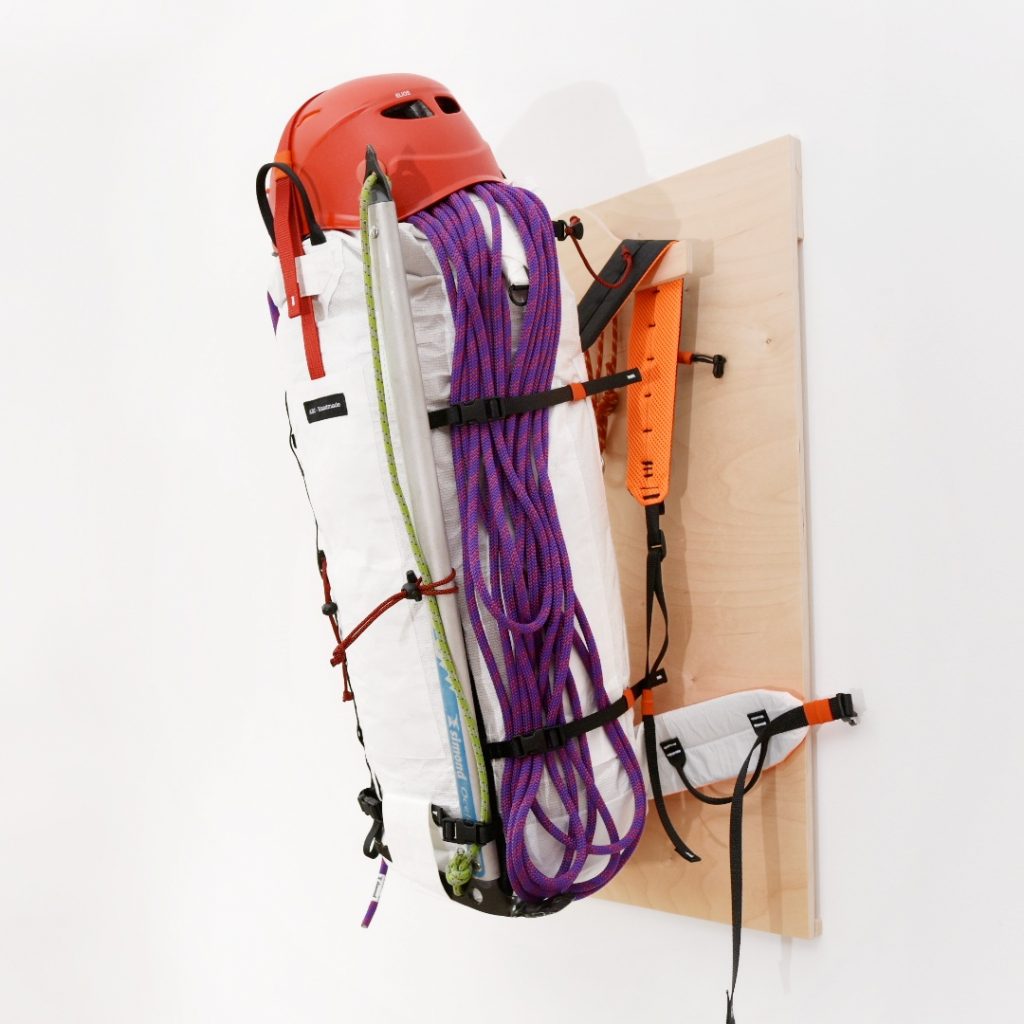
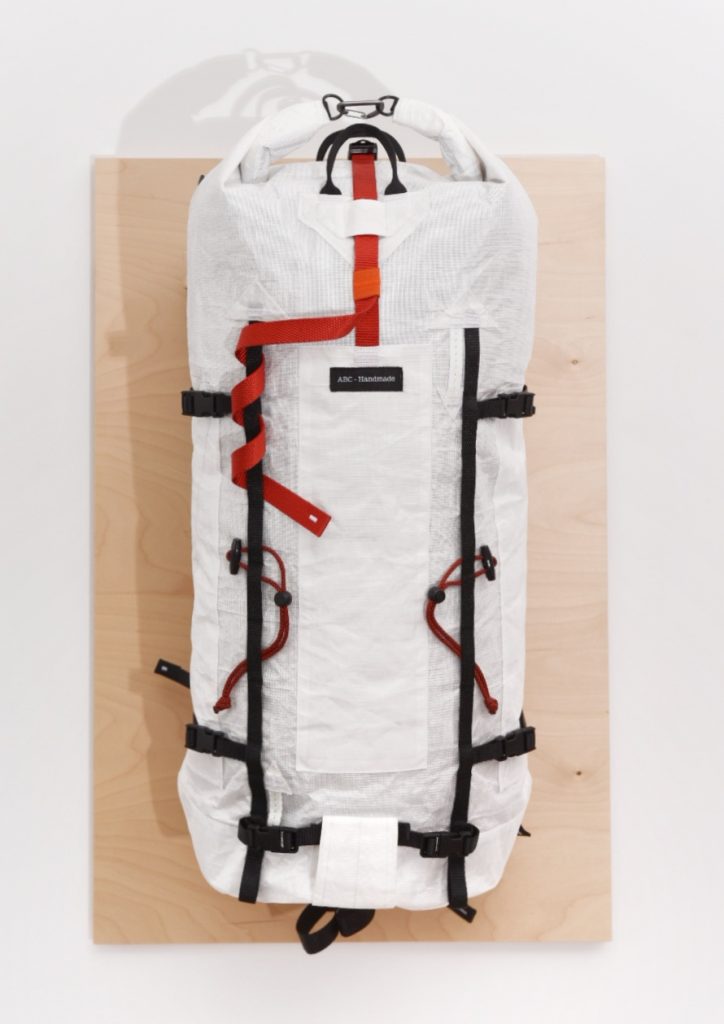
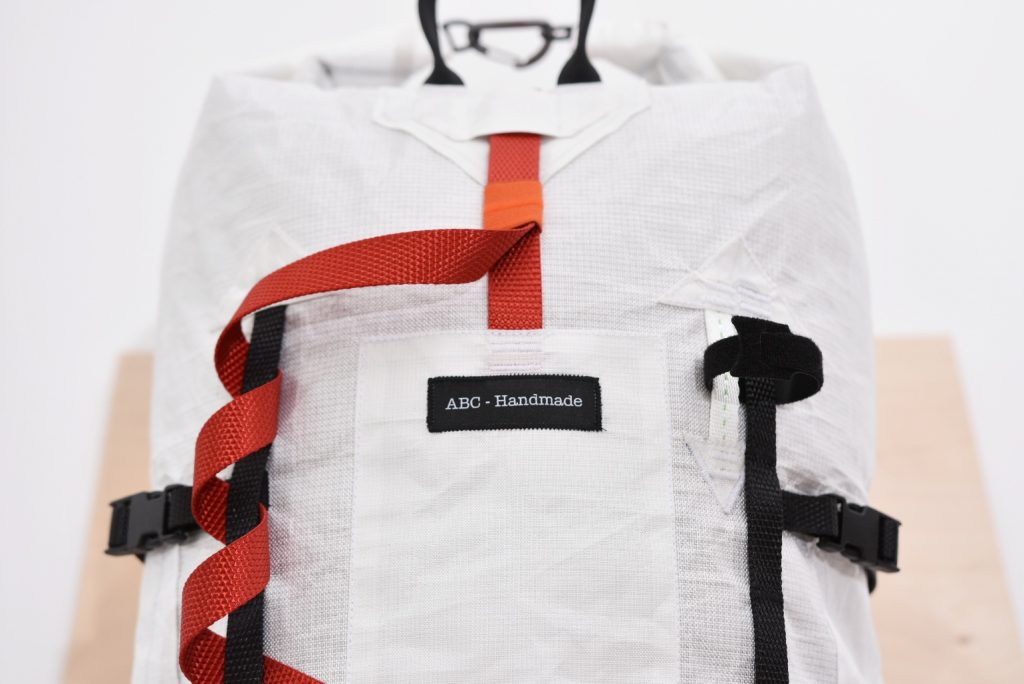
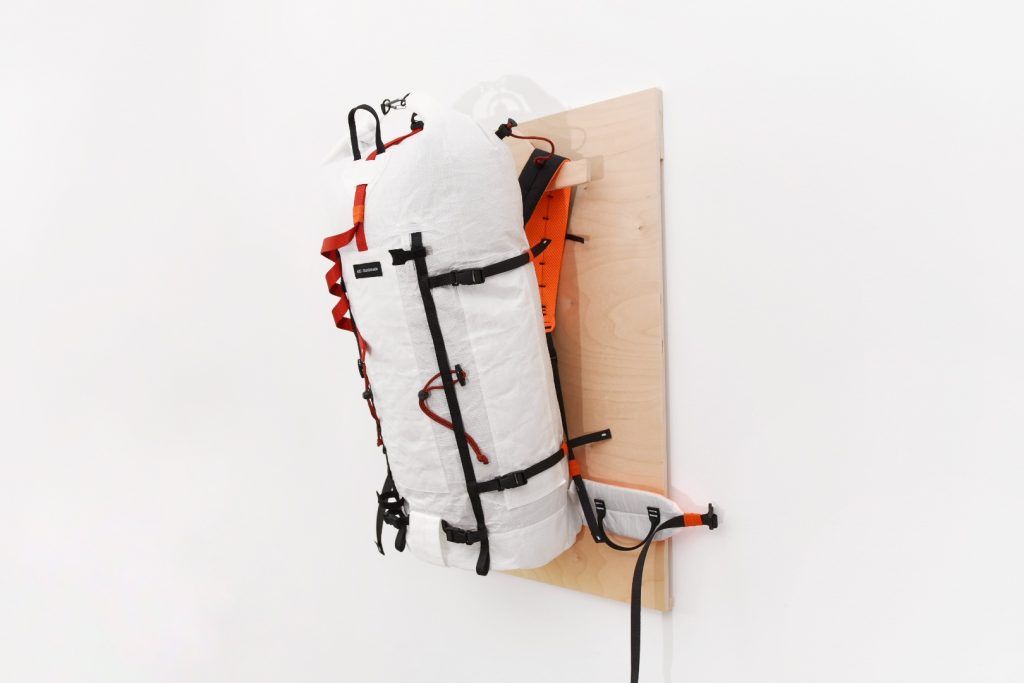
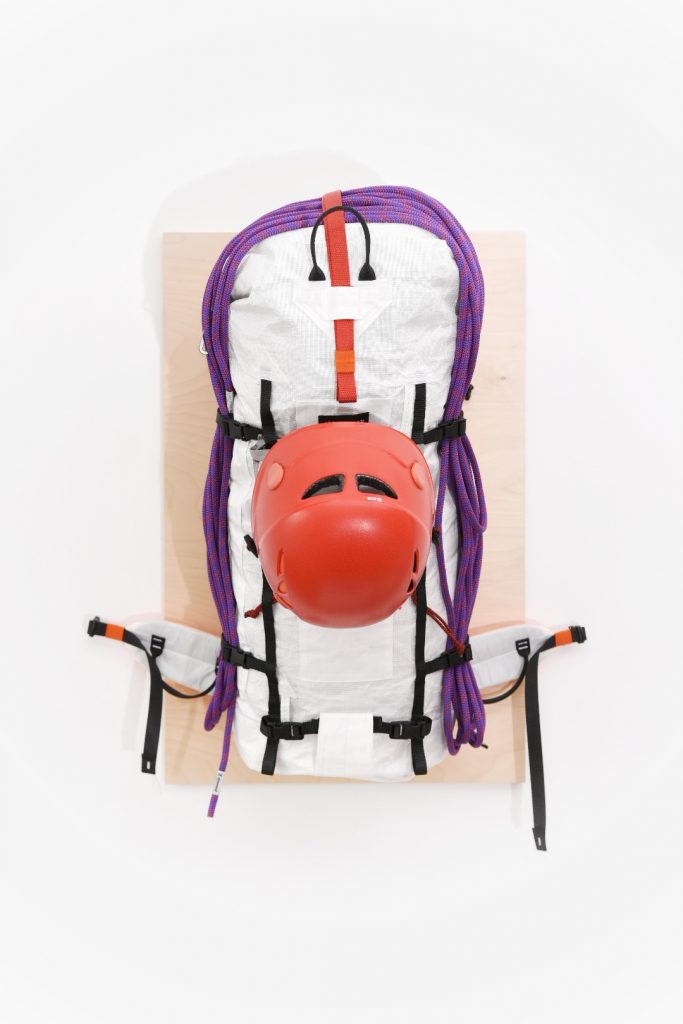
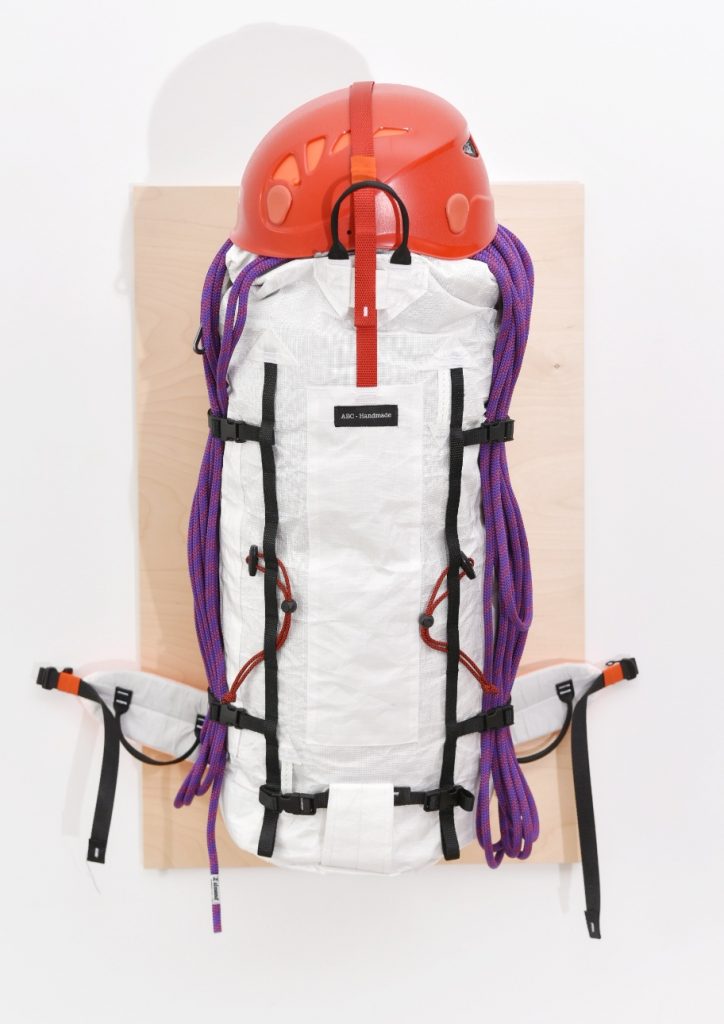
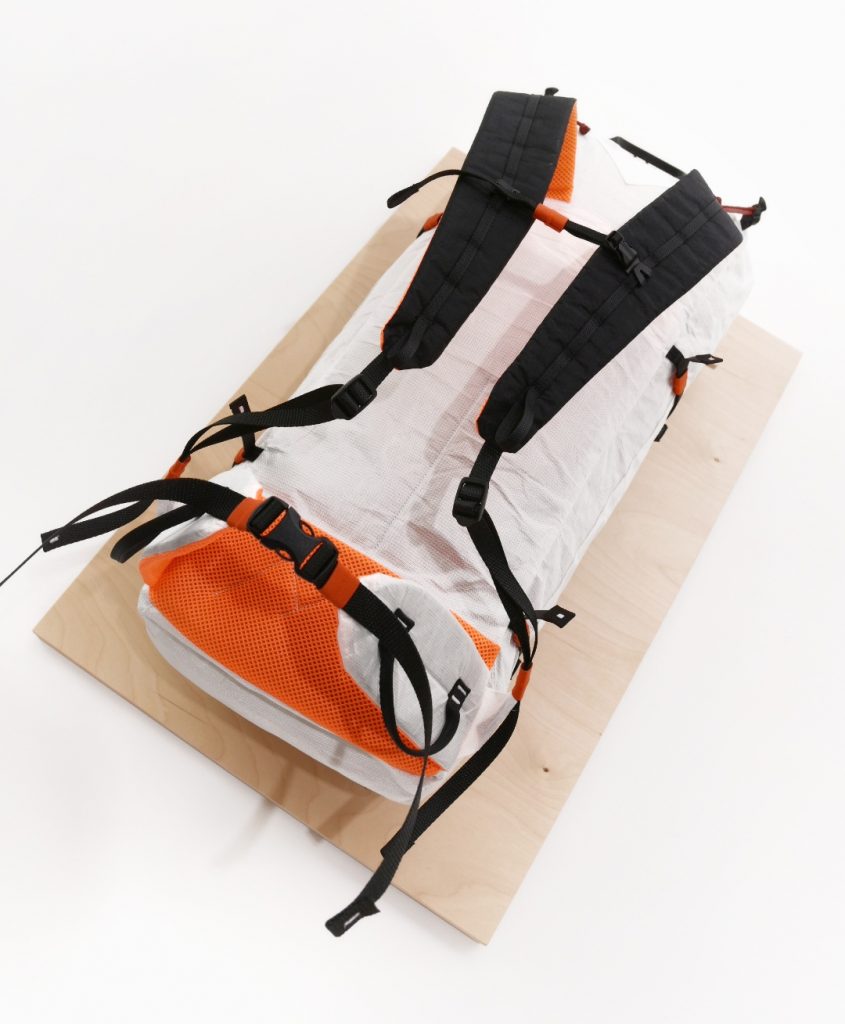
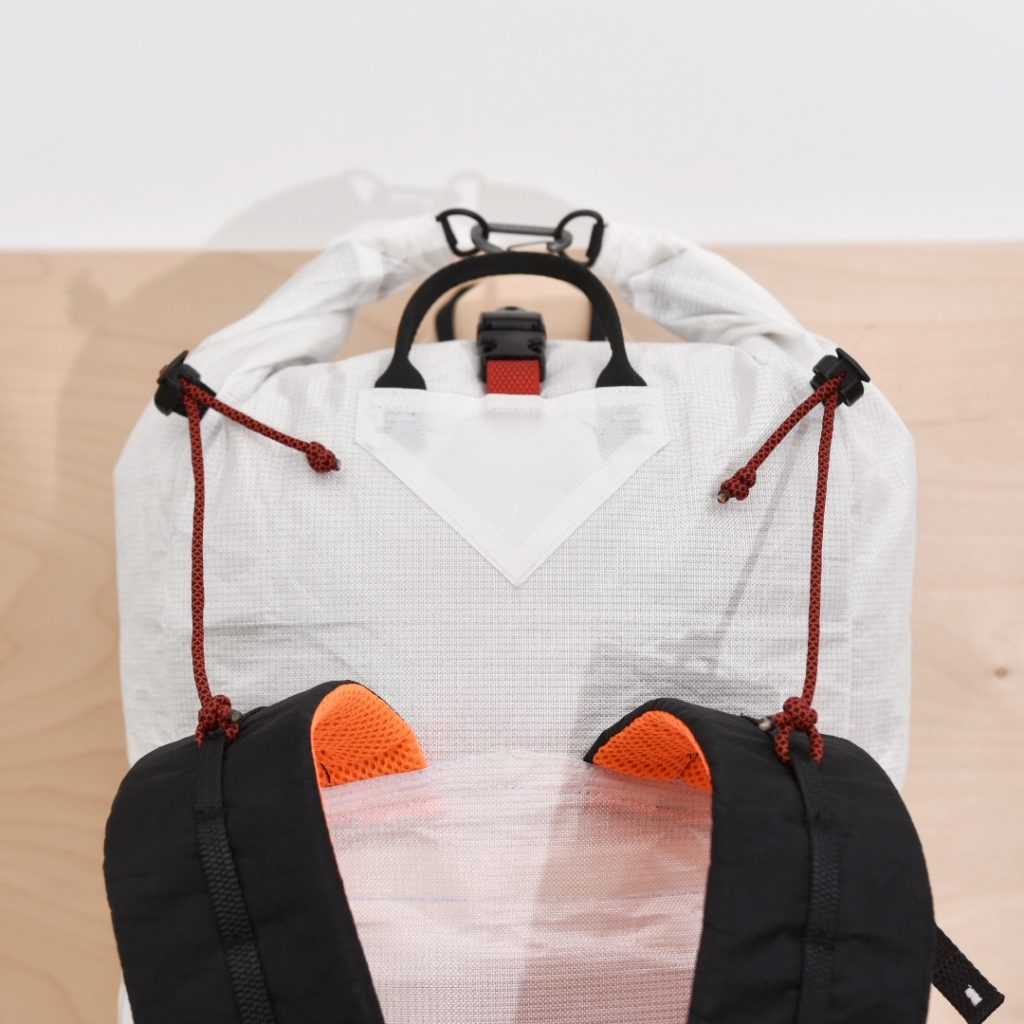
This backpack is a slightly bigger version of the previous alpine pack I made, but is built like a tank! It has many reinforcements on all four sides, and other areas prone to wear and tear. It is made almost entirely out of white Ecopak Ultra EPL 400 (a hybrid UHMWPE and recycled polyester fabric which is incredibly abrasion resistant) and boasts sturdy padding and a hip belt, a set of ski attachments (front and A-frame options), dual ice-axe attachments, rope tie-ins and a relatively huge roll-top extension for the approach.

The need to accommodate long hours of climbing and belaying meant that the bag had to have a relatively low profile when closed to not interfere with a helmet when belaying from below, and is therefore a little “fat” compared to previous designs. That being said, its owner being in fantastic shape, the increase in diameter should not interfere with arm movements in the slightest.

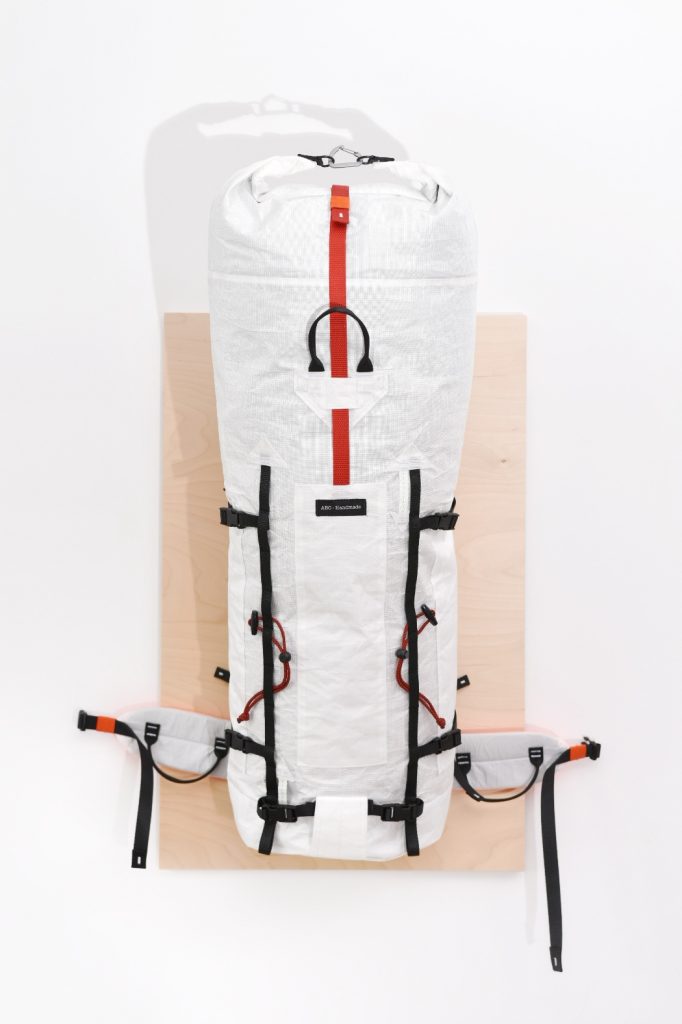
In the end, the complete pack weighs in at exactly 700 grams, which I am really proud of achieving with as little compromises as possible.

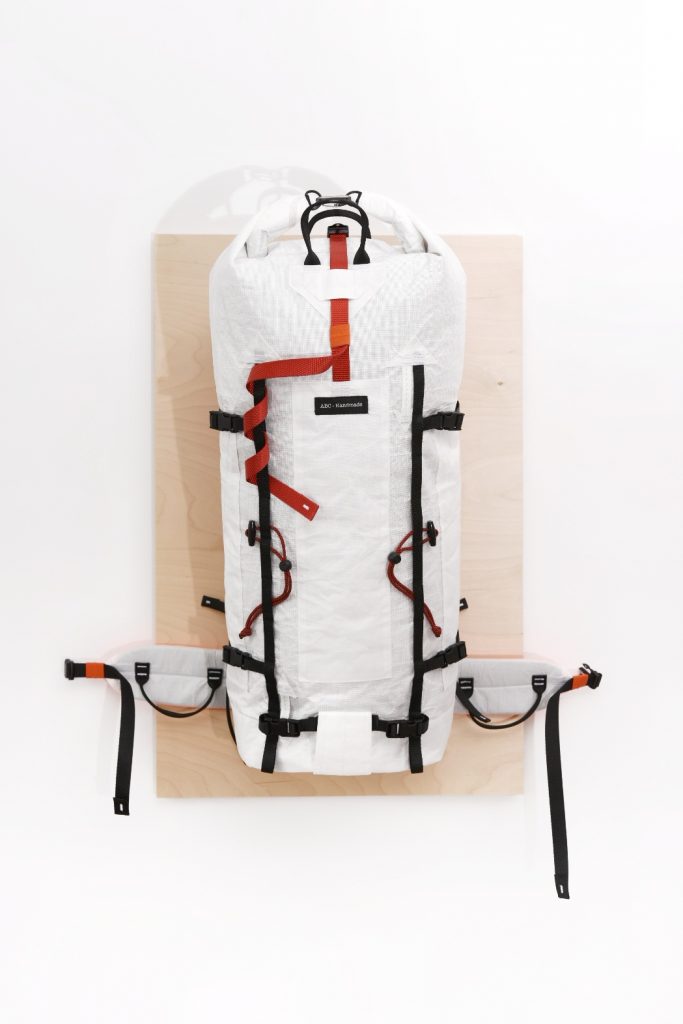
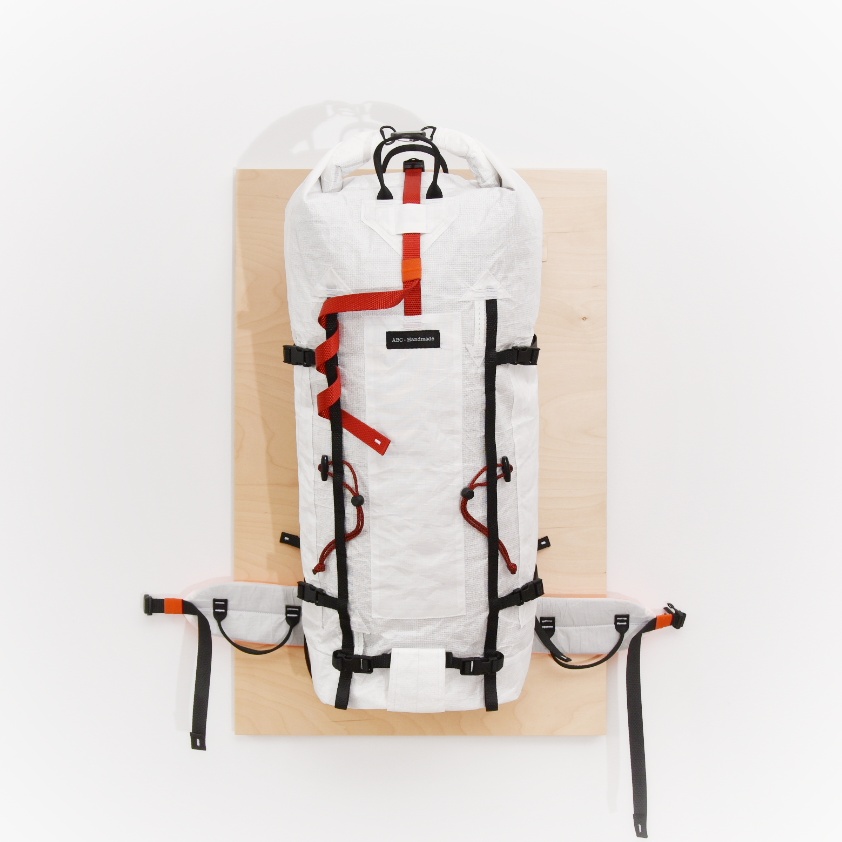
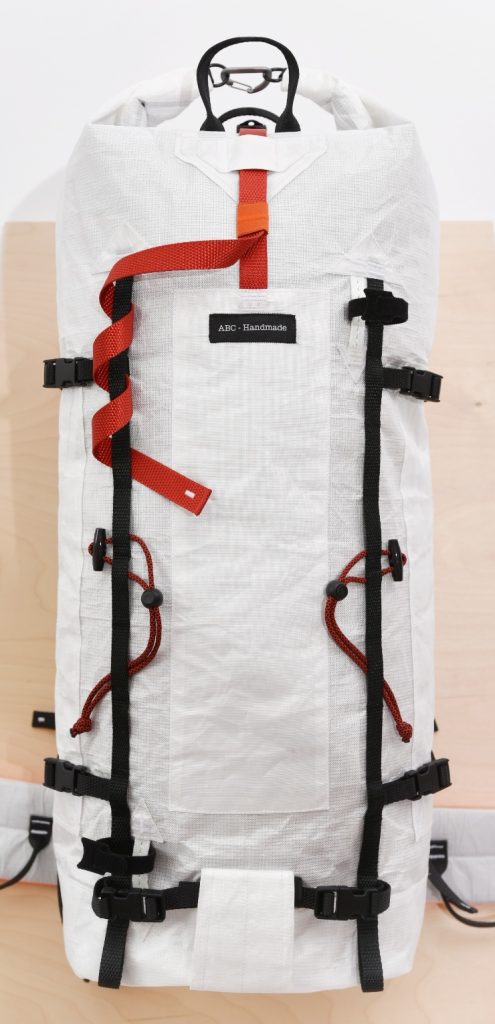
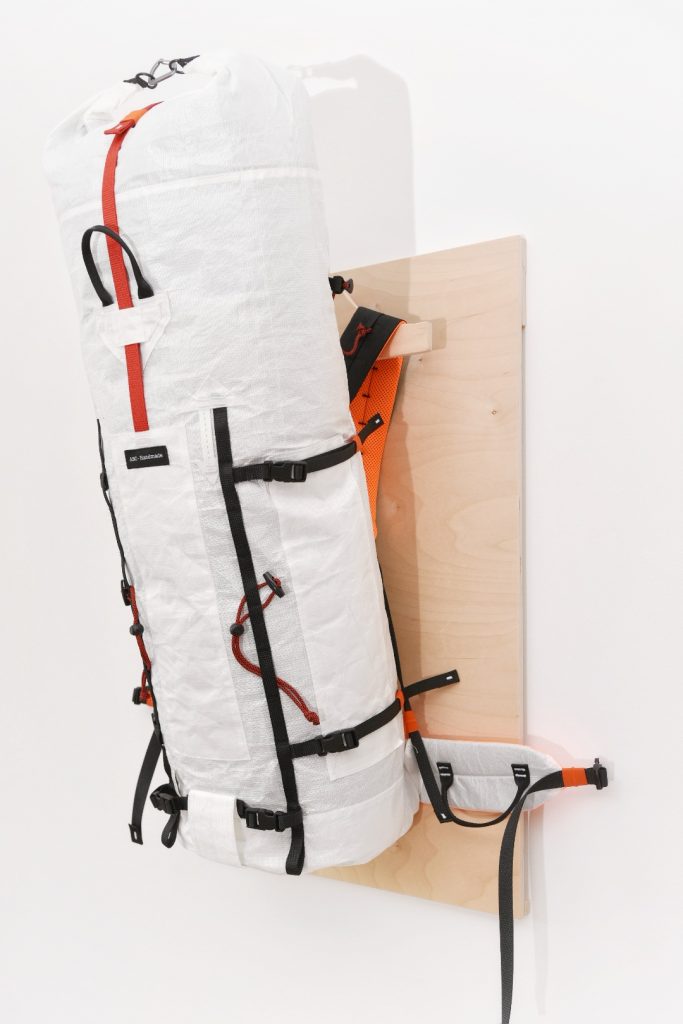
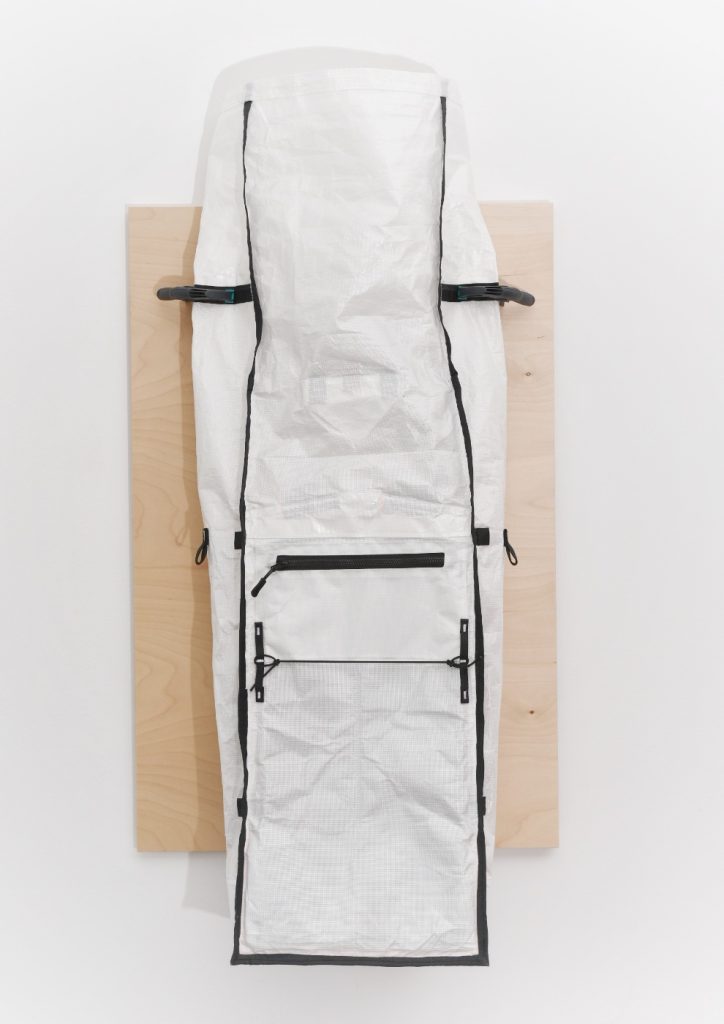
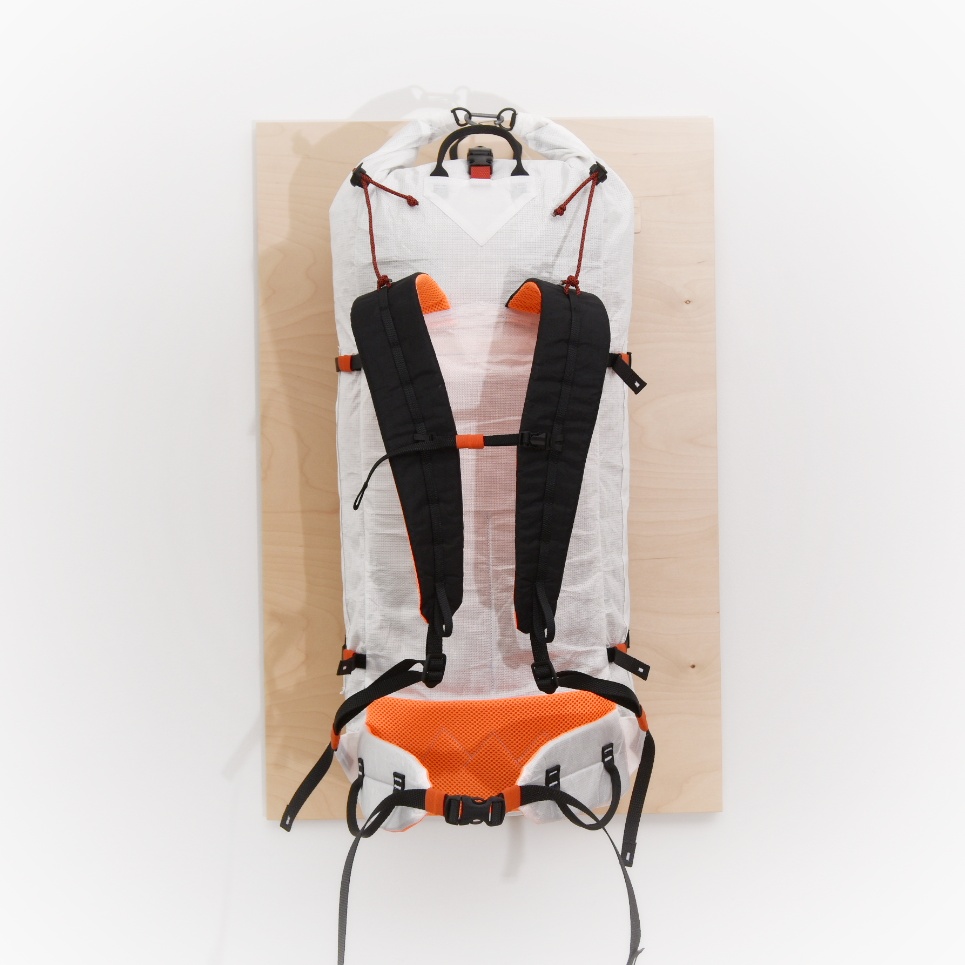
The back panel is of a relatively simple construction, and also out of Ecopak Ultra EPL 400 for its abrasion resistance if the pack needs to be hoisted. The complete back panel, the shoulder straps and hip belt are padded with high quality closed-cell foam for durability and to bring a little comfort when carrying high loads.

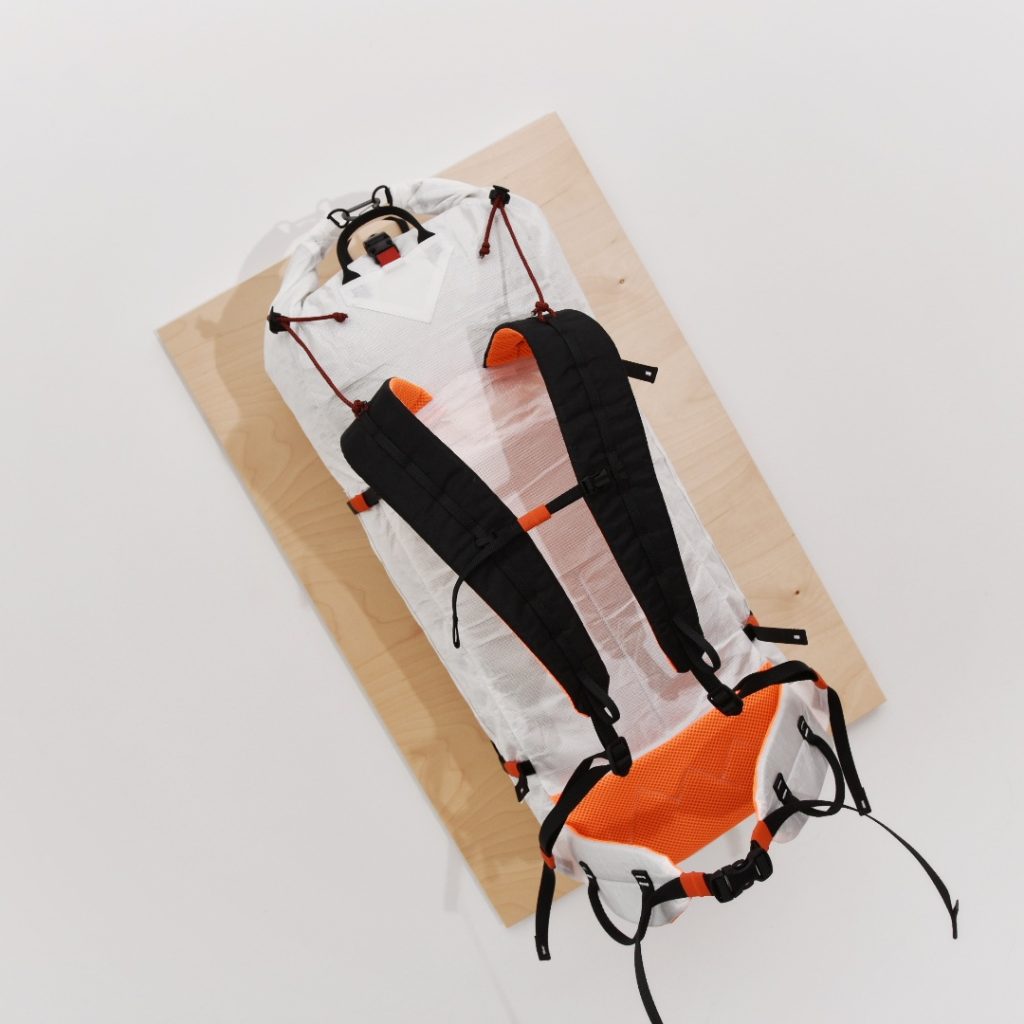
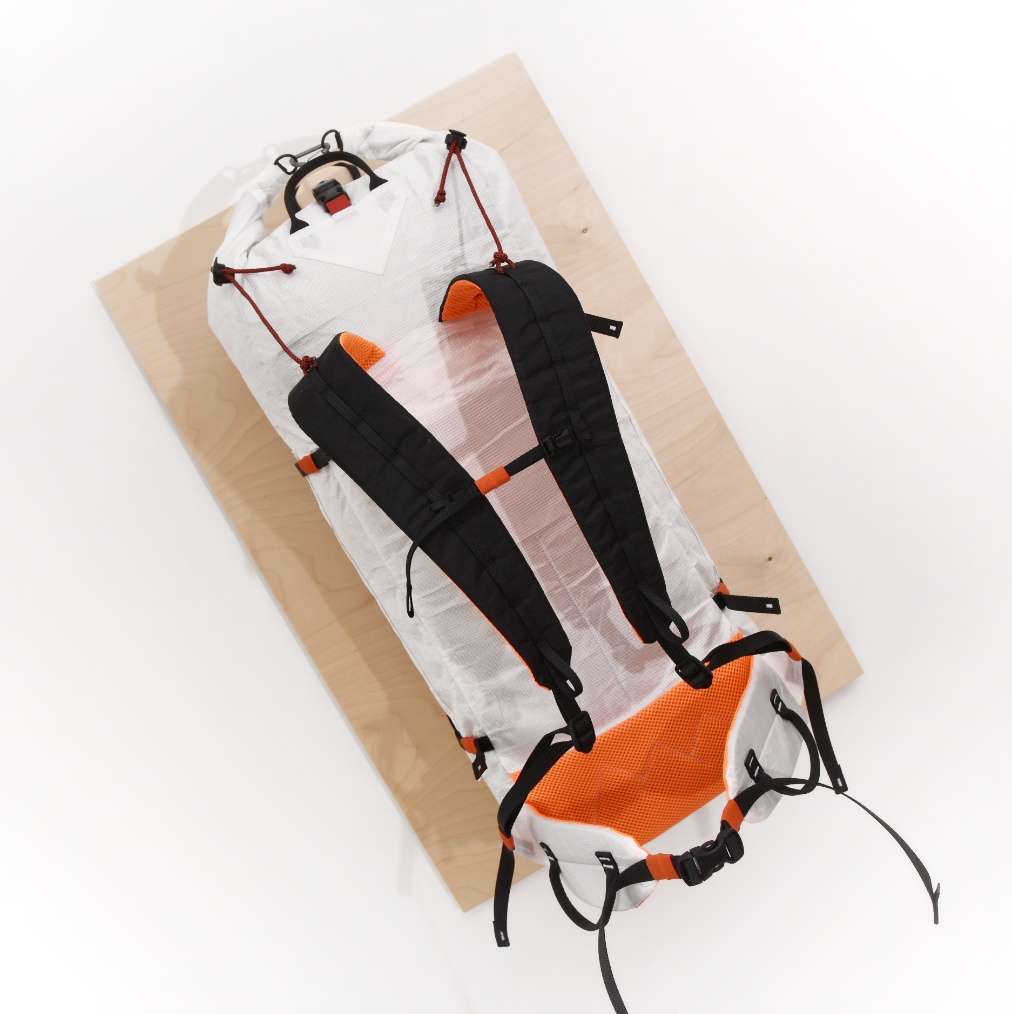
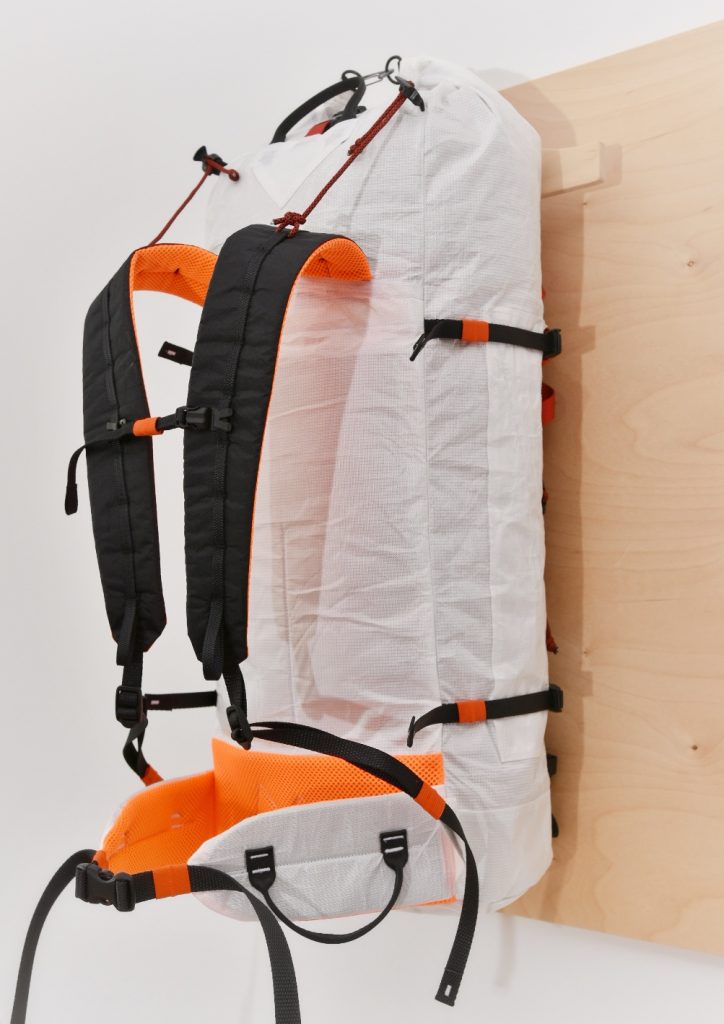
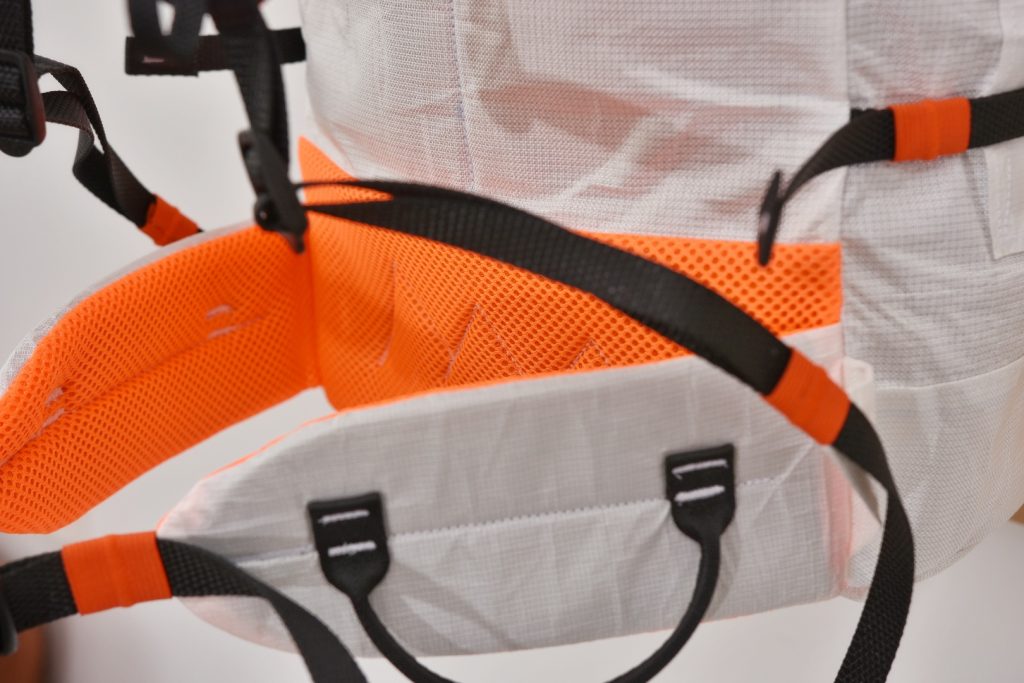
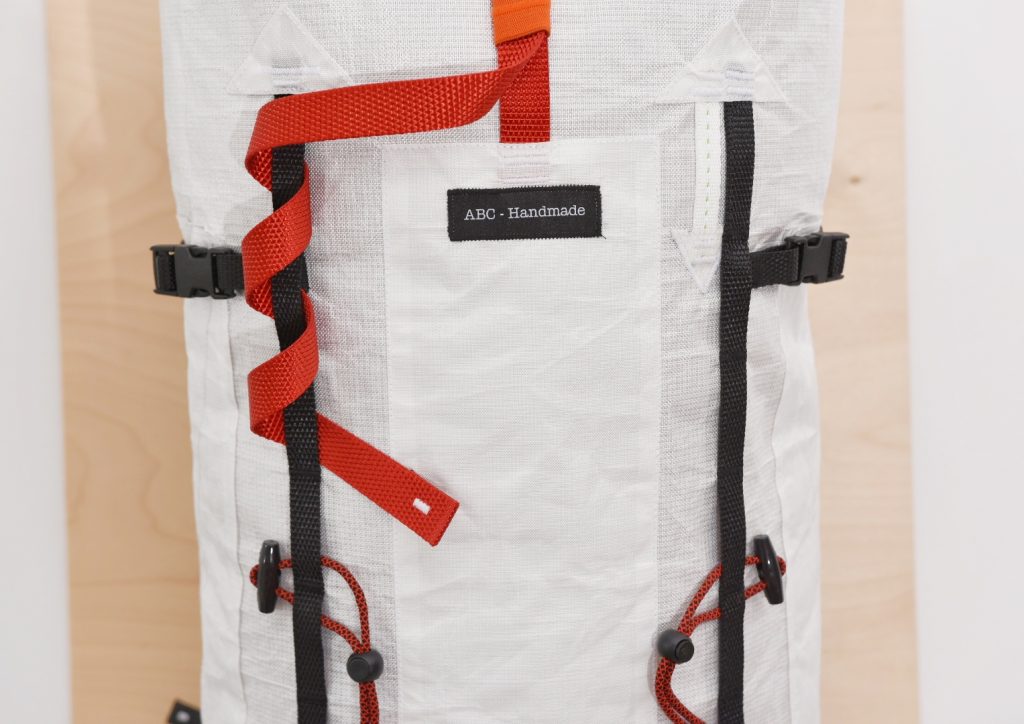
The interior is also very lean, and only offers a couple of gear loops and a small zipper pocket for IDs and other small items. All the seams and the load-bearing bartacks are reinforced and double stitched to prevent fraying of the Ultra EPL fabric in case the backing material starts to degrade. In retrospect, I think I would reinforce the seams and bartacks with a white backing fabric next time to blend in with the rest of the pack better. Since I make that backing “tape” myself, I can easily make it in the colors/fabrics of my choosing. This particular black liner is a 210D Diamond ripstop polyester fabric with polyurethane coating to act as a mild waterproofing tape as well..

How do I determine pack volume?

When it comes down to ultralight packs, the number #1 feature for me is volume to weight ratio. Unfortunately, while weighing a pack is easy, measuring volume is not so simple, so sometimes an estimate just has to be good enough.

Generally speaking, the backpacking industry tends to over estimate (or over advertise) pack volume which makes it relatively difficult to settle on a method that my audience can visualize. For ABC packs, I am following three simple rules to estimate their volumes.

Estimate the main compartment's volume as if it was a cylinder.
Do not account for pockets (even cargo pockets).
All measurements performed on a closed pack in the optimal position.

I will break down the math for you but it really is a simple process. Before I get the tape measure, I fill the bag with some pillow or cushions to give it a realistic volume and look. if you have only sleeping bags, even better. After that, I only need to measure the following two dimensions.

Height from bottom panel to the lowest part of the closed pack.
Circumference of the closed pack at mid-height.

Now let’s say the pack is a simple brick design, then the “circumference” is just the added width of the front, back and side panels after they were stitched together. It is a relatively crude approach, but it reflects the reality of how a pack deforms and sometimes stretches when full. So let’s do some simple math.

File:Circle radius.jpg
A circle and tis radius

The circumference of a circle is given by the following formula based on the radius r:

Circumference [cm] = 2 × π × Radius [cm]

Now if you take the standard formula giving the volume of a cylinder, it basically says that the volume is the product of the surface area of the base circle and its height and some contants.

File:Cylinder geometry.svg
A cylinder, its radius and its height

In other words, given that h is the height and r the radius:

Volume [cm³] = π × Radius [cm] ² × Height [cm]

If I now take the formula of the circumference and extracts the radius from it, I can inject the radius into the volume formula.

Radius [cm] = Circumference [cm] ÷ ( 2 × π)
Volume  [cm³] = Height [cm] × Circumference [cm] ² ÷ ( 4 × π)

That’s it, that’s all you need! In the metric system, I would use centimeters for all my measurements, so I end up with a volume in cubic centimeters [cm³]. To convert this to liters:

Volume [L] = Volume [cm³] ÷ 1000

Et voilà, you now have a rough estimate of how much gear you can stuff in a bag. It’s not accurate since it is measuring a squarish form as a cylinder and making a lot of assumptions, but when packed to the brim, you can expect to be able to fit at least that volume in the pack. Note that in general a roll-top can also compensates for calculation errors, other closure types might not be so forgiving.

Afterword

But how does that help you if you are not making a pack but buying a custom pack from a maker? Well just send them this page and ask for them to measure their packs this way, then take this measurement and compare it to your measurements of the bags you already have. That way, you have one simple system. The exact volume does not matter, what matters is that you know what theoretical volume you use for different activities. Over time, you will develop a sense of what you need for a winter day hike, or a week long solo camping trip above the arctic circle in full autonomy.

Why would the exact volume not matter? Well, we all pack differently, and have different gear. Some gear compresses well, some gear creates empty space that cannot be filled, some gear needs to be inside the bag, while other gear just hangs on the outside… It mostly boils down to you and how you achieve your outdoor goals. The volume is an indicator of what that particular pack will hold “for you” in a particular configuration. The features you would request with that pack are what matters most after the volume of the main compartment. And that same volume of pack for two different configuration might not both do what you need.

Anyhoo, hope this helps! 🤞